


These icebox chocolate butter cookies have a perfectly bittersweet dark chocolate flavor, and a soft and tender texture. They're made using an easy slice and bake method, and I'll even show you a simple chocolate drizzle decoration you can use to dress them up for your holiday cookie tray or any special occasion!
Jump to (scroll for more!):
What are icebox cookies?
Chocolate butter cookies are a regular attendee on my family's annual Christmas cookie list. (Not that we don't enjoy them for tea parties at many other times of the year too!)
And I have to warn you, these chocolate slice and bake delights have a sneakily addictive nature. If you aren't careful, you'll catch yourself going back for another, and another, and yes...another!
Their "icebox" title comes from their prep method. Essentially, icebox cookies are made from chilled or frozen cookie dough (aka one that's stored in the "icebox"). The dough is usually formed into a log after mixing. Then, once chilled, it's sliced into rounds and baked off for a prepped-ahead sweet treat.
In this recipe, I'll show you how to prepare and bake off the dough, and walk you through my favorite decoration method too!
Why This Recipe Leads to Sweet Success
- This recipe is almost entirely prepped ahead of time. These cookies have one of the longest shelf-lives of any cookie dough I've worked with. Once you prepare the dough, you can keep it in the in the freezer for up to a month. When you're ready to bake, simply pull the cookies straight from the freezer, and slice them off. Then tray and bake them right away, for a minimal prep, freshly baked treat!
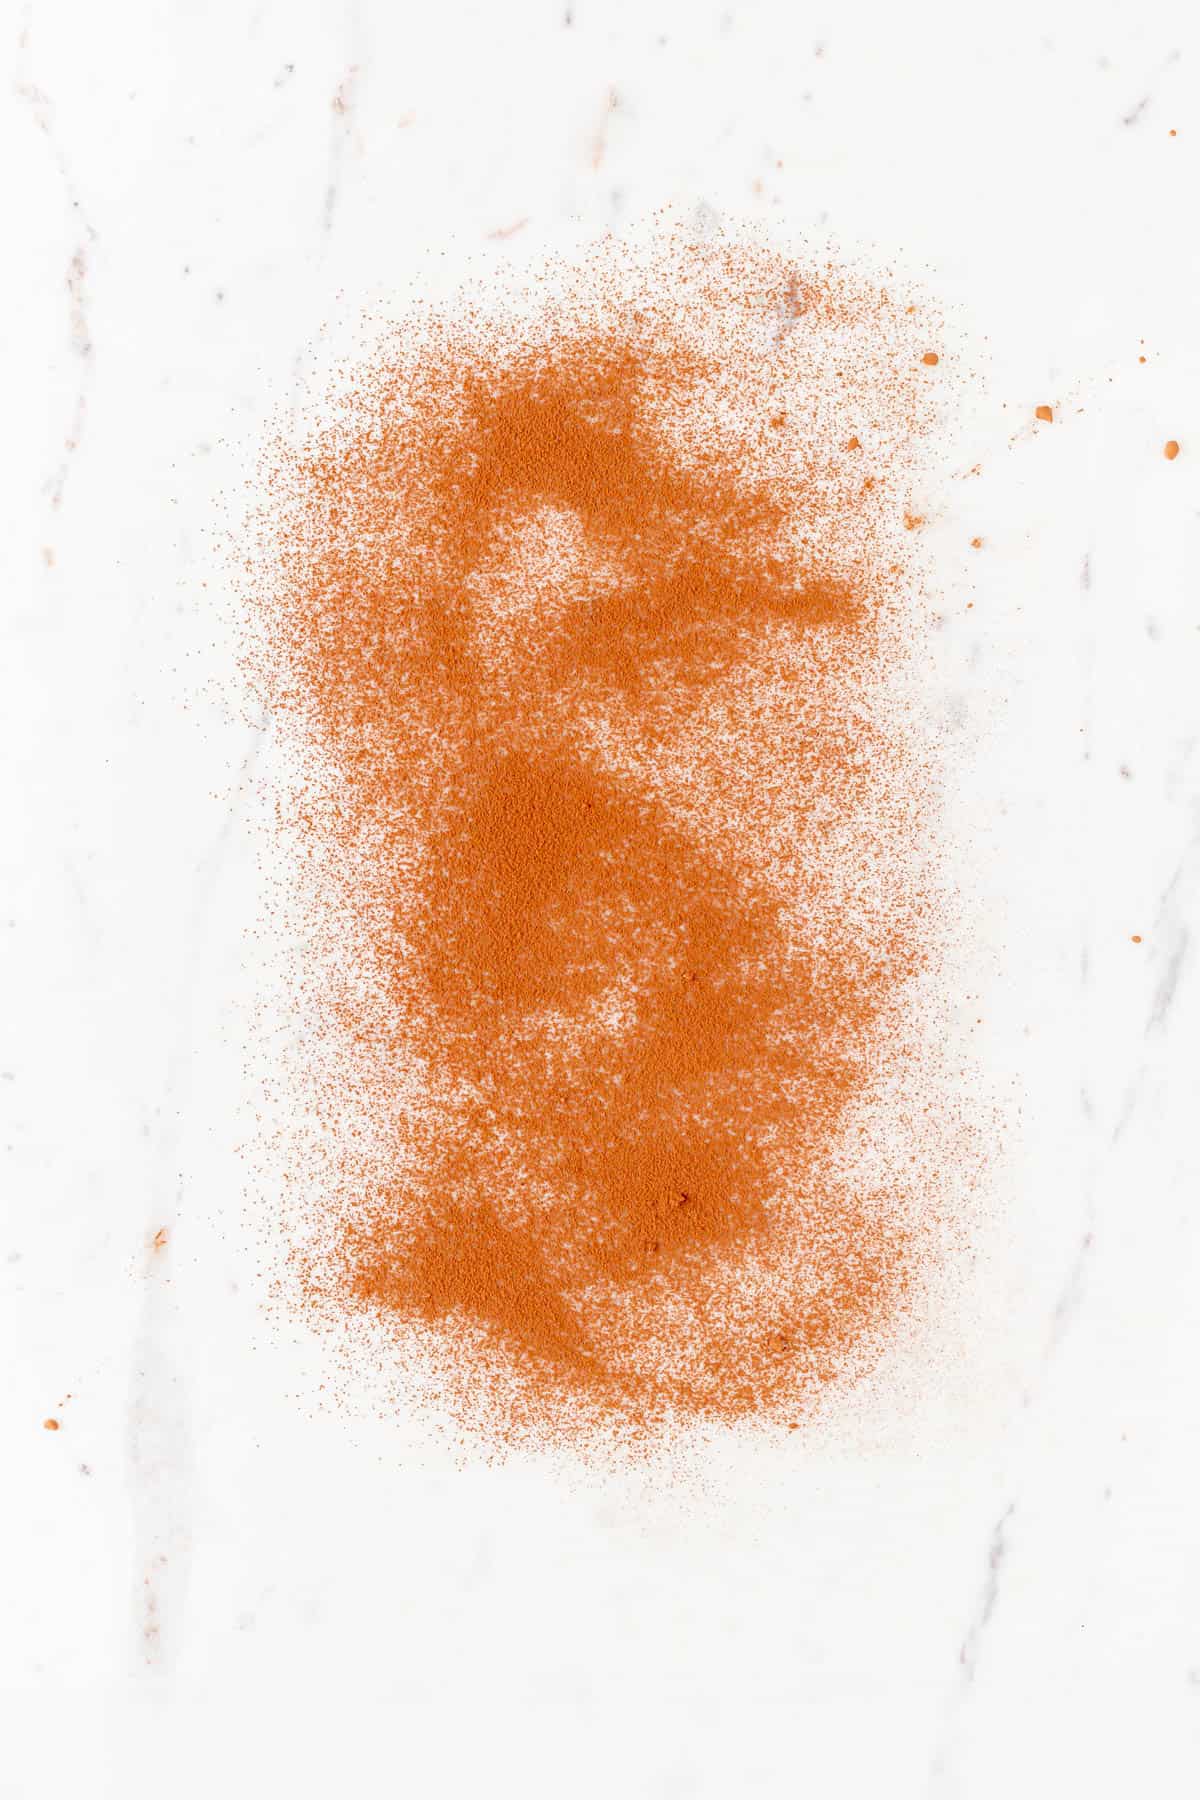
- Cocoa powder is your new best friend. These cookies have a naturally sticky dough (which helps to keep them tender and soft for days after baking). So we're going to use cocoa powder to wrangle the dough into a log. If we were to use flour (as you usually do when "flouring" your work surface), it would cover our dough in white splotches. Using cocoa powder, will instead give us a really pretty dark brown finish on the outside edge of our baked cookies.
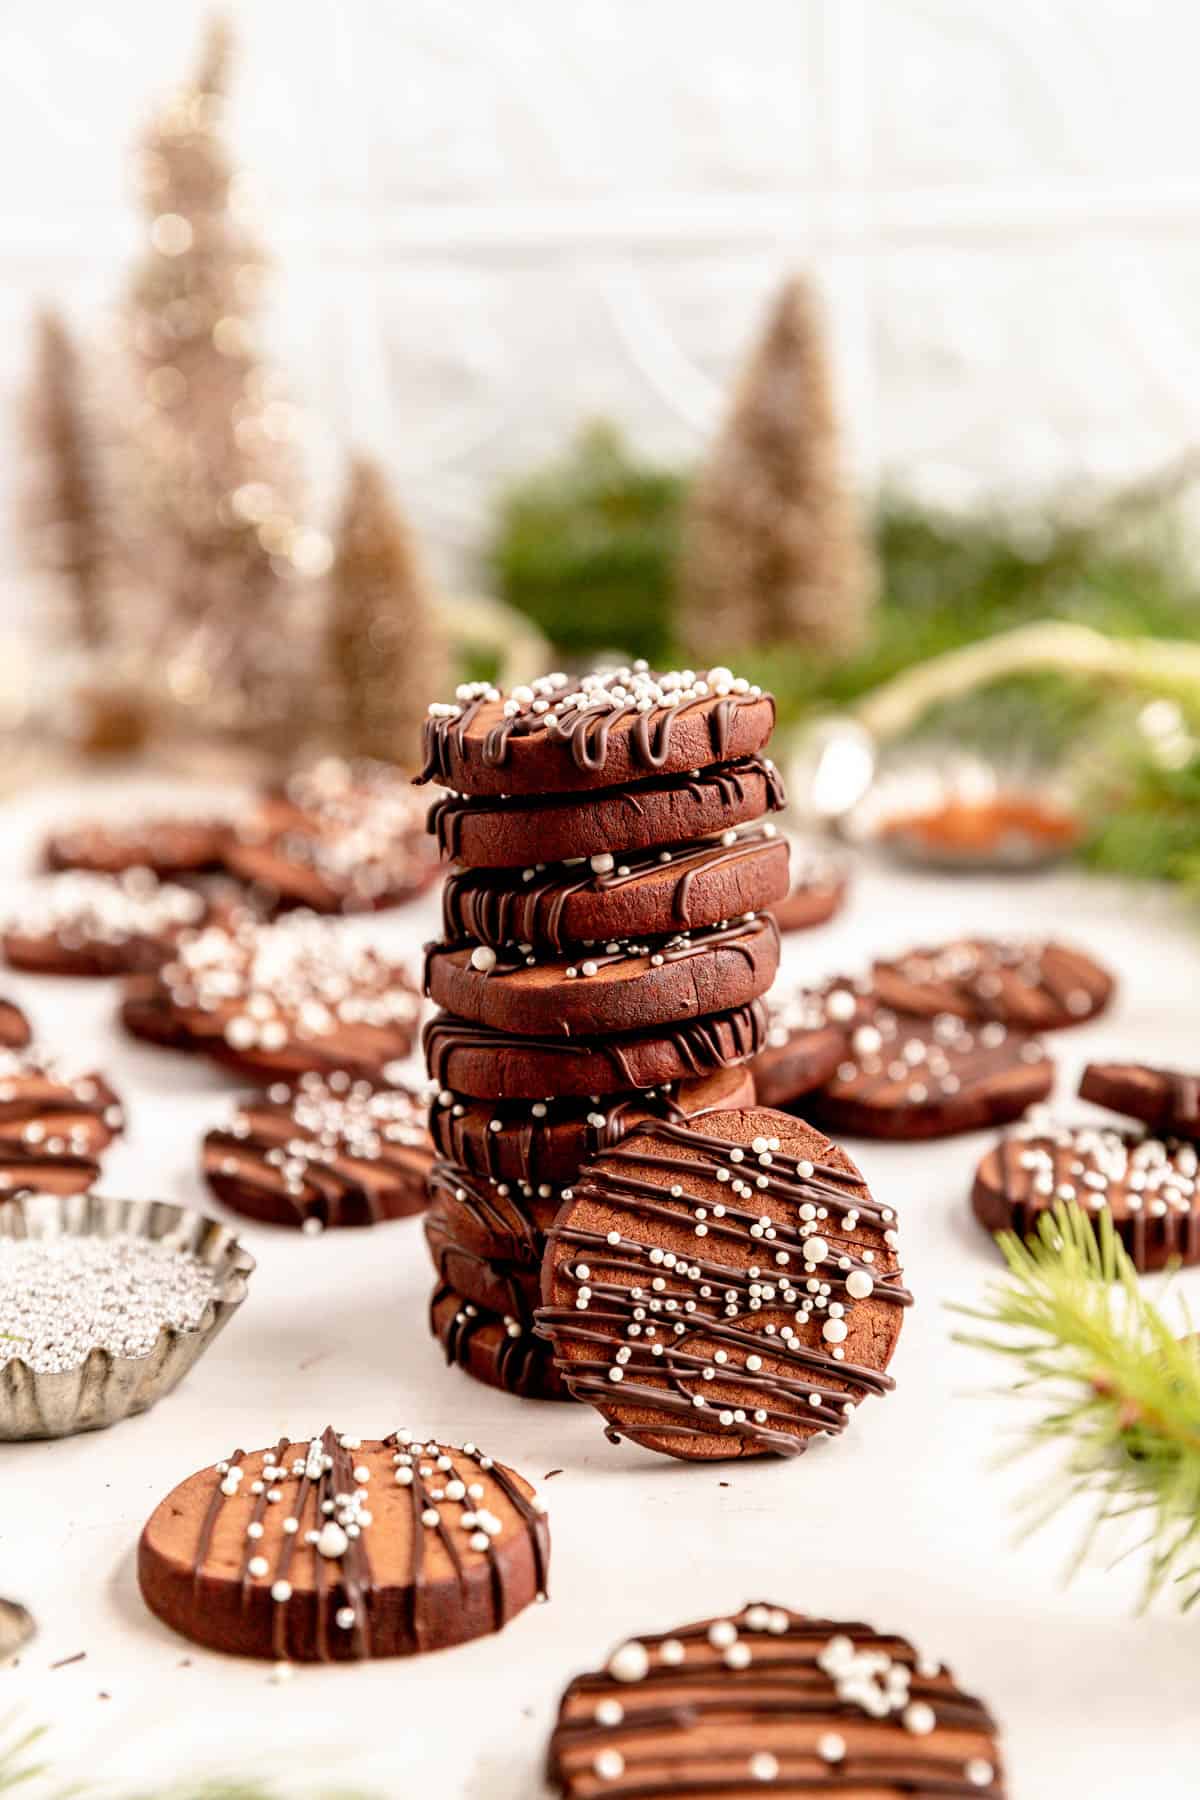
- Customizable decorations: you can customize these cookies for any special occasion. Simply theme the sprinkles in the final step however you like, and your cookies will be ready for any celebration!
- Roll it, then roll it again, then roll it again. Slice and bake cookies are notorious for not staying round. This is because you usually start with a soft-ish dough, that acquires a flat bottom while it's chilling in the fridge. To fix that, we're going to re-roll the dough log twice after it's had some time to stiffen up. That'll allow us to re-round that flatten bottom so we end up with slices that are ultimately round.
Ingredient Tips to Bake it Better
(Pssst…if you're ready to just get baking, get all the details in the recipe card below!)
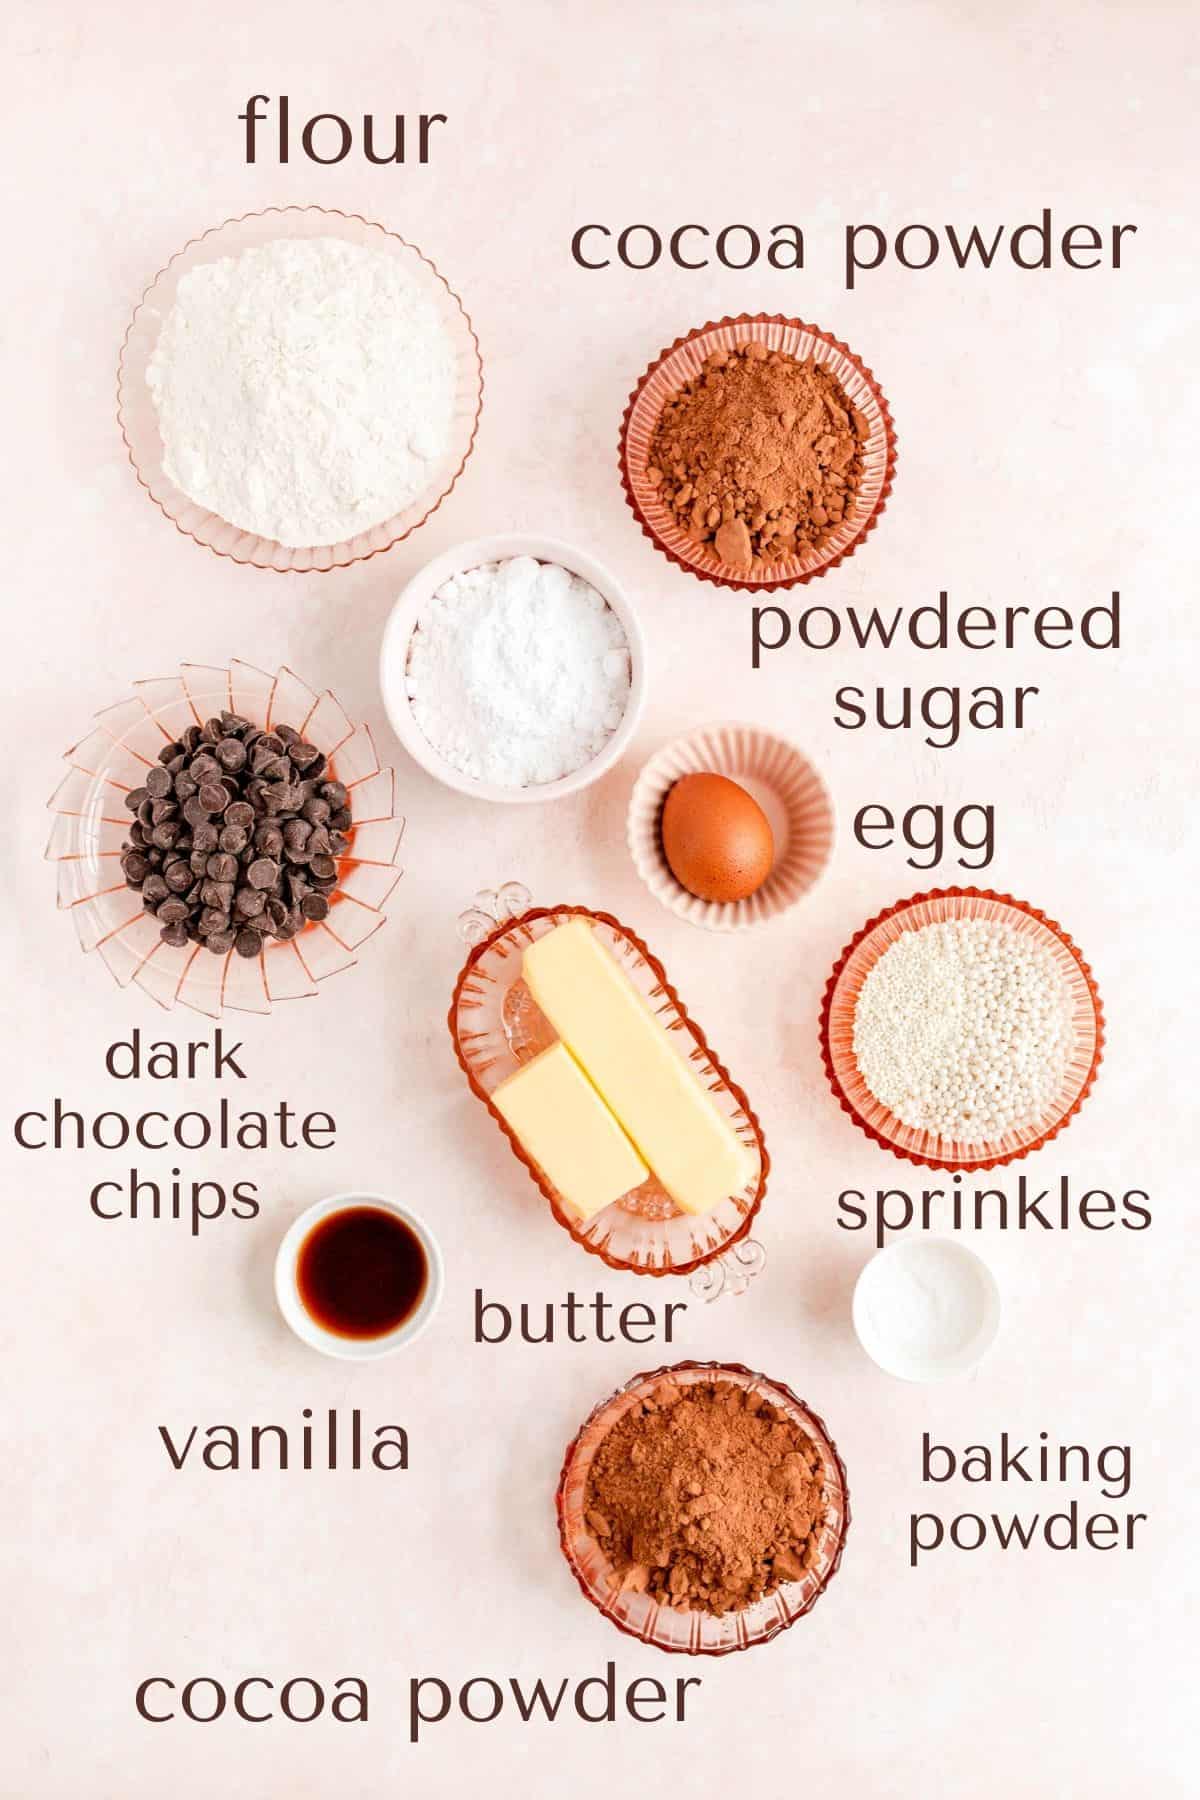
- Butter: with such a high quantity of butter in this recipe, you'll want to use a high quality butter with a rich flavor. Make sure that it's unsalted too so our cookies don't get too salty!
- Powdered sugar: we're using all powdered sugar instead of the traditional granulated sugar in this recipe. Firstly, it helps our cookies hold their shape in the oven (even with all that butter in the dough). This will also lead to a slightly denser, smoother, less crumbly, and softer texture than if we used granulated sugar instead.
- Cocoa powder: butter cookies are naturally very rich in flavor thanks to all that tasty butter. So we're using cocoa powder instead of melted chocolate to keep a nice, slightly bitter dark chocolate flavor. I like using this Triple Cocoa Blend in particular. It's an all-purpose cocoa you can use for every recipe. And it has cocoas that bring both robust flavor and a rich color to your baked goods.
- Sprinkles: to customize these treats for your occasion, simple swap out the classic white and silver nonpareils I used here for whatever sprinkles best fit your celebration's theme!
(p.s. for all the basic tips that no one ever taught you, that are super important to help you bake your best, check out my Baking 101 series!)
How to Make Icebox Cookies from Scratch
(Pssst…if you're ready to just get baking, get all the details in the recipe card below!)
TO MAKE THE COOKIES:
- Cream together butter and sugar until smooth.
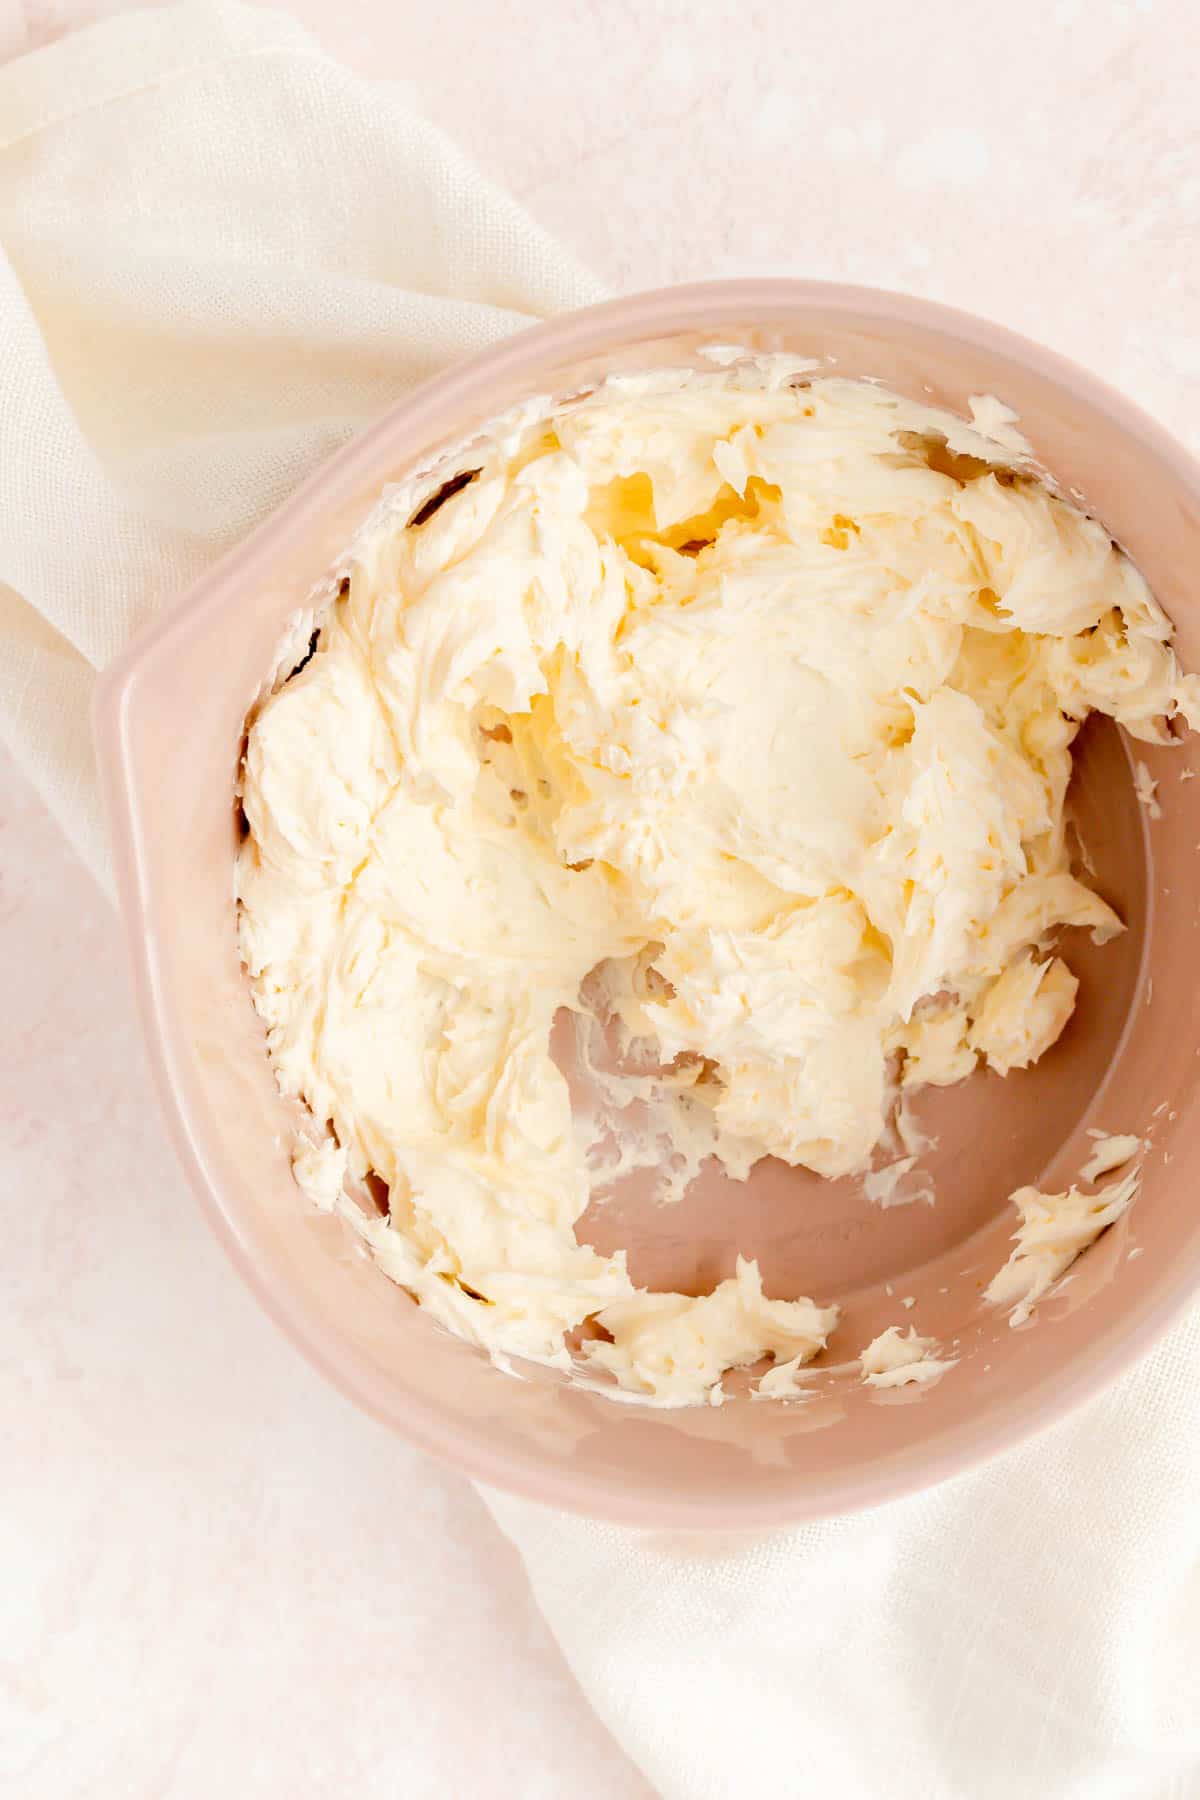
- Mix in all other ingredients to form a sticky dough.

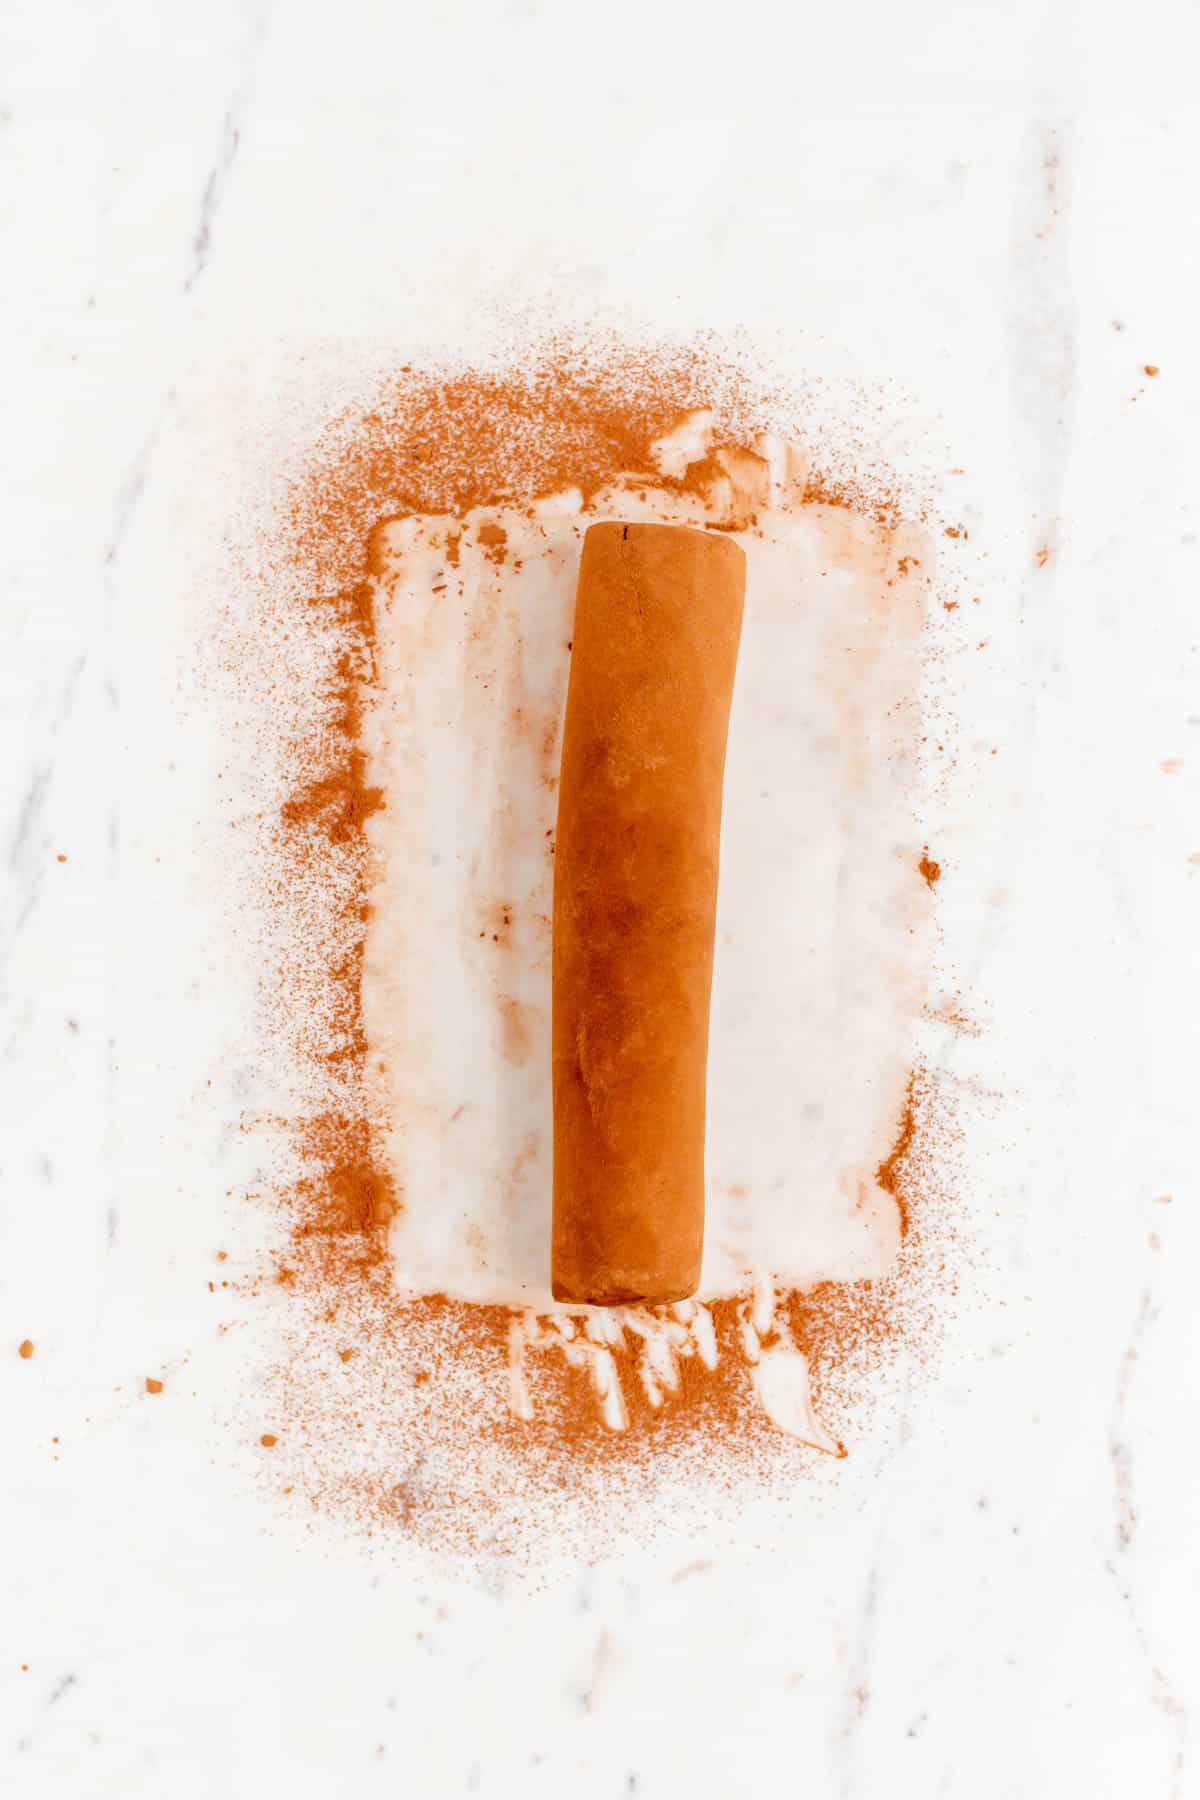
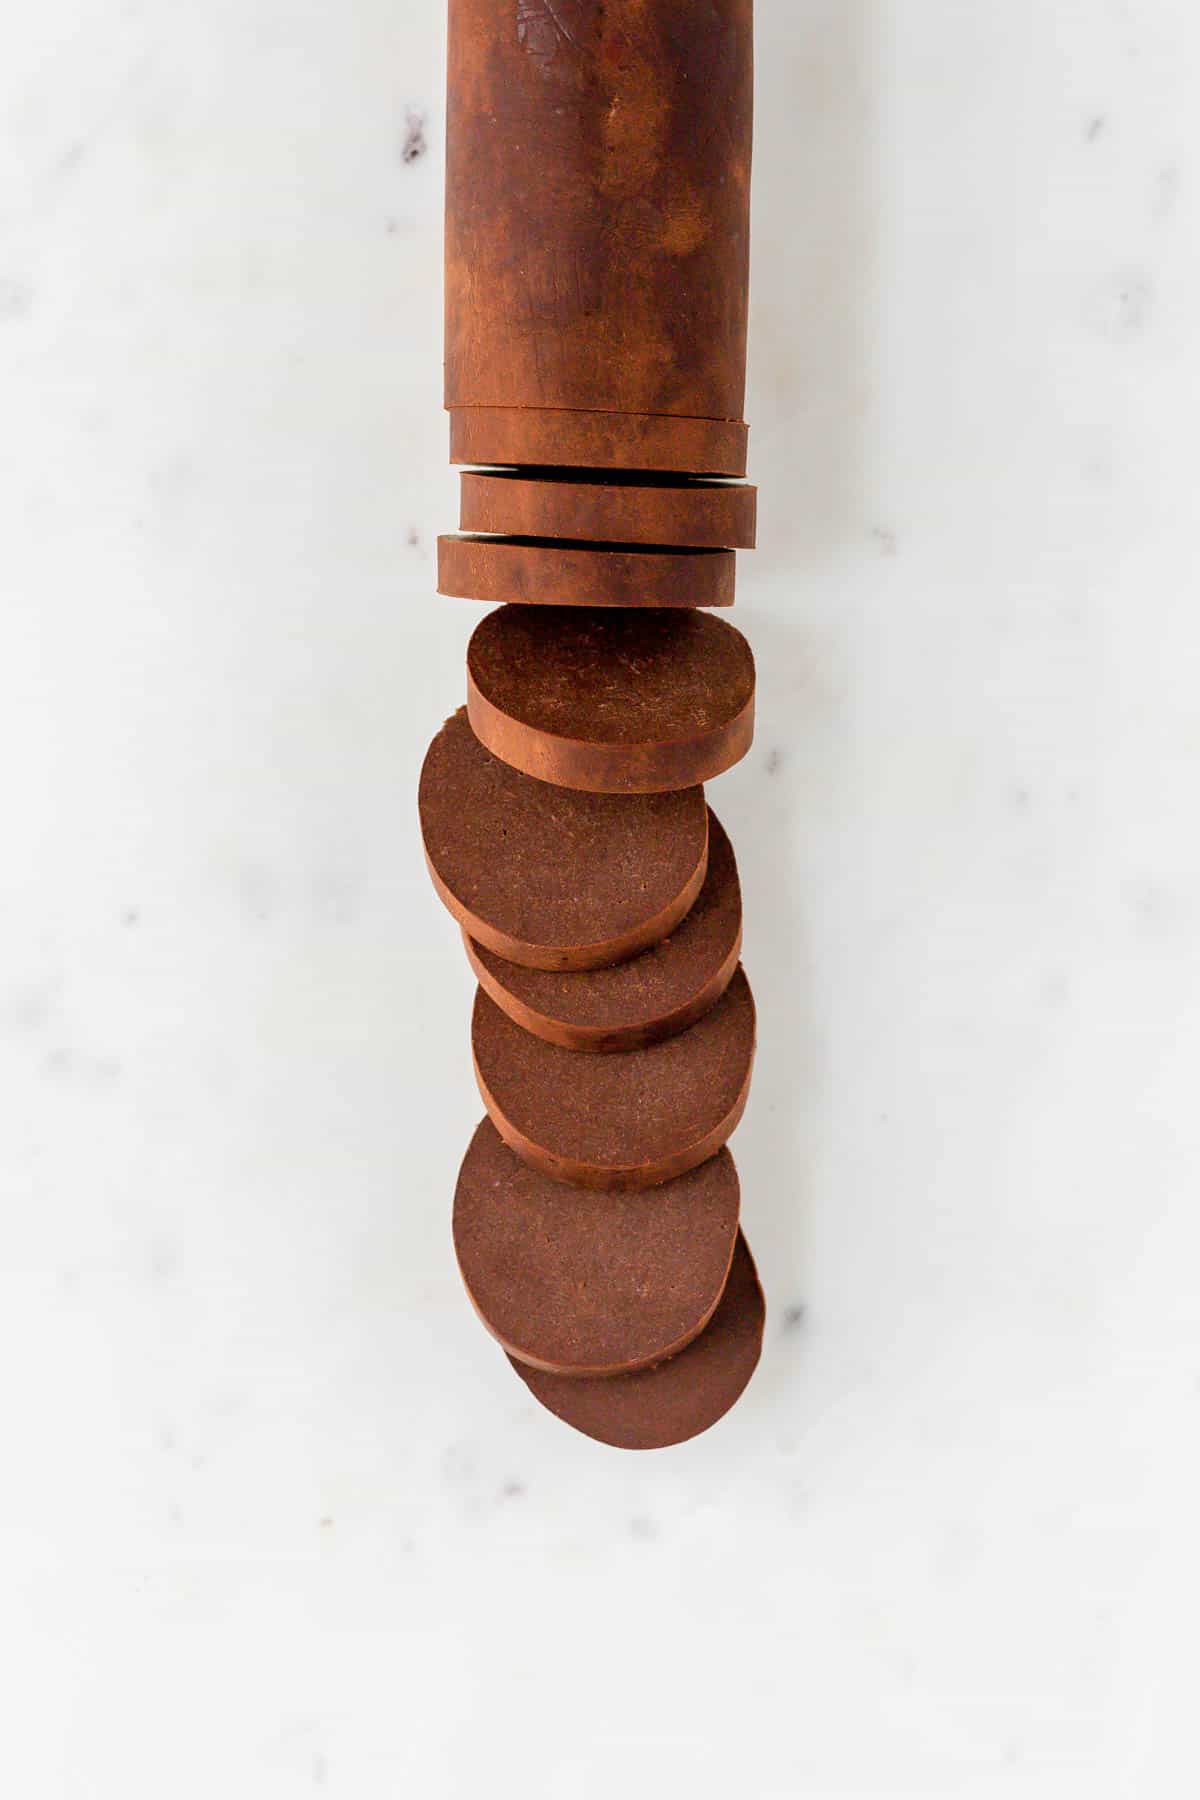
- Transfer the dough to a cocoa-dusted work surface, form it into a cylinder, and coat the dough fully in cocoa powder. Roll your dough into a log until it's about 1 ½"-2" wide and 10" long.
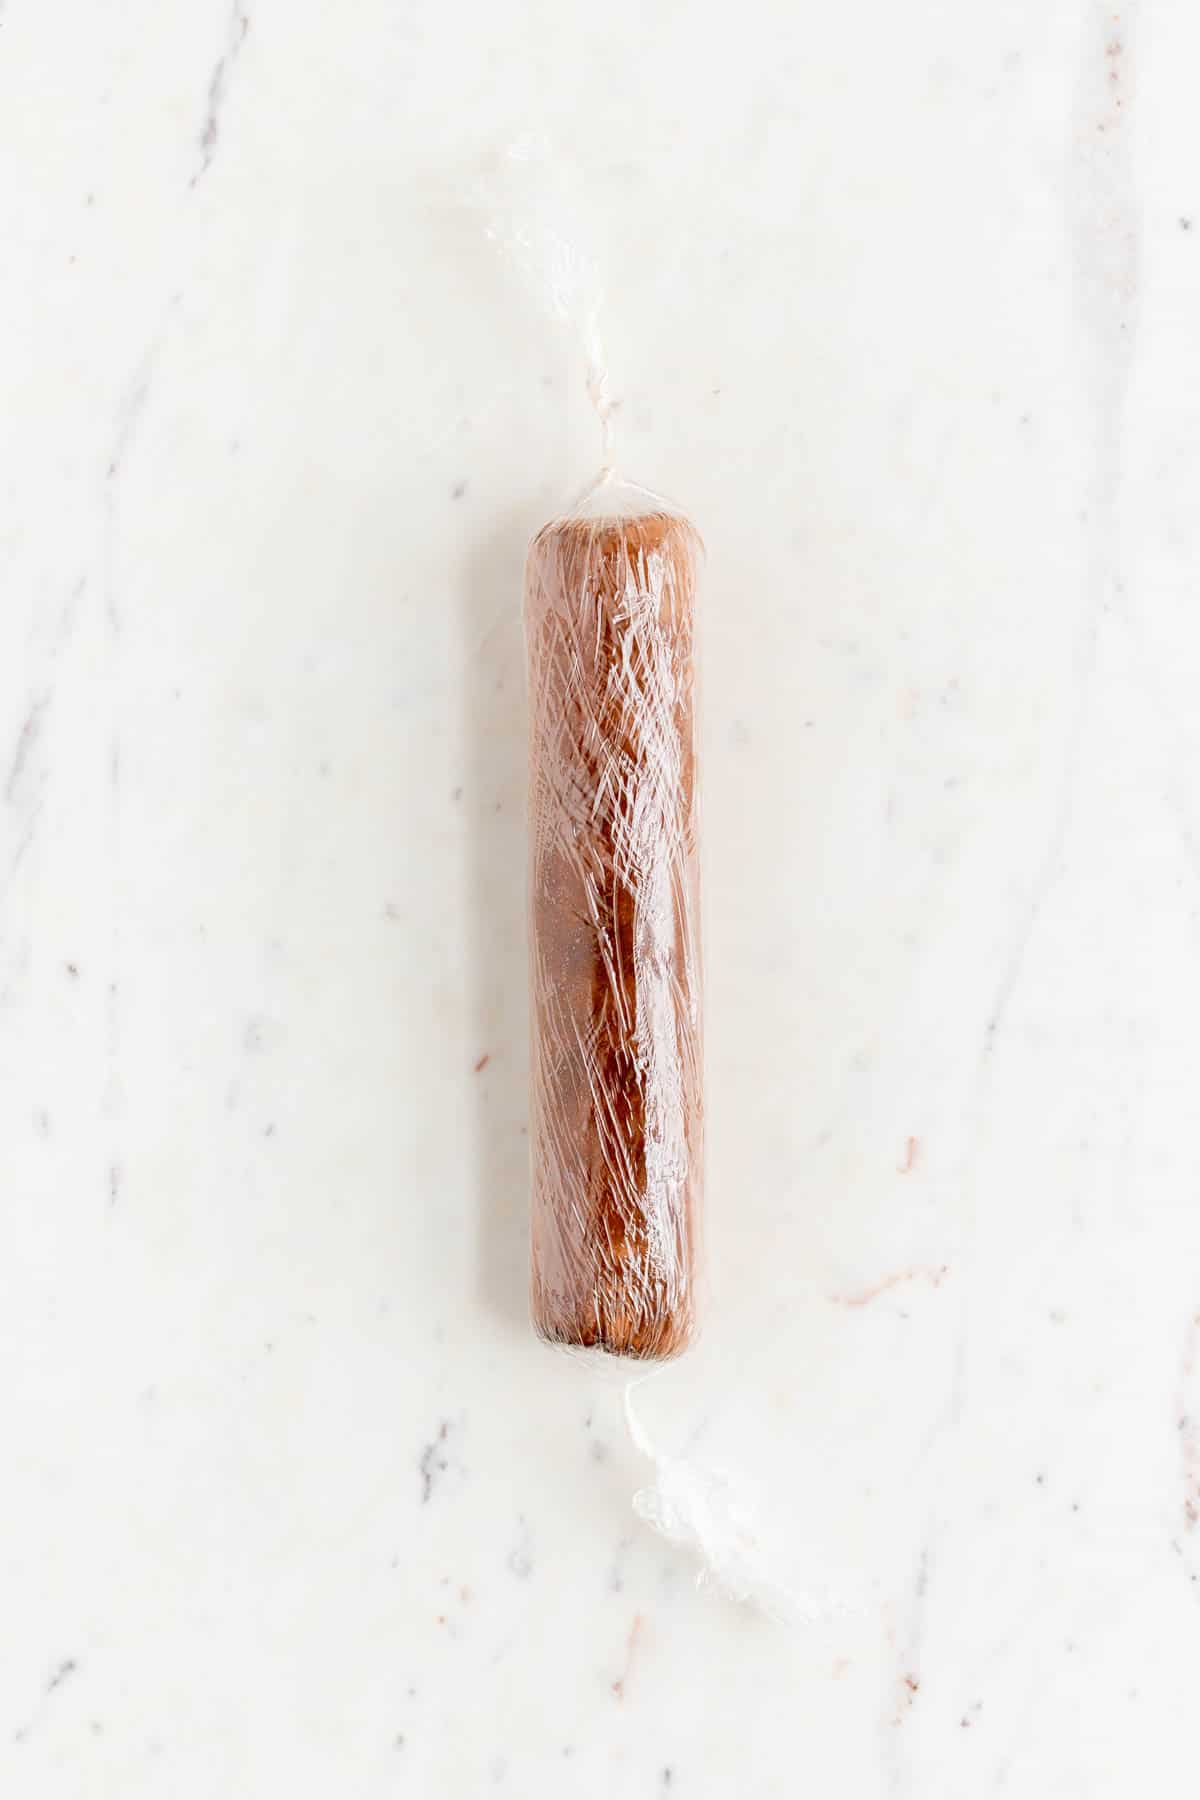
- Wrap it neatly in plastic wrap. Chill the dough in the fridge for 30 minutes, then re-round it. Place in the fridge for another 30 minutes, then re-round it once more. Chill for at least 1 additional hour in the freezer (or up to 1 month).
TO BAKE THE COOKIES:
- At the end of the chilling time, preheat your oven to 350°F and line two baking sheets with parchment paper.
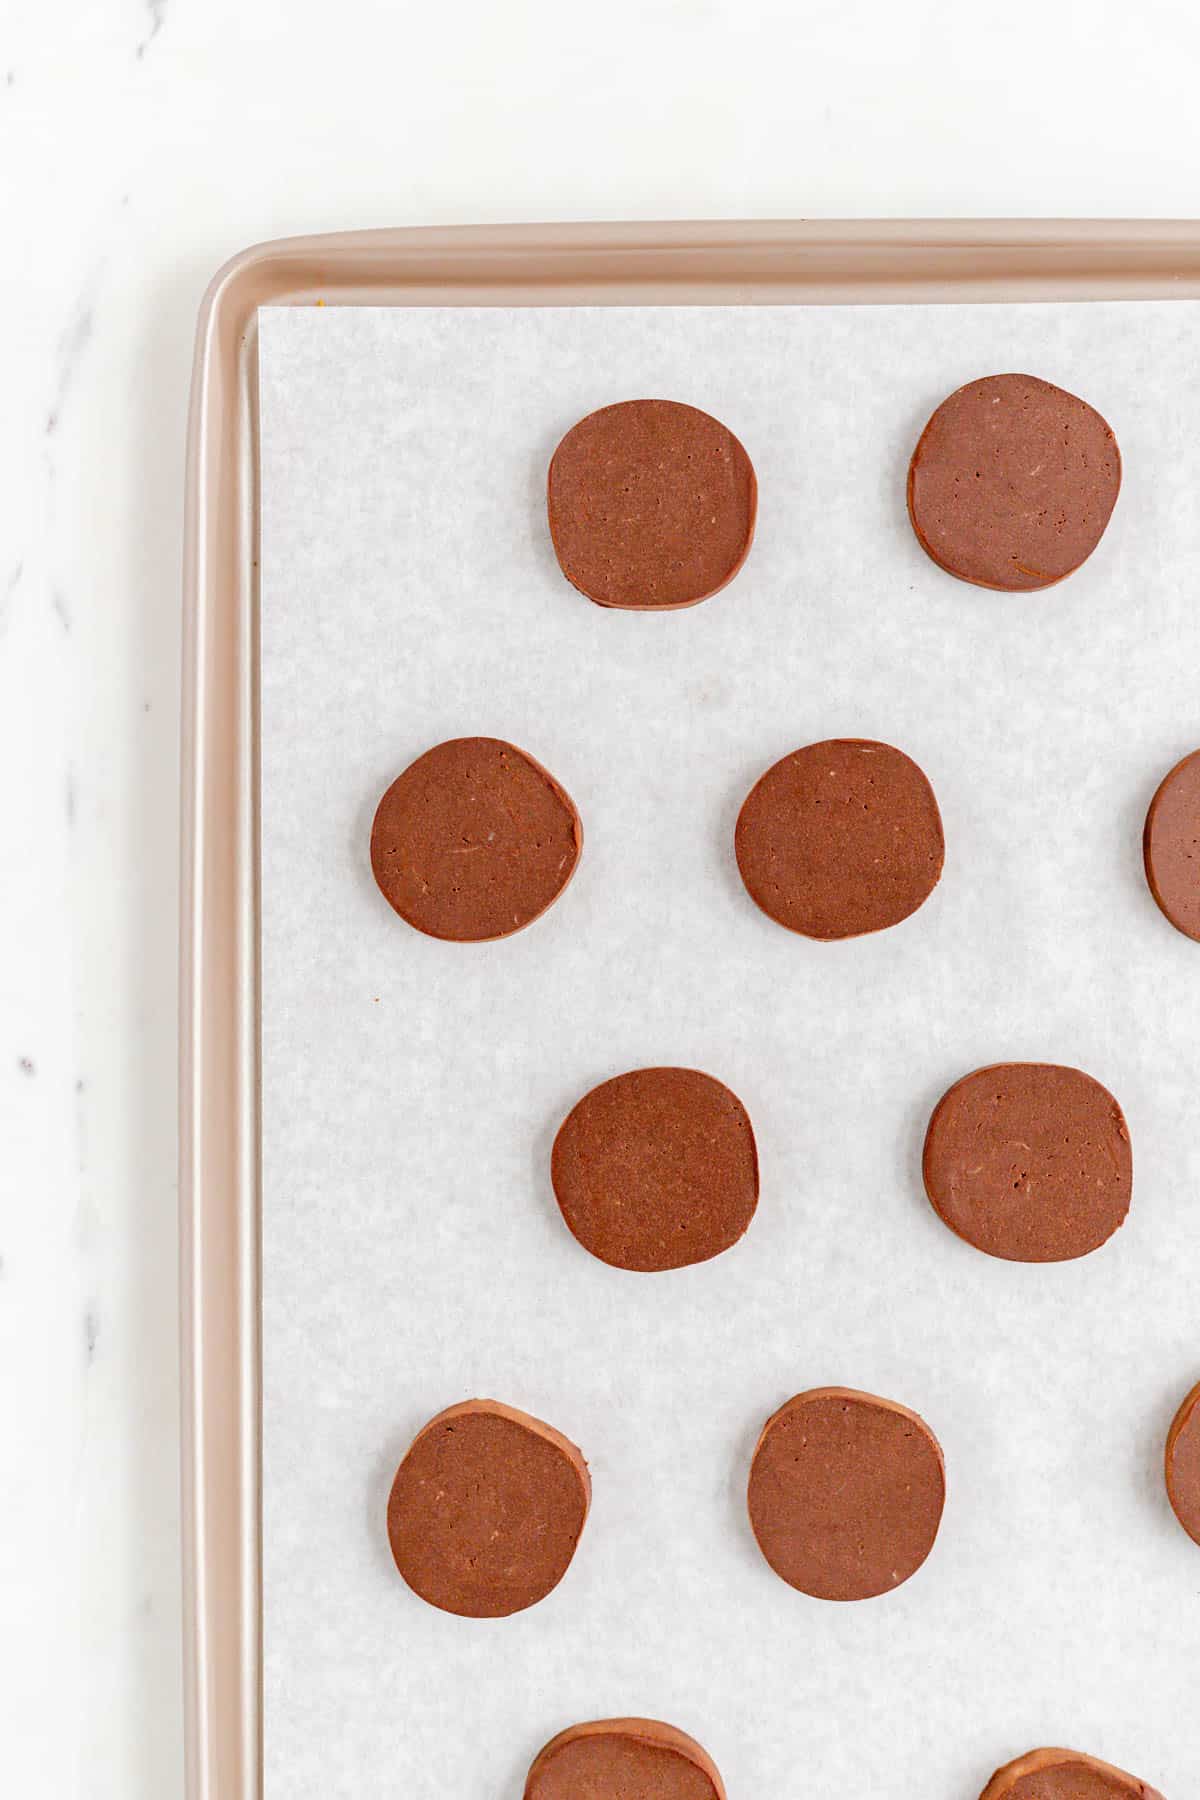
- Slice cookies into ¼" slice, tray them up on prepared pans, and bake for 14-16 minutes until dry, matte, and fully set on top.
- Cool cookies fully and enjoy as a classic butter cookie, of continue on to decorate for a special occasion.
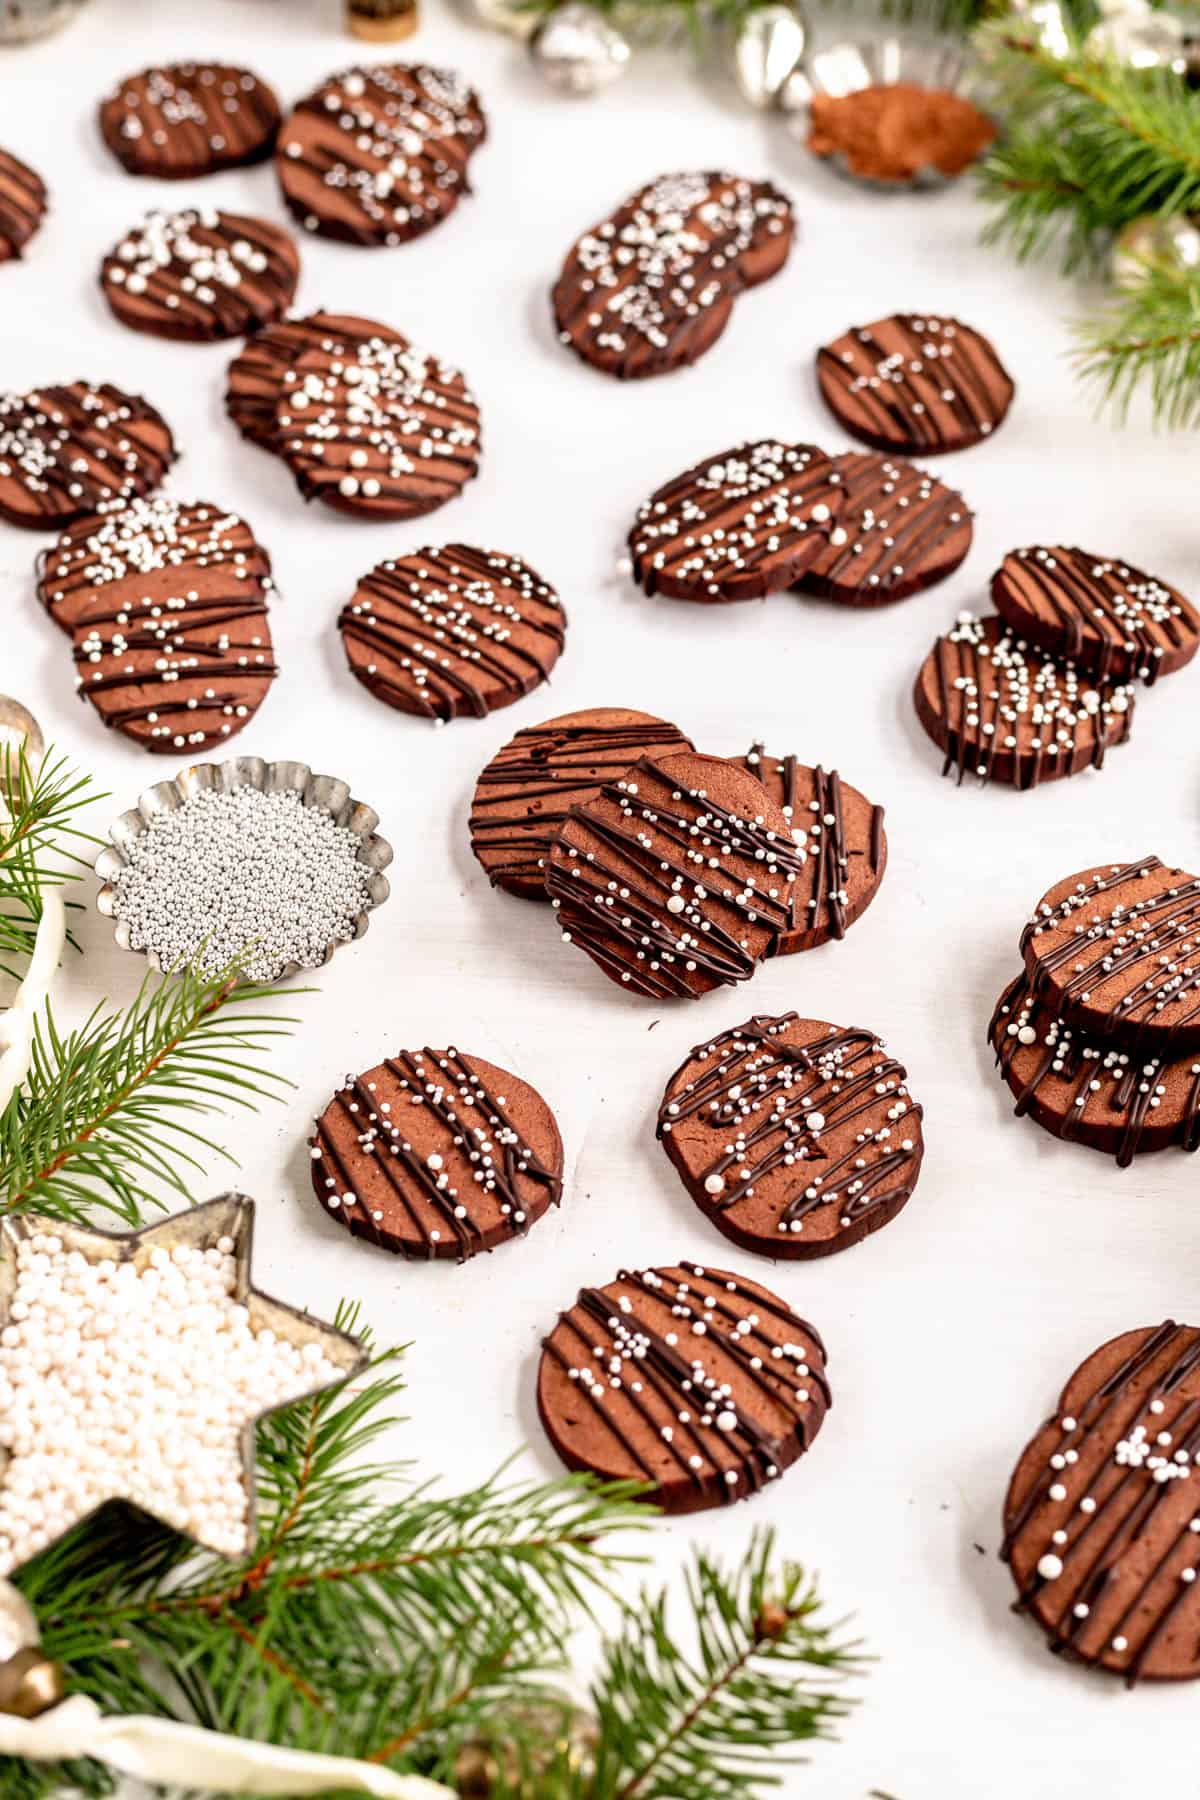
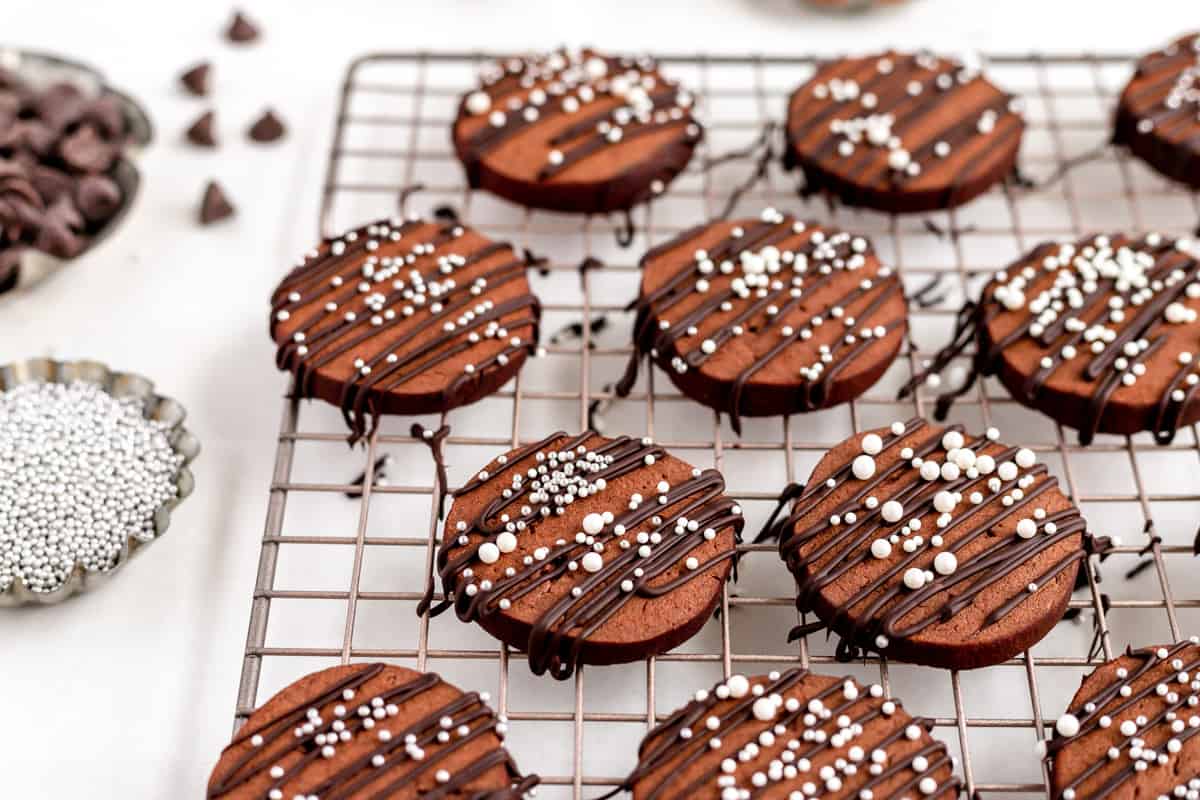
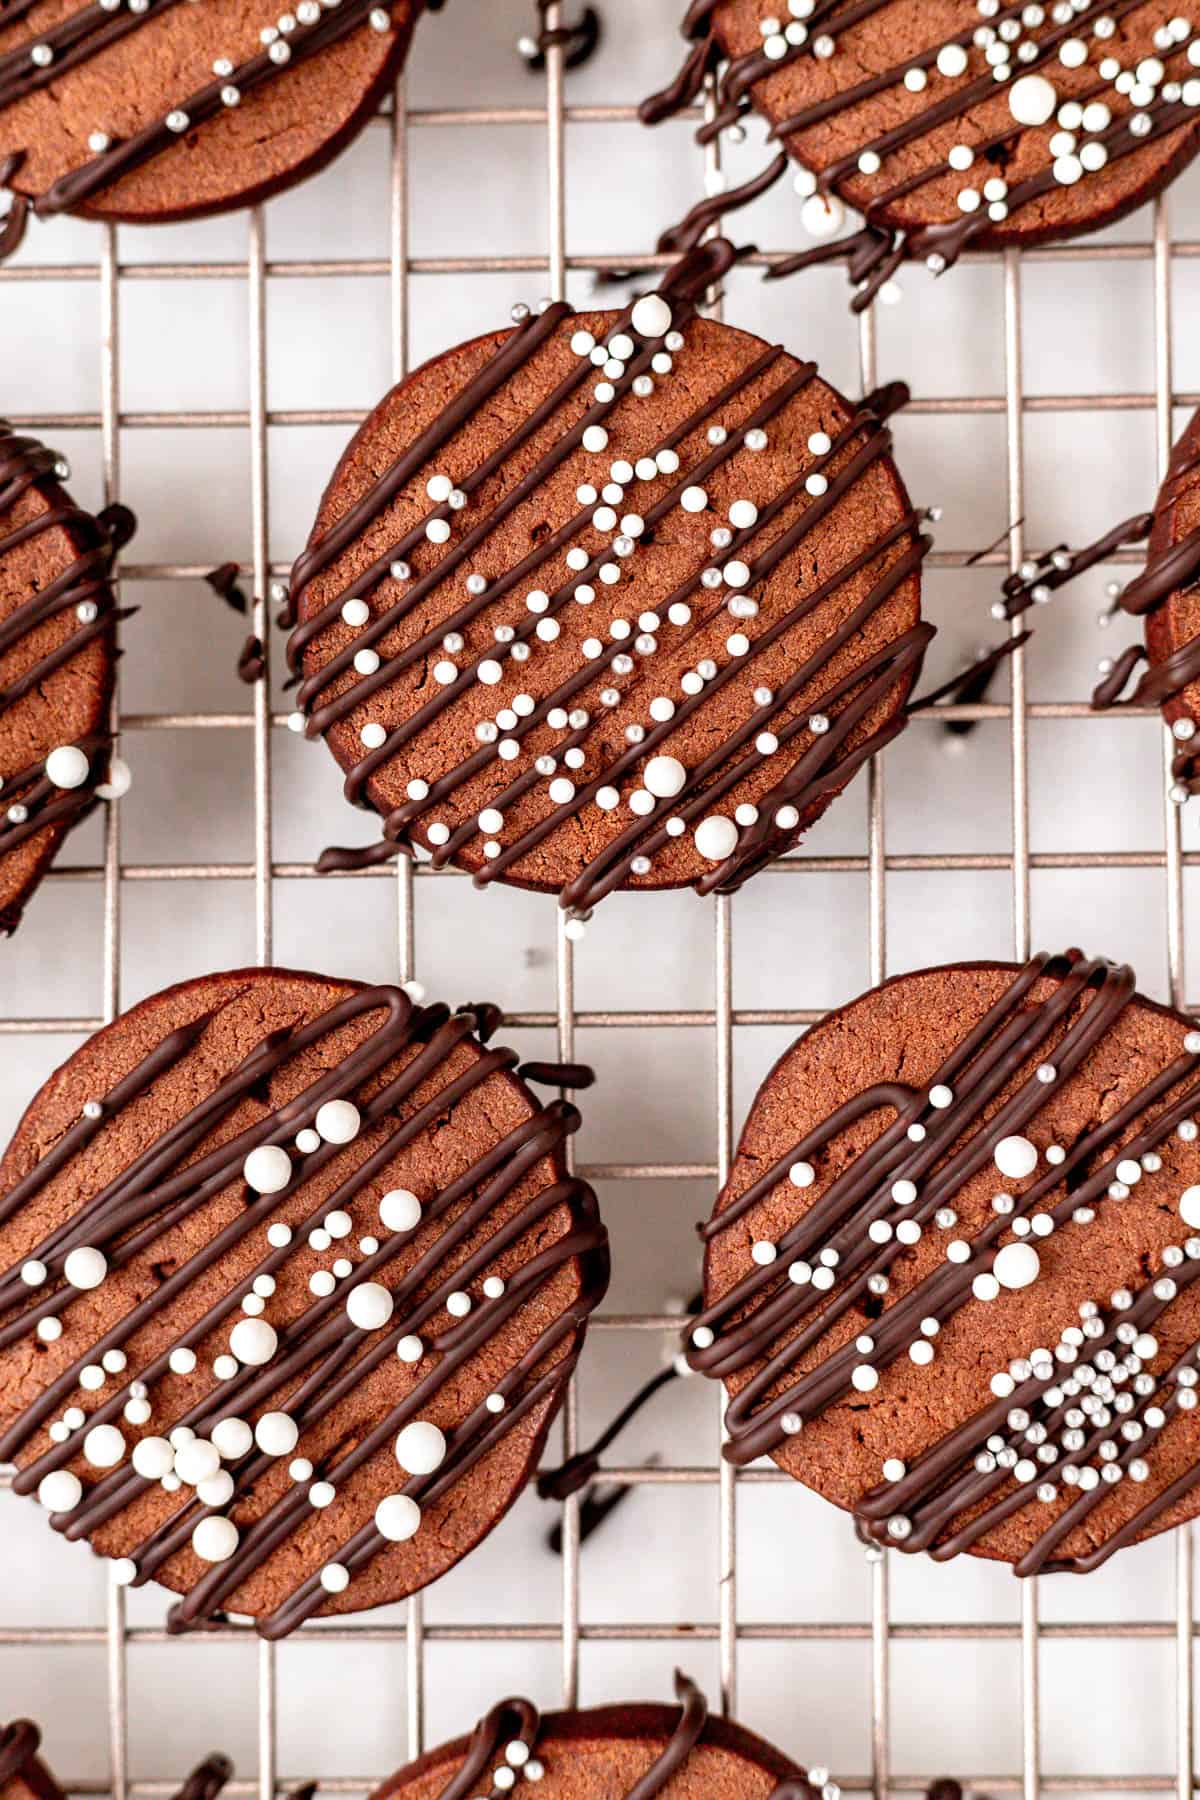
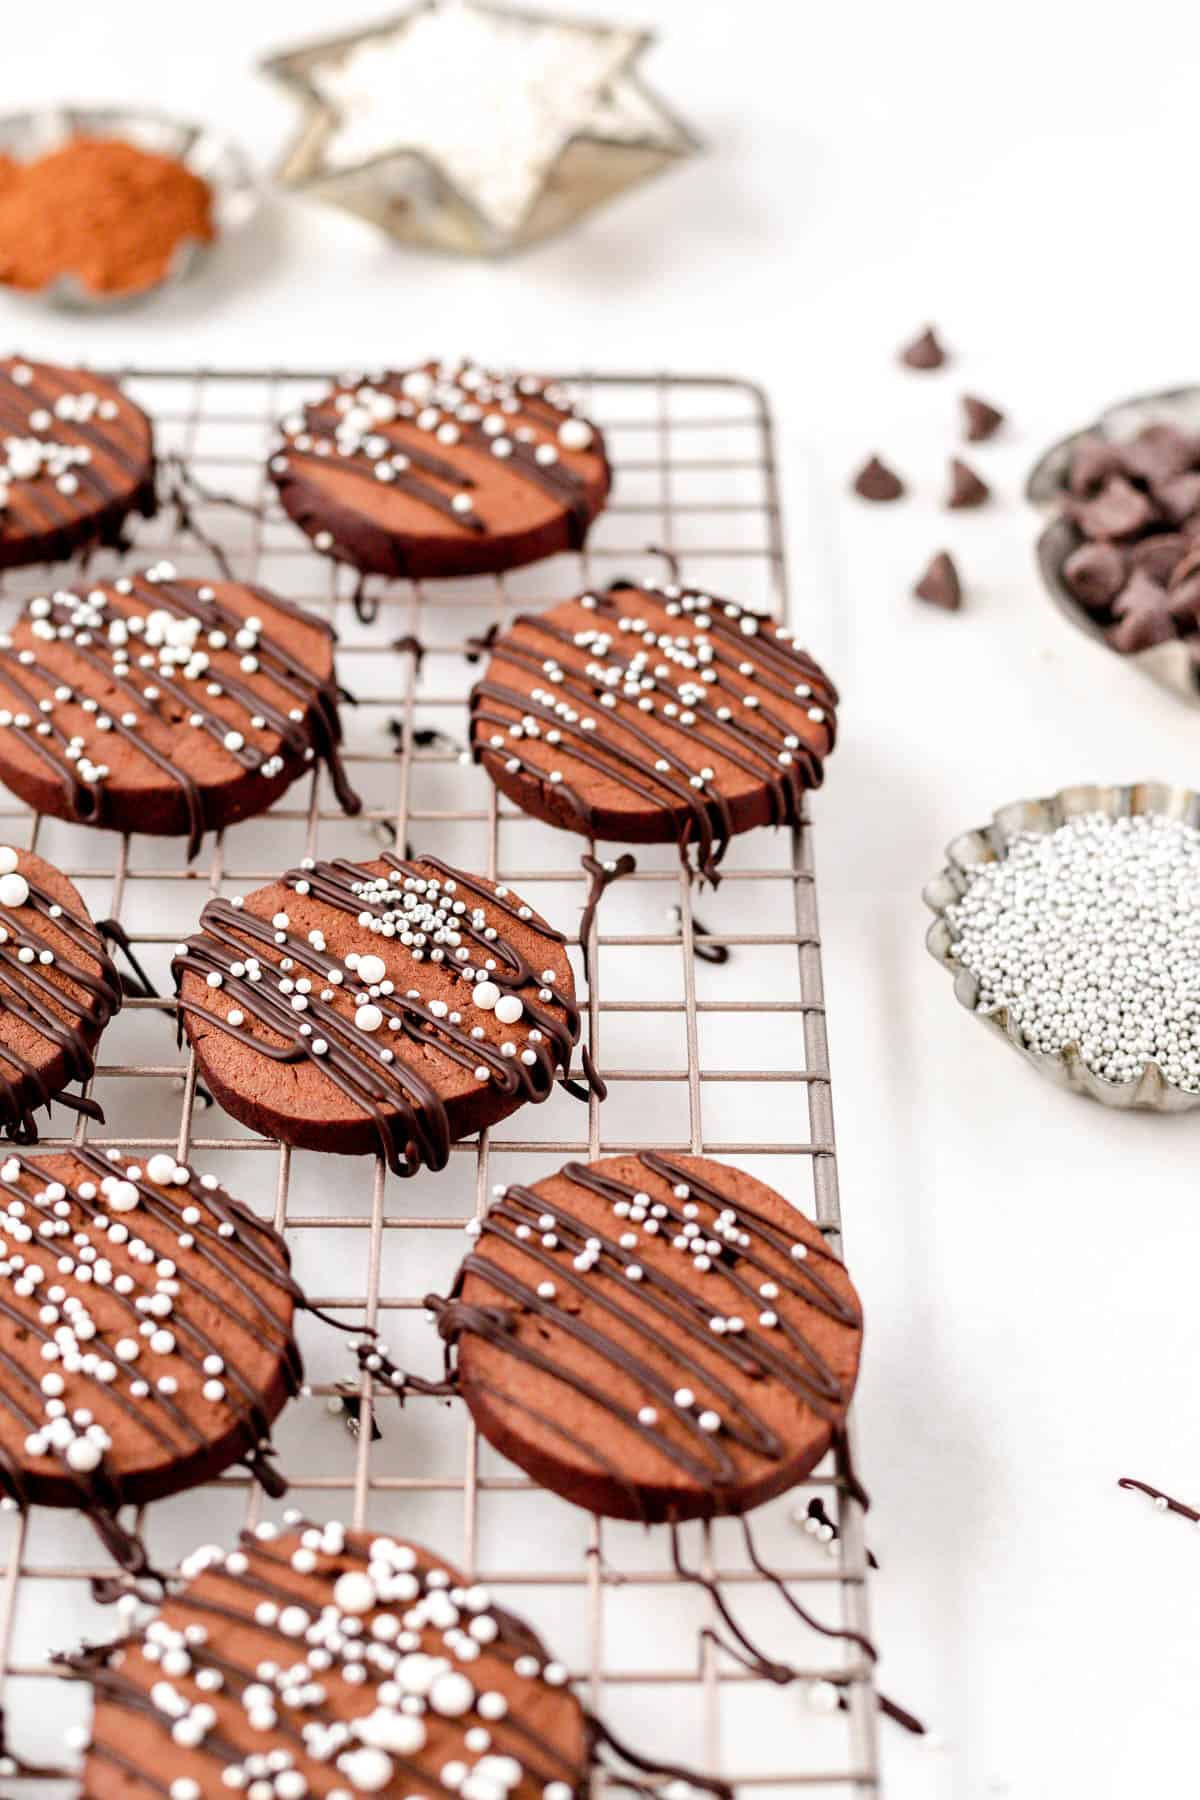
TO DECORATE (optional):
- Place cookies on a cooling rack over parchment, foil, or plastic wrap.
- Melt the chocolate chips or chopped bars fully.
- Use a dinner fork to drizzle chocolate back and forth over the cookies.
- Sprinkle some sprinkles on top if you like then allow chocolate to set for a few hours before enjoying these rich, dark chocolate delights!
Check out the full RECIPE WEB STORY for a click-through tutorial!
*Expert Tips and Tricks* for Better Baking
What's the TOP TIP for making the best icebox cookies?
My #1 tip would be to make sure these cookies are fully chilled (a bare minimum of two hours) before you slice and bake them.
I know they sound delicious and you want to get them in the oven right away, but if they're not chilled enough, they'll pancake out into a thin cookie crisp when they're baked.
Can you freeze icebox cookie dough? How do you bake them from the freezer?
Yes! This dough will keep in the freezer for up to 1 month, wrapped airtight. This recipe is actually written to be baked right from the freezer so you can just follow it as written even if your dough has been chilling for days or even weeks.
How do you keep icebox cookies round?
1) Make sure your dough is fully chilled through before baking.
2) Re-round your cookies at a few critical points in the chilling process (I'll walk you through this in the recipe card!).
Why do icebox cookies need to be refrigerated?
Icebox cookie dough, by design, needs to be really well chilled (often fully frozen) before it's baked.
1) This fully re-solidifies the butter before the bake, which will help the cookies to maintain their structure and round shape in the oven. Essentially, it'll help them not turn into cookie pancakes.
2)The rest time in the fridge also allows the flour to hydrate which stabilizes the dough further.
3) Only once the log is fully chilled, will it stand up to slicing. Thus, that long chill is required to portion your cookies using the slice and bake method as opposed to a roll and cut-out method.
What is the difference between a sugar cookie and a butter cookie?
While the ingredients are fairly similar between a sugar cookie and a butter cookie, there are a few common differences.
1) Typically a sugar cookie is going to have a much higher ratio of sugar (and often eggs) to flour than a butter cookie. Alternatively, a butter cookie would have a much higher ratio of butter to flour than a sugar cookie.
2) You'll also usually have little or no leavener (baking powder or baking soda) in a butter cookie. But there's often at least some leavener in a sugar cookie so it has a little rise in the oven.
3) While it depends on the type of sugar cookie we're talking about, you will usually try to whip some air and lightness into a sugar cookie batter. However, butter cookies will typically be minimally mixed, with little air in the batter, as you're looking for a tender final cookie, with little to no rise.
Other Recipes You'll Love
If you're a chocoholic like me, be sure to check out my Fudgy Dark Chocolate Brownies, Double Fudge Brownie Truffles, Fudgy Blondie Brownies and Chewy Double Dark Chocolate Chip Cookies.
For a traditional roll and cut vanilla butter cookie, head over to my Jammy Dodger recipe!
Last, but certainly not least, here's a few other holiday favorites: No-Chill Cut Out Sugar Cookies, Gingerbread Sandwich Cookies with Orange Cream Filling, and Easy 7-layer Magic Bars, and Bourbon Pecan Pie Bars!

⭐ If you gave this recipe a try please give it a ⭐ rating and tag me on Instagram @mint.and.mallow.kitchen so I can see what you're baking up! ⭐
📖 Full Recipe

Icebox Chocolate Butter Cookies (slice and bake!)
Ingredients
FOR THE COOKIES:
- ¾ cup (1 ½ sticks) unsalted butter (softened)
- 1 cup powdered sugar (sifted)
- 1 ½ cups all-purpose flour
- ¼ cup dutch or natural cocoa powder (sifted)
- ¼ teaspoon salt
- 1 large egg
- 1 teaspoon vanilla extract
- ¼ cup dutch or natural cocoa (for dusting the counter)
FOR DECORATION (optional):
- 1 cup dark chocolate chips or chopped bars
- Sprinkles, chocolate shavings, or crushed candy canes
Instructions
TO MAKE COOKIES:
- Cream butter and sugar: cream butter with powdered sugar for 1 minute on medium speed until light and fluffy.
- Add all other ingredients: add all remaining dough ingredients (but not the second ¼ cup of cocoa for dusting), and mix on low speed for about 30 seconds just until fully combined (the dough will be pretty sticky).
- Coat the dough fully in cocoa: lightly sprinkle cocoa over your work surface (just like you would when flouring a work surface). Transfer the dough to your work surface, form it into a single mass (doing your best to work out any major holes in the center), and form it into a thick cylinder (re-coating the surface and dusting your hands with cocoa as needed). The dough will be very sticky to start, but as soon as you get a full coat of cocoa powder on it, it should be easy to work with.
- Roll it up: start to roll the cylinder into a log until it's about 1 ½"-2" wide and 10" long. Wrap your log neatly in plastic wrap (trying to avoid major bumps of excess wrap), then use one hand on each end to twist the ends of the wrap in opposite directions to tighten the wrap around the dough (essentially making a chocolate dough sausage).
- Chill, roll, then chill again: place your dough log in the fridge for 30 minutes. After that, pull your log out of the fridge and re-round it by just rolling it on the counter (while it's still in the plastic wrap), now that the dough is a little stiffer. Place the log back in the fridge and allow it to chill for another 30 minutes, then re-roll it once more. Finally, place the dough in the freezer for at least one more hour or overnight to fully chill through (you can even leave the dough in the freezer for up to a month as long as it's wrapped air-tight).
TO BAKE THE COOKIES:
- Prep and line: at the end of the chilling time, preheat your oven to 350°F and line two baking sheets with parchment paper.
- Slice, tray, and bake: place your dough log on a cutting board and use a straight-edged blade cut into ¼-inch-thick rounds. Place sliced cookies on prepared trays, at least 2” apart. Bake for 14-16 minutes, until the tops look dry, matte, and feel set when gently pressed. (You should be able to smell a delicious chocolate aroma in the kitchen when they're about done).
- Cool, share, and enjoy: allow cookies to cool on their pan for 10 minutes, then transfer to a cooling rack to allow them to cool fully. Enjoy as a classic chocolate butter cookie, or continue on to decorate your cookies once they're fully cooled.*1
TO DECORATE (optional):
- Melt chocolate: to decorate your cookies, line them up about 1" apart on cooling racks, over parchment, foil, or plastic wrap (for easy cleanup!). Melt chocolate fully in a double boiler or in the microwave.*2
- Drizzle on chocolate, then add sprinkles: use a fork to drizzle the chocolate back and forth over the cookies on the cooling rack. Sprinkle some sprinkles on top if you like then allow chocolate to set for a few hours before enjoying these rich, dark chocolate delights!*3
Test Kitchen Tips
- *1To decorate or not to decorate: these cookies are absolutely delicious on their own and don't require any additional decor or gilding, but there are definitely some options to snazzy them up if you like!
- *2Melting chocolate: if using the microwave, use 50% power or less in 30-second intervals, stirring well between each to prevent burning the chocolate.
- *3Chocolate set time: if simply melting your chocolate for the drizzle, you'll want to give your cookies a few hours for the chocolate to harden after decorating. If you want your chocolate to set much faster, you can always temper it (just make sure it is couverture chocolate). Here's a great tutorial on tempering if you'd like to learn how to temper.
Comments
No Comments