


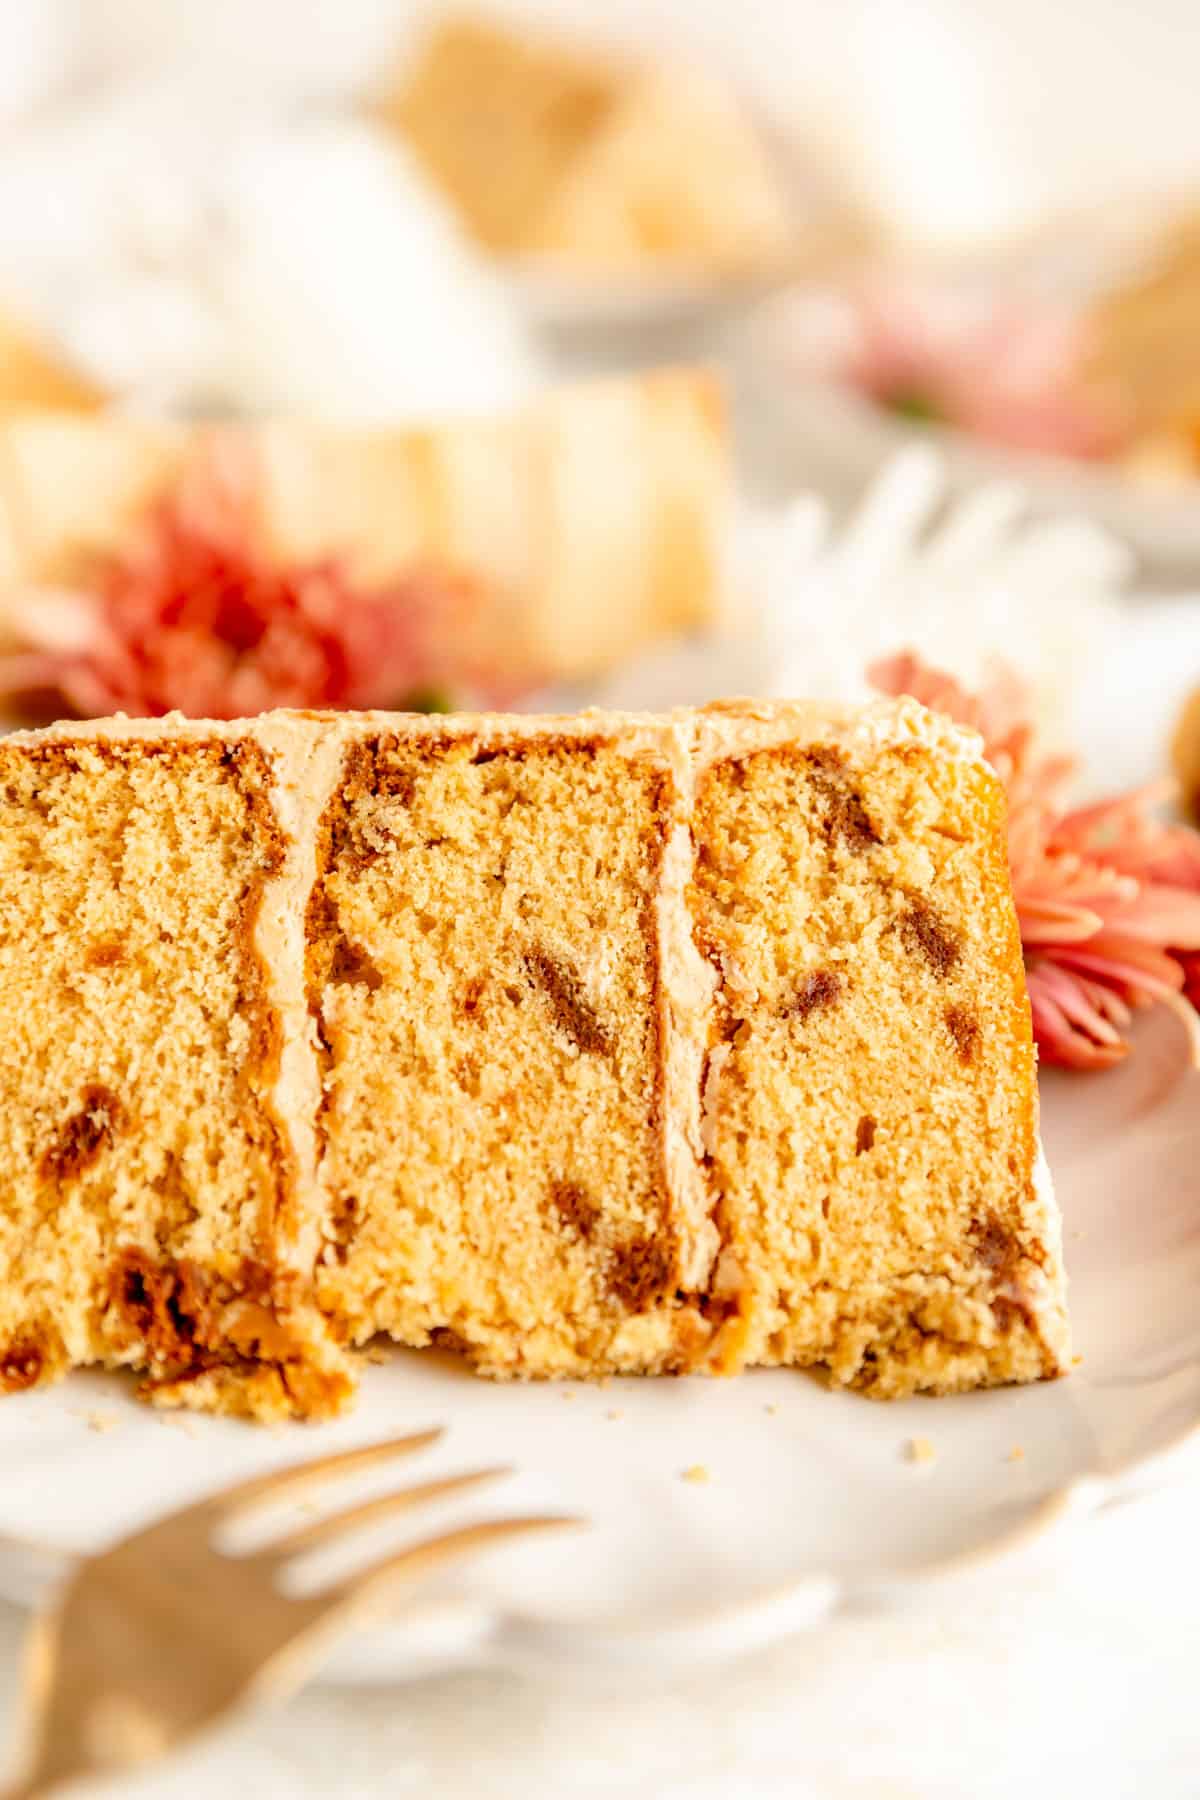
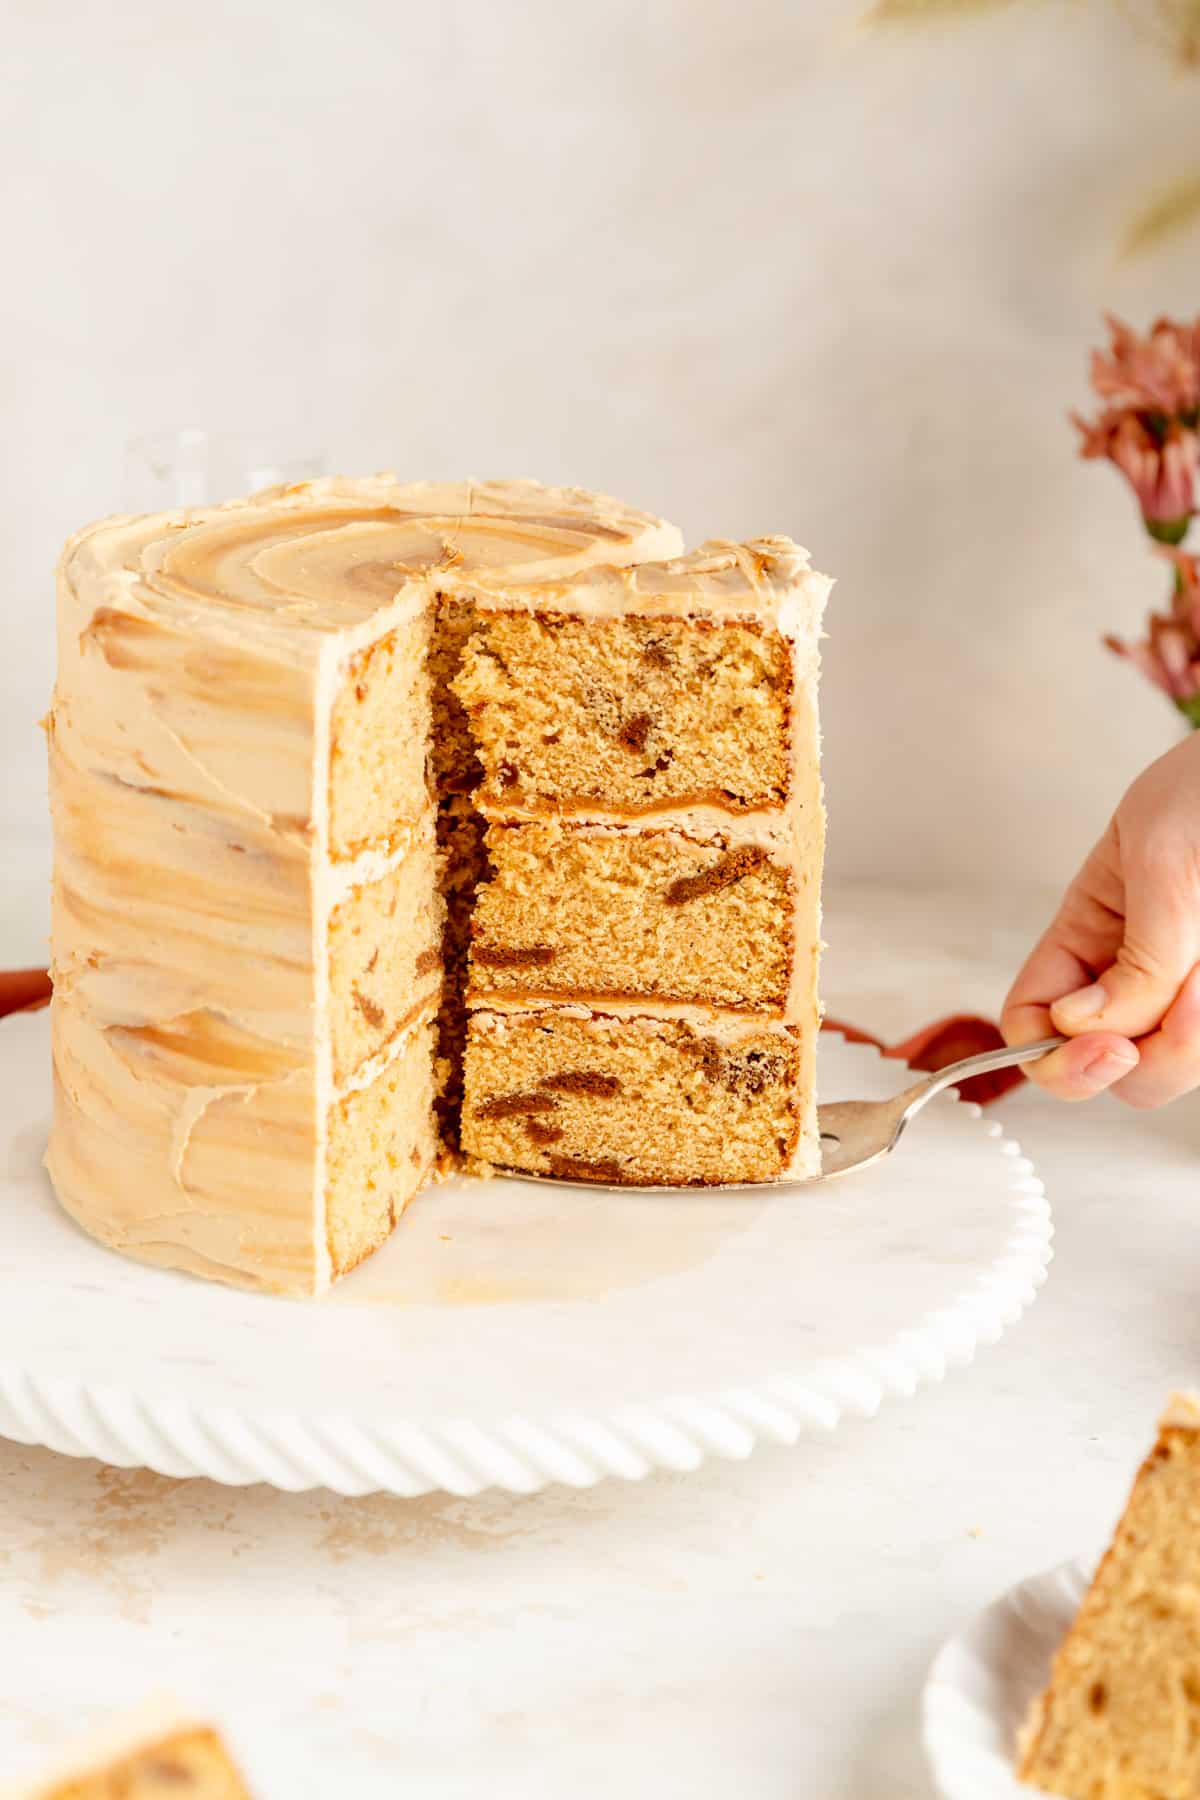
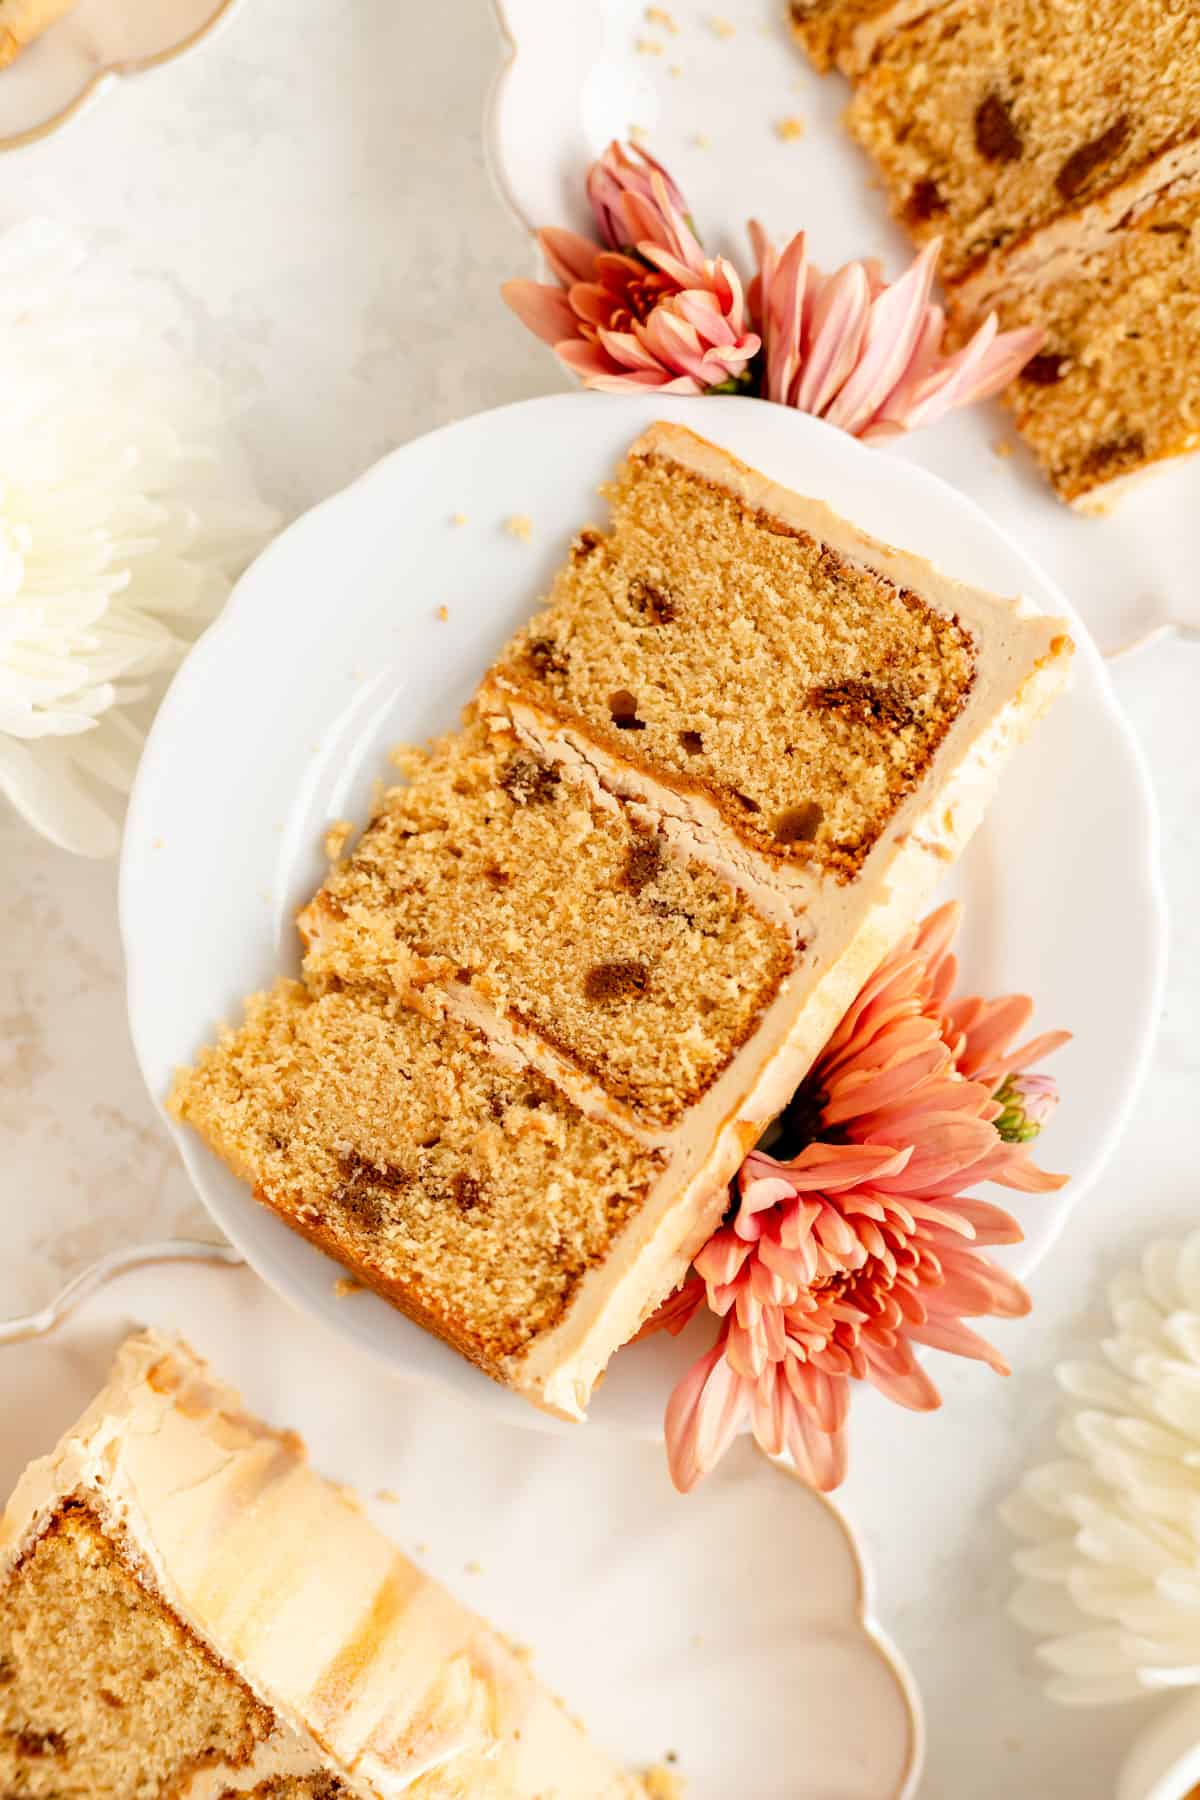
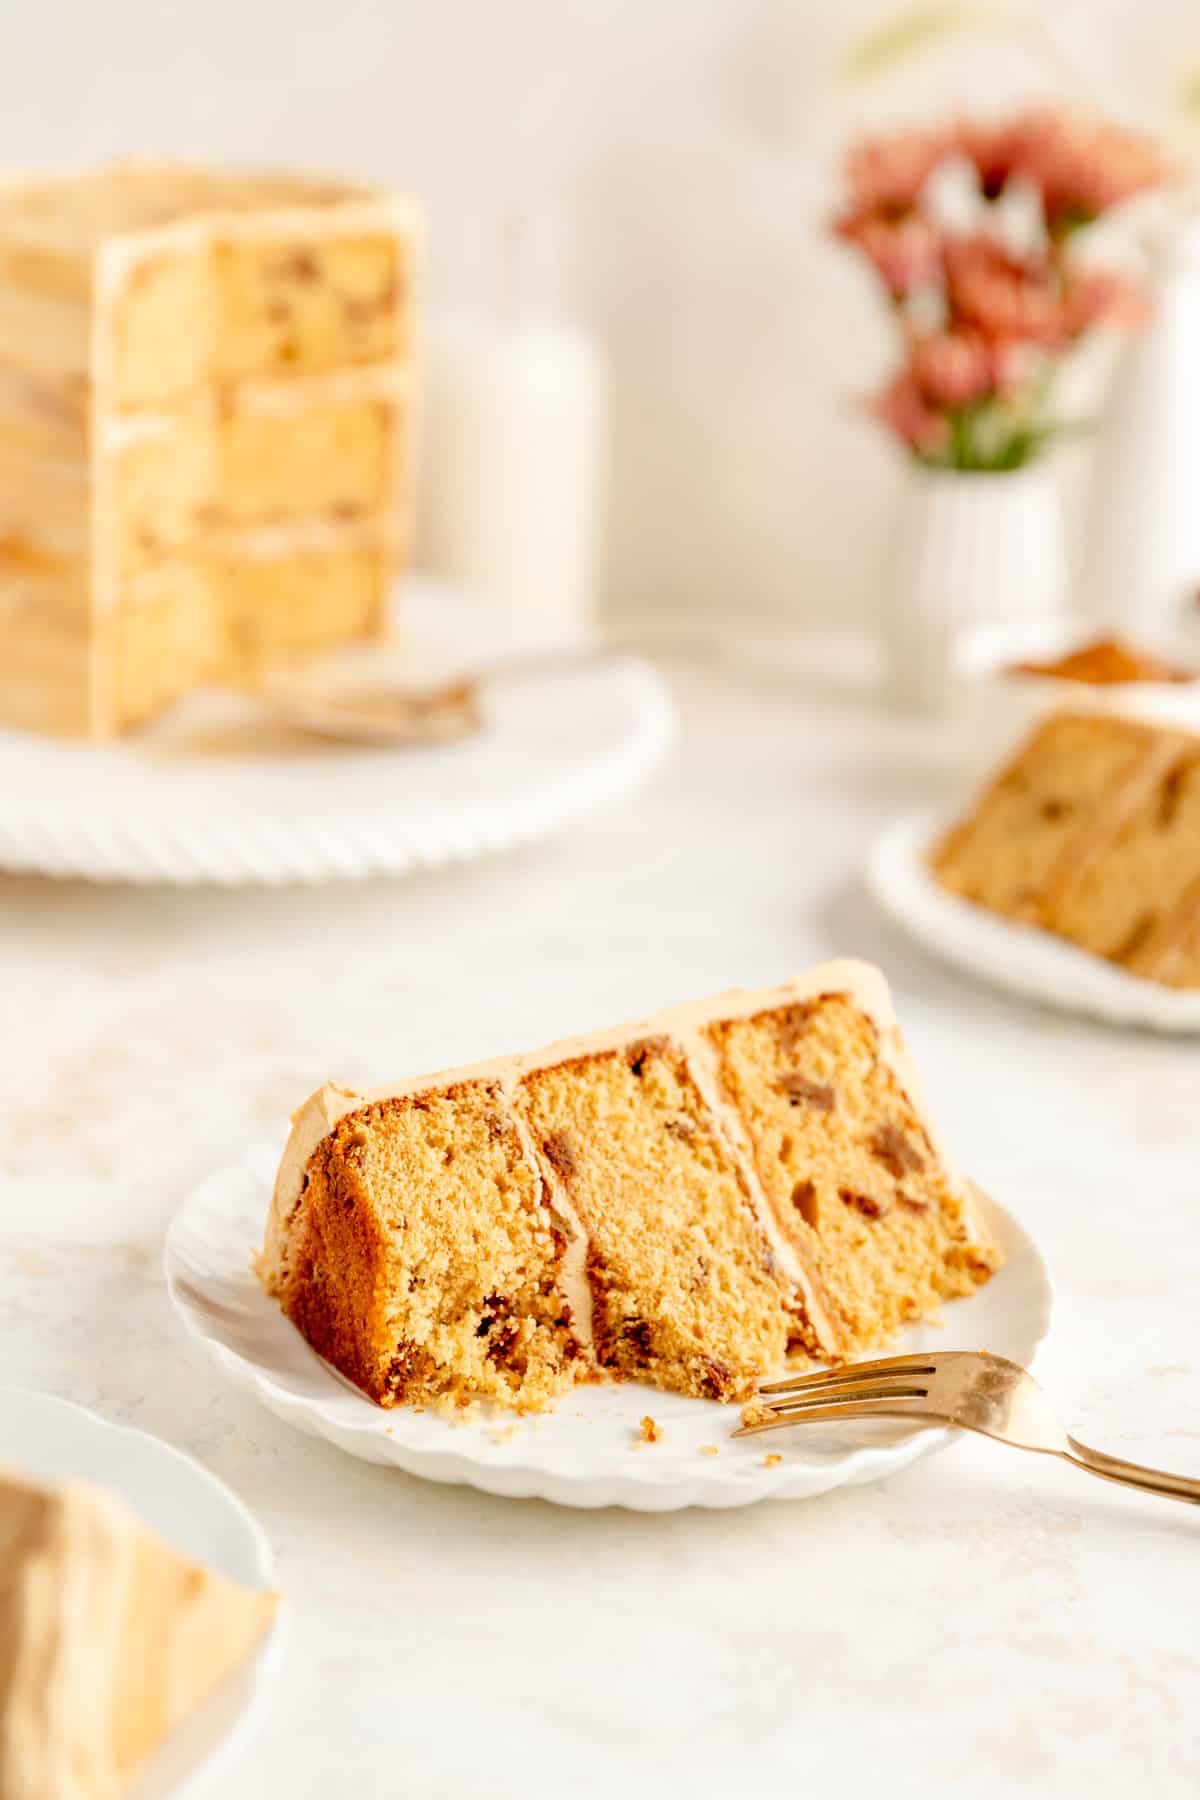
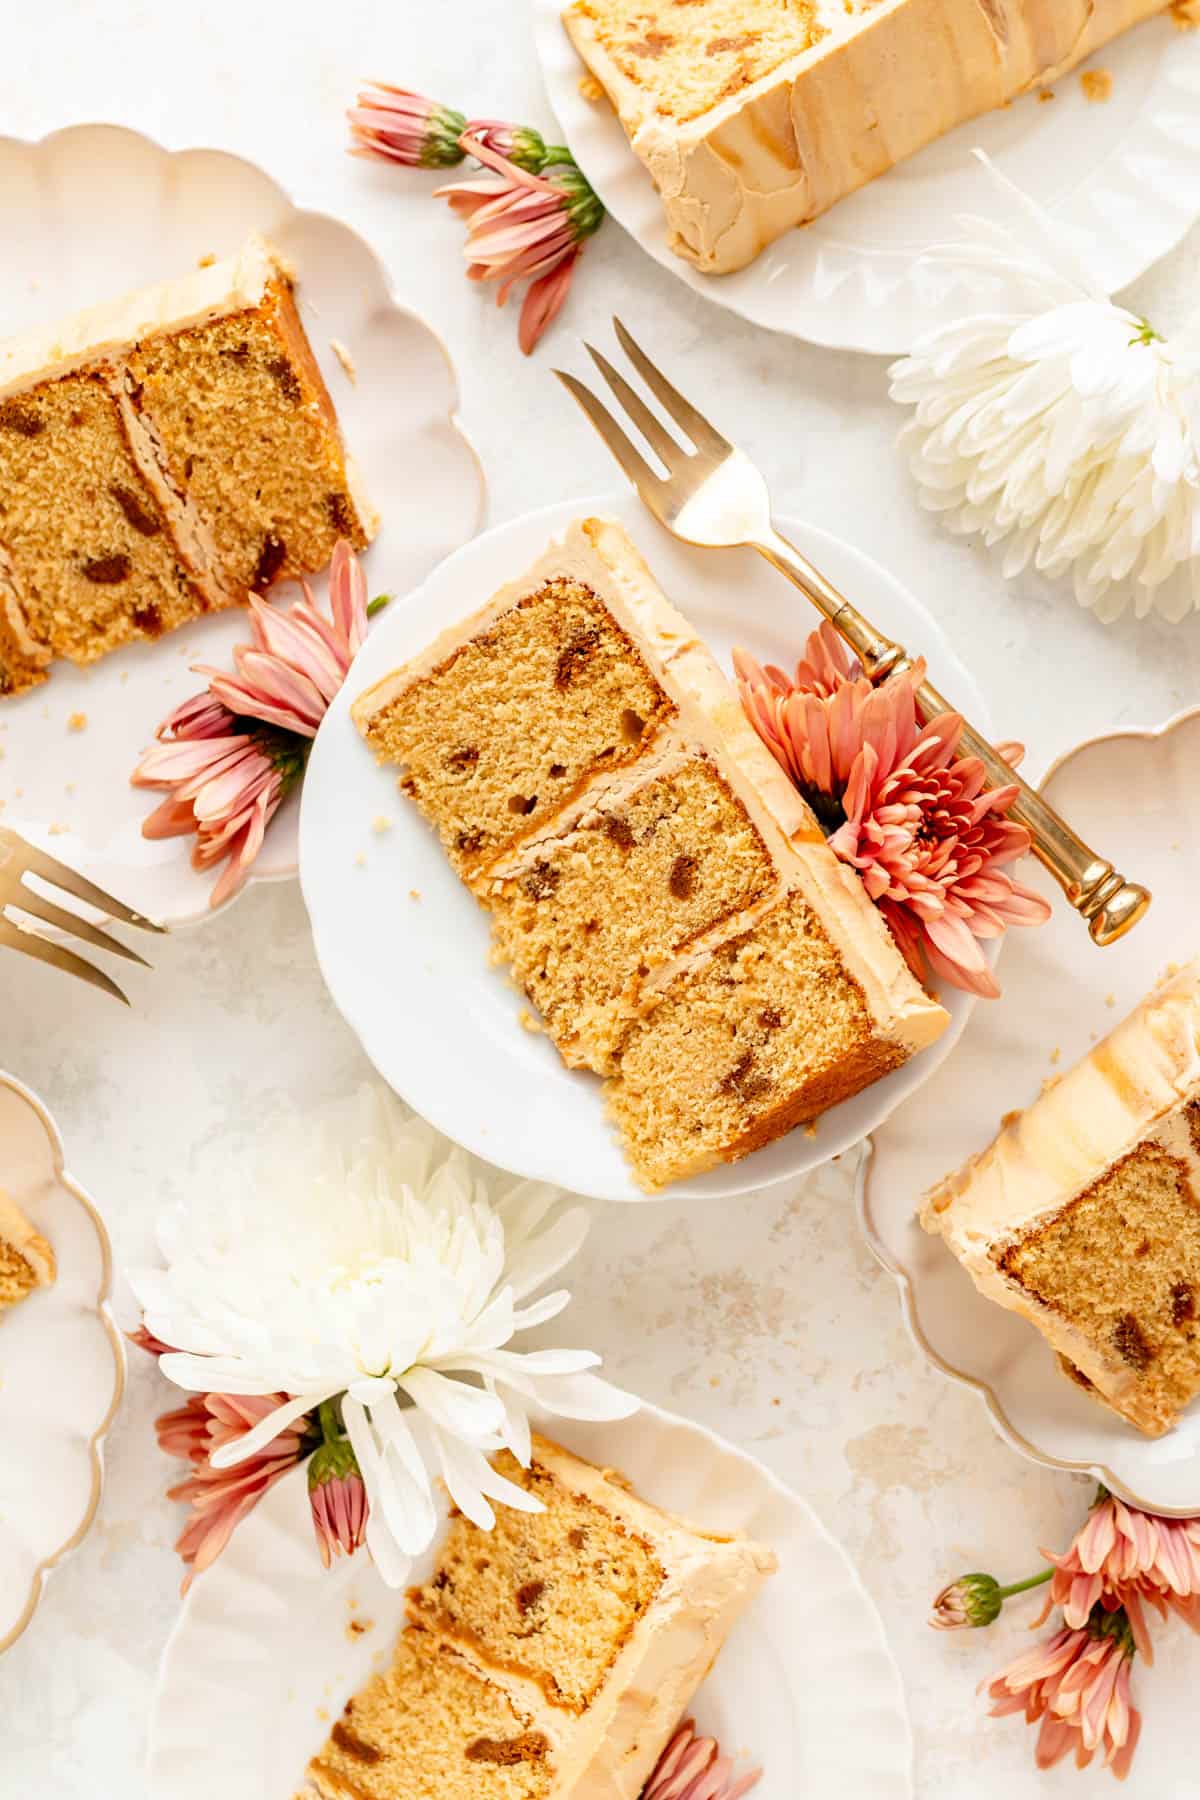
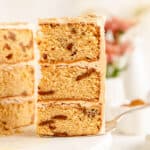
This perfectly spiced cookie butter cake starts with three thick layers of Biscoff cake filled and frosted with silky Biscoff buttercream. Made with two easy recipes, and five rounds of cookie butter flavor, this cake will be come a go-to sugar and spice favorite in no time!
Jump to (scroll for more!):
What is cookie butter?
Many people liken Biscoff cookies and spread to a "speculoos" flavor. But since not a lot of people have a clear concept of what that means, I always describe them as an extra flavorful cinnamon graham cracker. (We used to use them as a base for s'mores gelato when I was a gelato maker and it was super yummy!)
There is most notably a sweet cinnamon flavor to the Lotus Biscoff cookies, followed by a toasty, caramel, brown sugar flavor - all of which comes through really nicely in this ultimate cookie butter cake recipe.
What I love about this cake is its rich flavor and tender layers, with a super silky buttercream thanks to that Biscoff spread. The cinnamon flavor also isn't too strong so you can really enjoy the toasty and caramel-y notes too (similar to a snickerdoodle cookie where you can still taste their buttery-ness through the spice).
And what about that Biscoff cookie butter?
Biscoff cookie butter goes by many names - Biscoff butter, Biscoff cookie butter, Biscoff cookie spread, Biscoff spread, just cookie butter - but whatever you call it, the stuff is addictively delicious.
It has the look and texture of peanut butter, but tastes like you ground up a bunch of Biscoff cookies into the most delicious butter you've ever tasted.
With five rounds of Biscoff spread and cookies going into this tall and oh-so-tasty cake with cookie butter buttercream, you'll be very familiar with this delicious, maybe new, flavor in no time!
Ingredient Tips for Better Baking
(Pssst…if you're ready to just get baking, get all the details in the recipe card below!)
(plus an optional orange for zesting!)
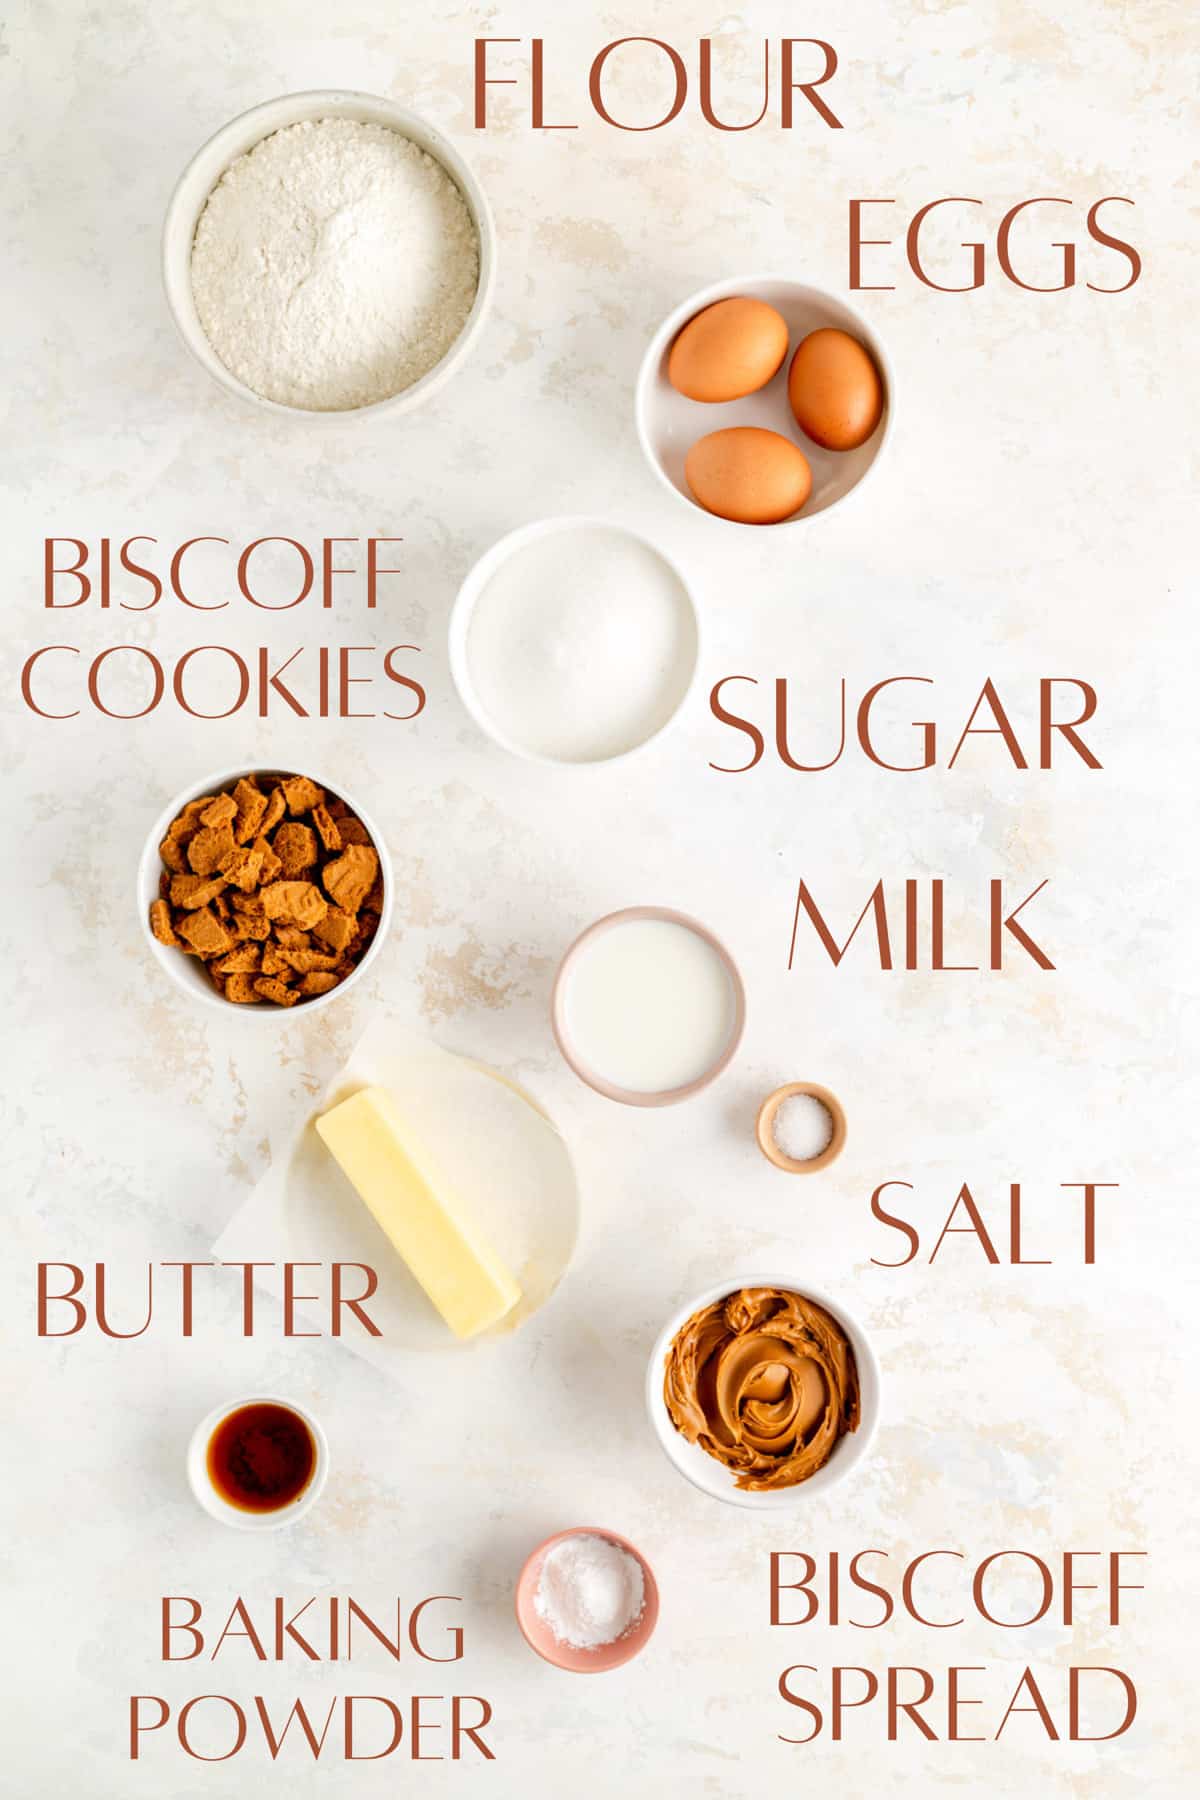
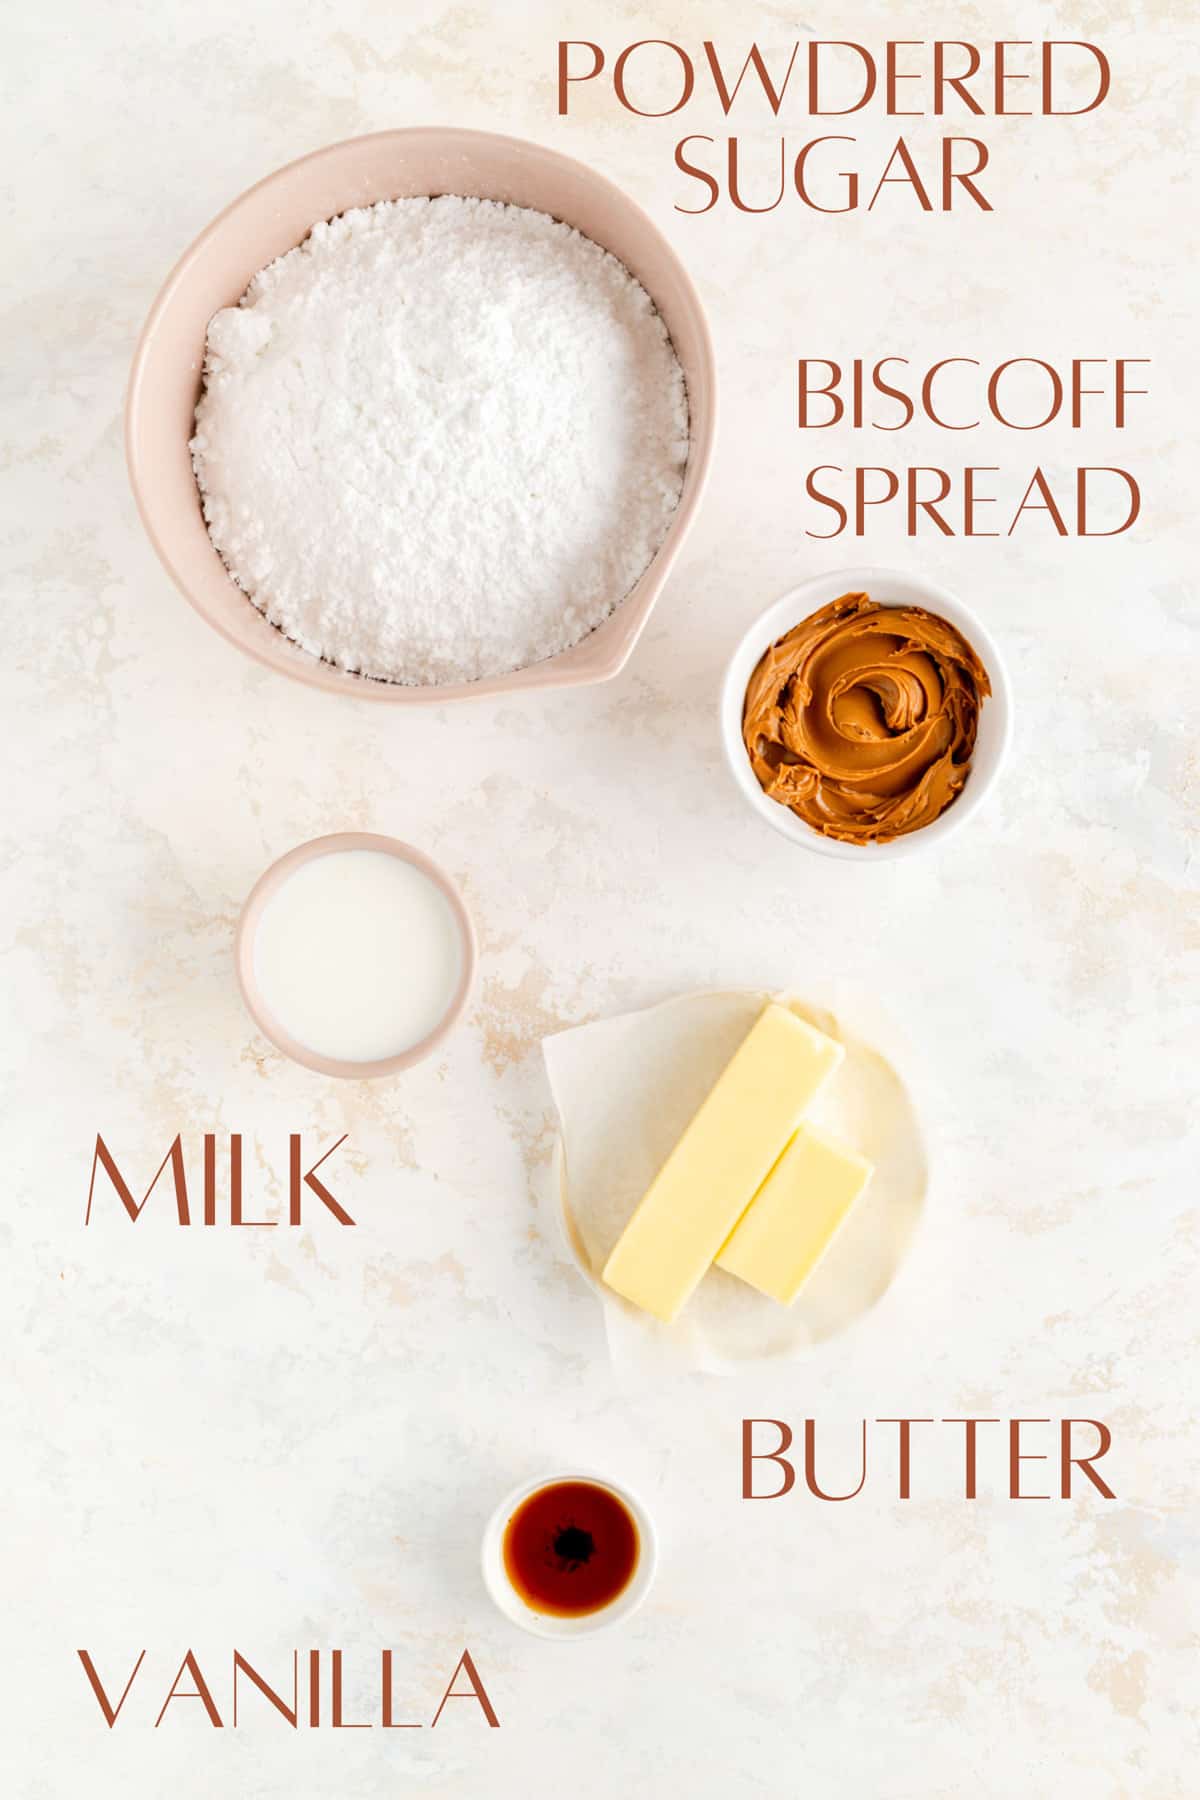
- Butter: we're using a good deal of butter in this recipe so make sure it's unsalted.
- Biscoff butter: make sure you use smooth Biscoff spread for this recipe. We'll be adding the "crunchy" part ourselves with some extra crushed cookies. I chose to add the crunch ourselves, because the smooth cookie butter incorporates into our batters more easily than the crunchy. (For where you can find Biscoff cookie butter, read the FAQs below!)
- Milk or Cream: for this cookie butter frosting, I like using milk for a slightly lighter texture, given we have a lot of fat in there with the butter and Biscoff spread already. But if all you have in the house is cream, then you can go ahead and use that instead, and I promise you'll still have a delicious biscoff buttercream in the end.
- Orange zest: the orange zest is totally optional in this recipe, but adds a nice fresh and bright note to this cake that perfectly compliments the cinnamon spice.
(p.s. for all the basic tips that no one ever taught you, that are super important to help you bake your best, check out my Baking 101 series!)
Special Tools You'll Need
- Hand or stand mixer: to get your butter and sugars light and fluffy
- Cake turntable: while not technically required, a cake turntable is the way to go for a clean, easy frosting process. If you don’t have one though, you can certainly still frost your cake by simply turning your serving plate by hand to work your way around the sides.
- Pastry bags: these are also super helpful for easy frosting, but a zip-top bag with a ½” wide hole cut off the corner works well too.
How to Make Biscoff Cake from Scratch
(Pssst…if you're ready to just get baking, get all the details in the recipe card below!)
TO MAKE THE CAKE:
- Preheat oven and prep pans. Cream butter, Biscoff, sugar and vanilla.
- Add the eggs and mix until thickened and fluffy again.
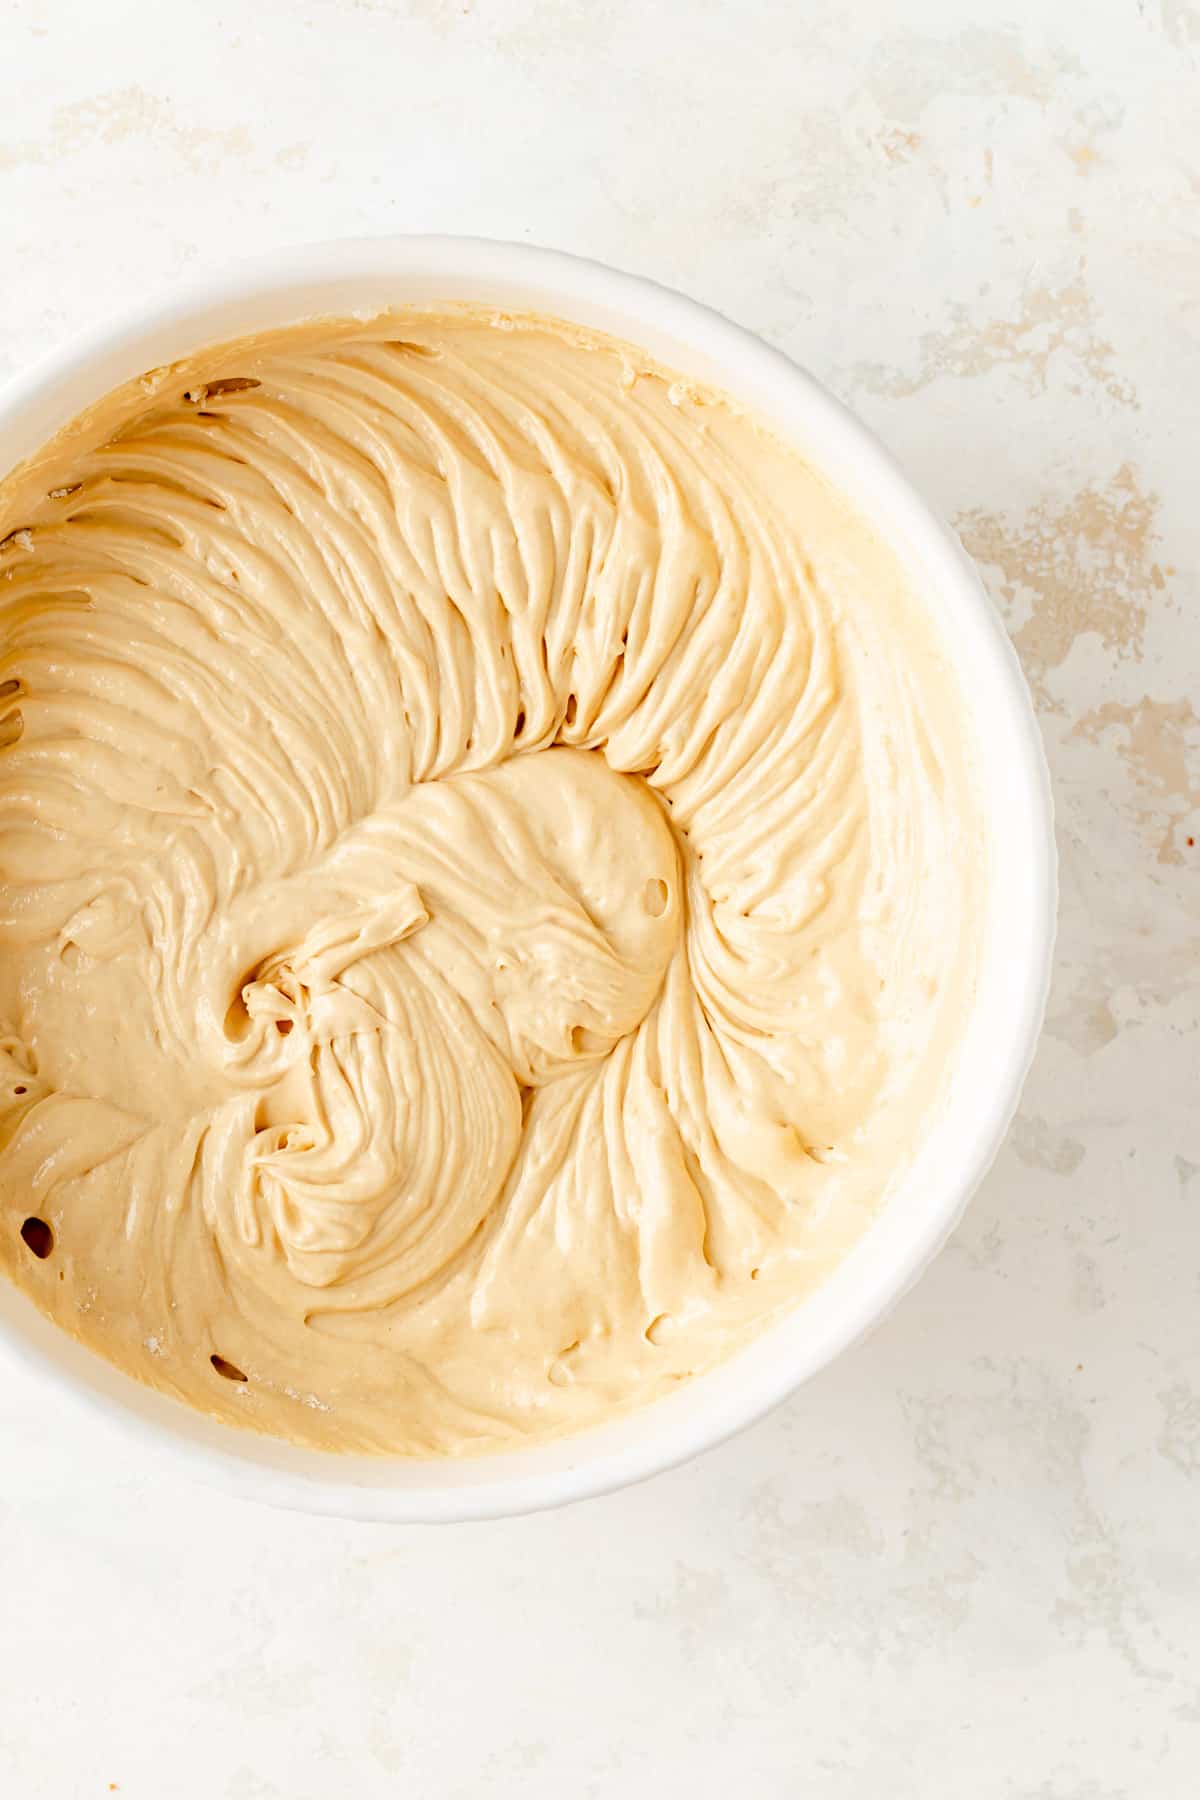
- Beat in the milk and dries until batter is smooth and fluffy.
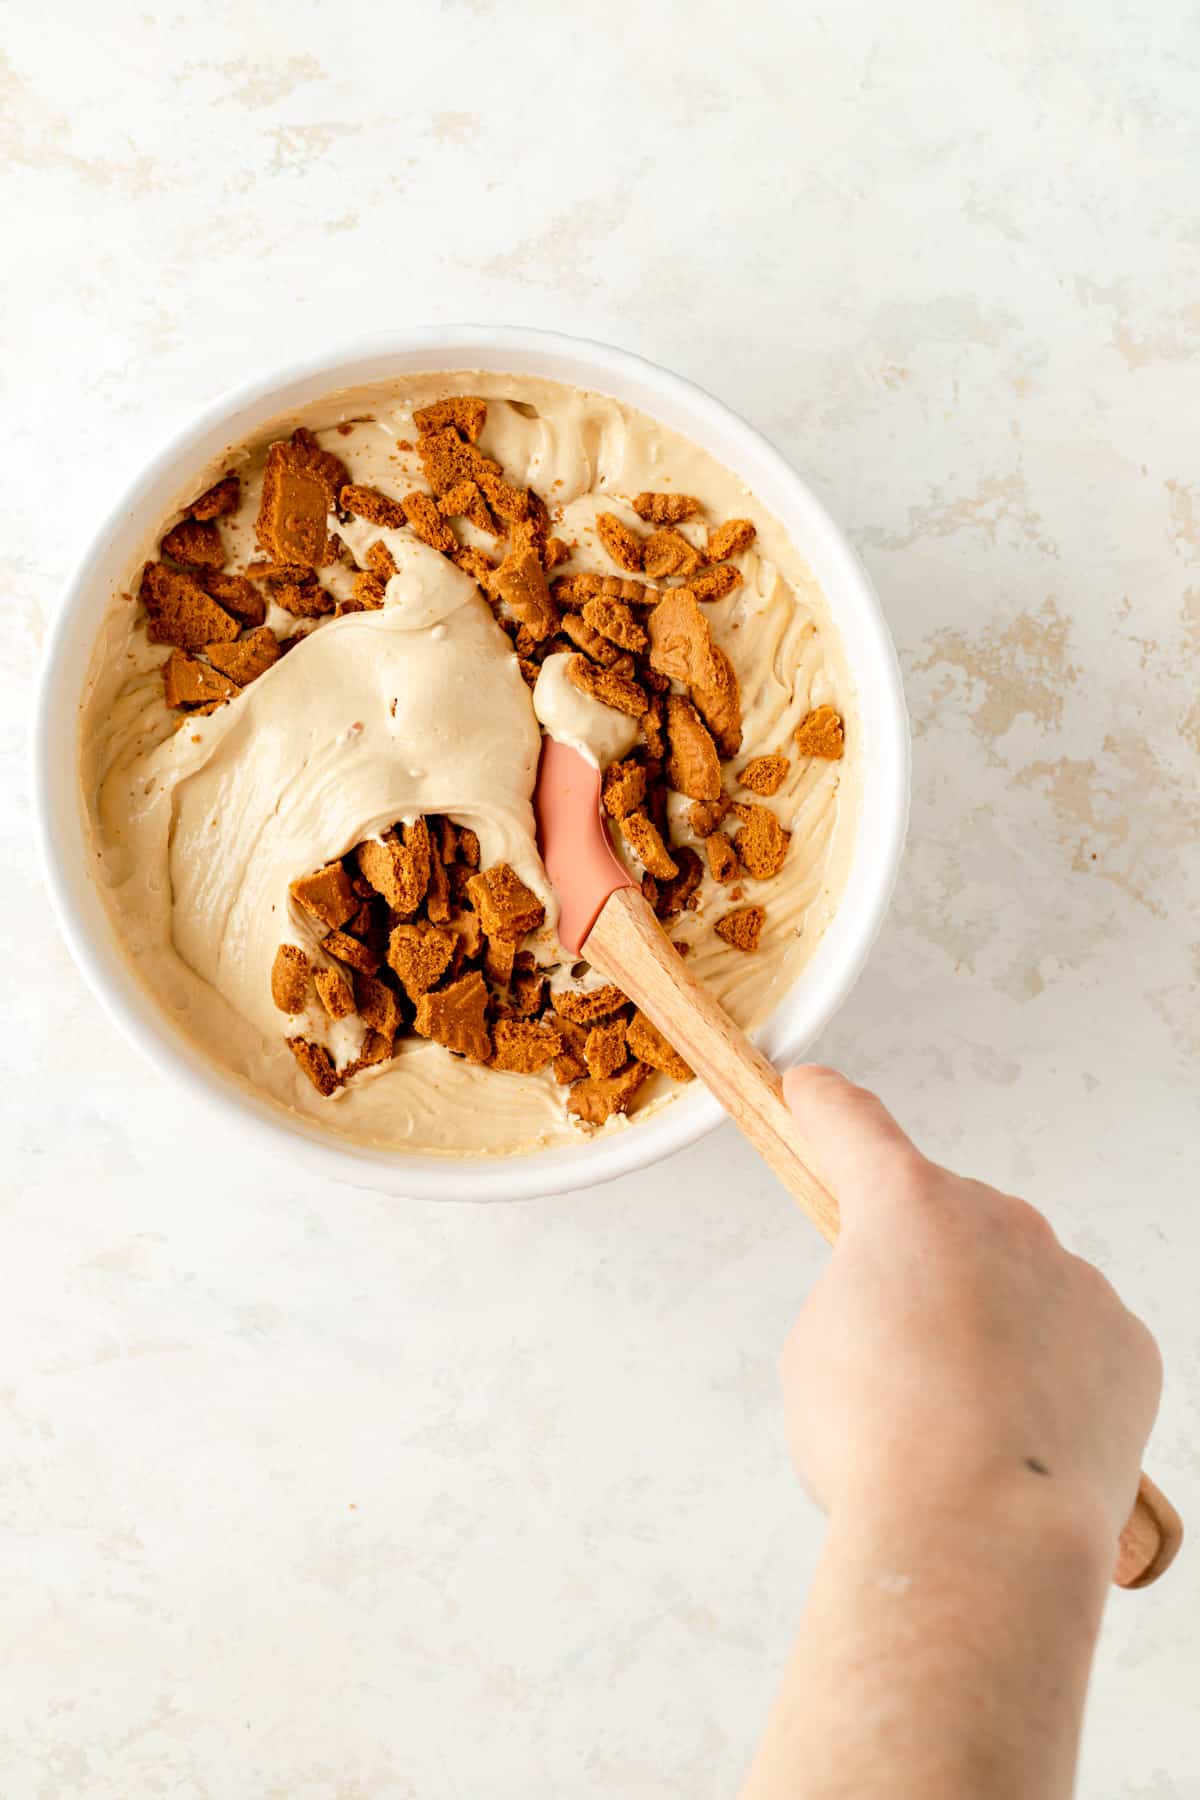
- Fold in crushed cookies by hand.
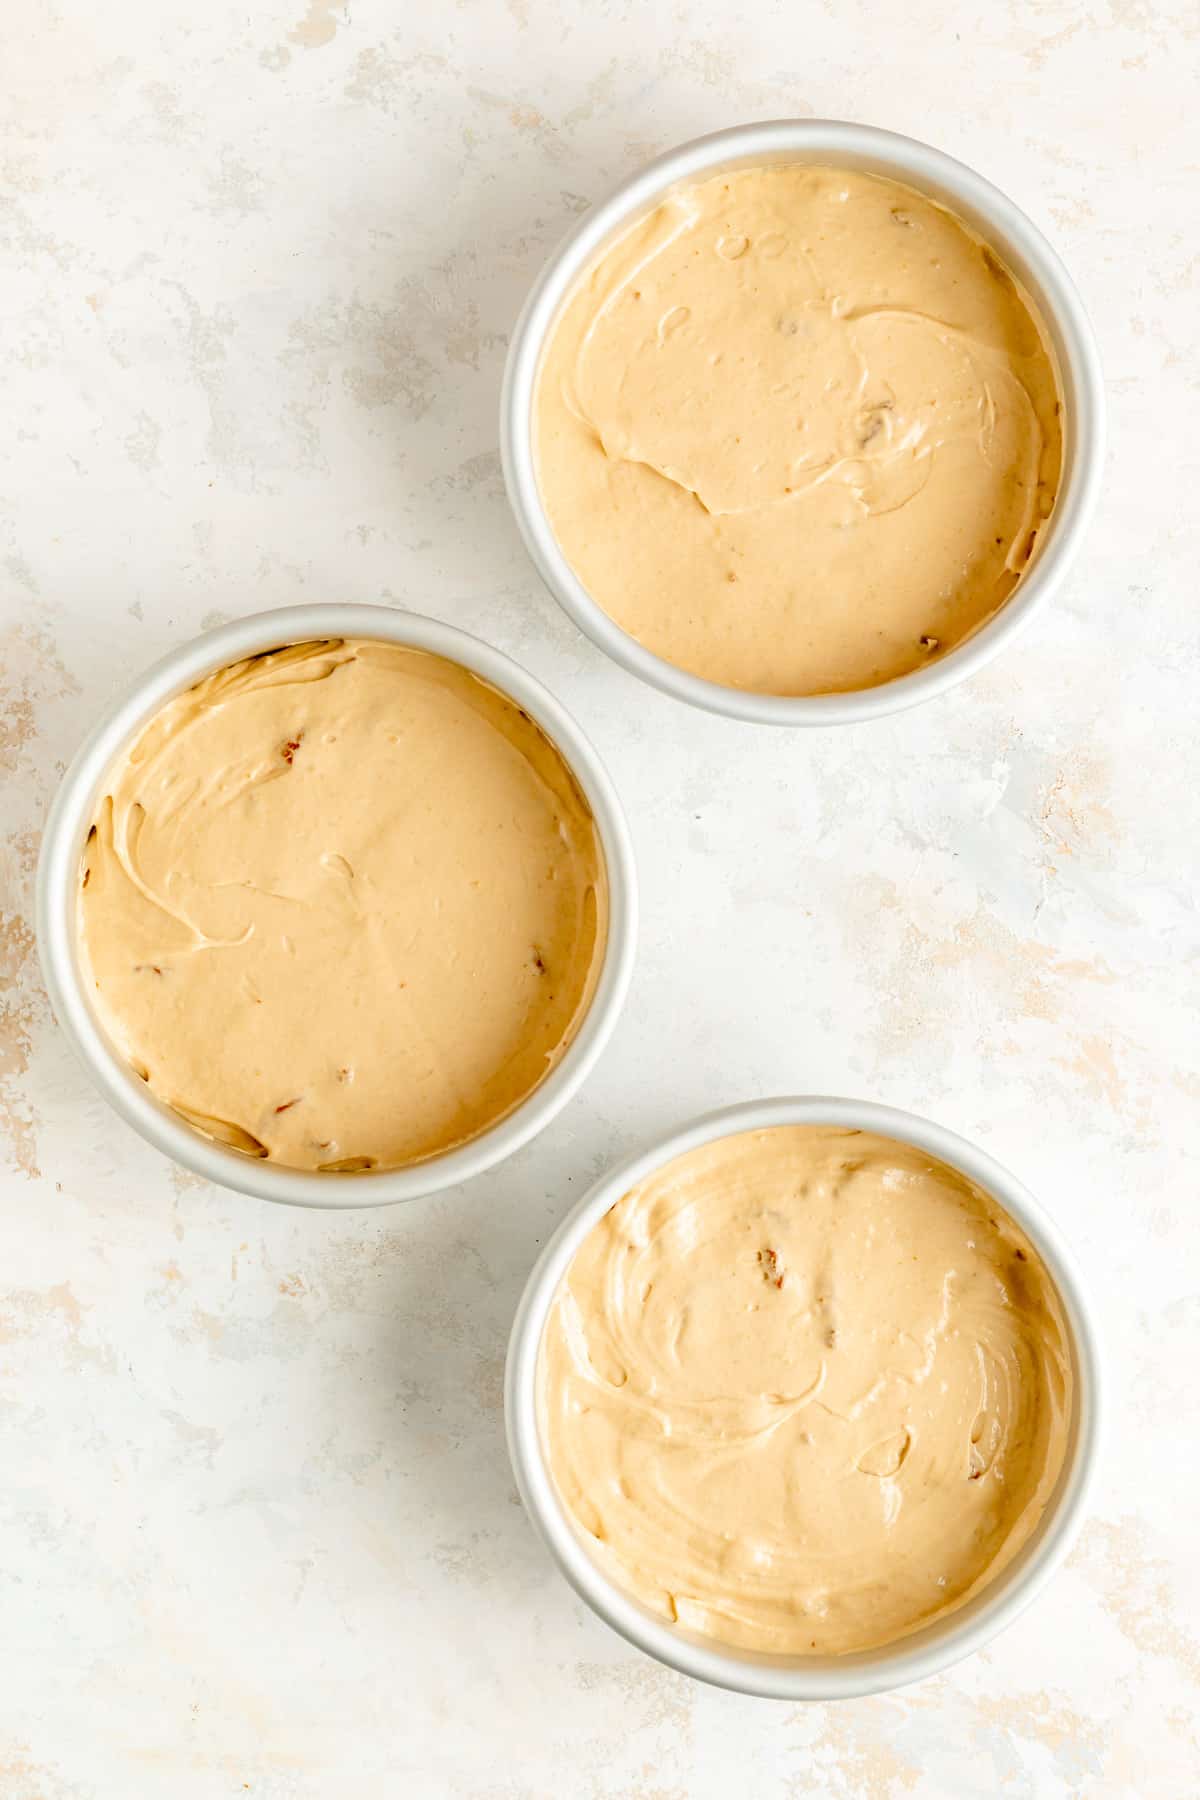
- Divide batter evenly into the three prepared pans.
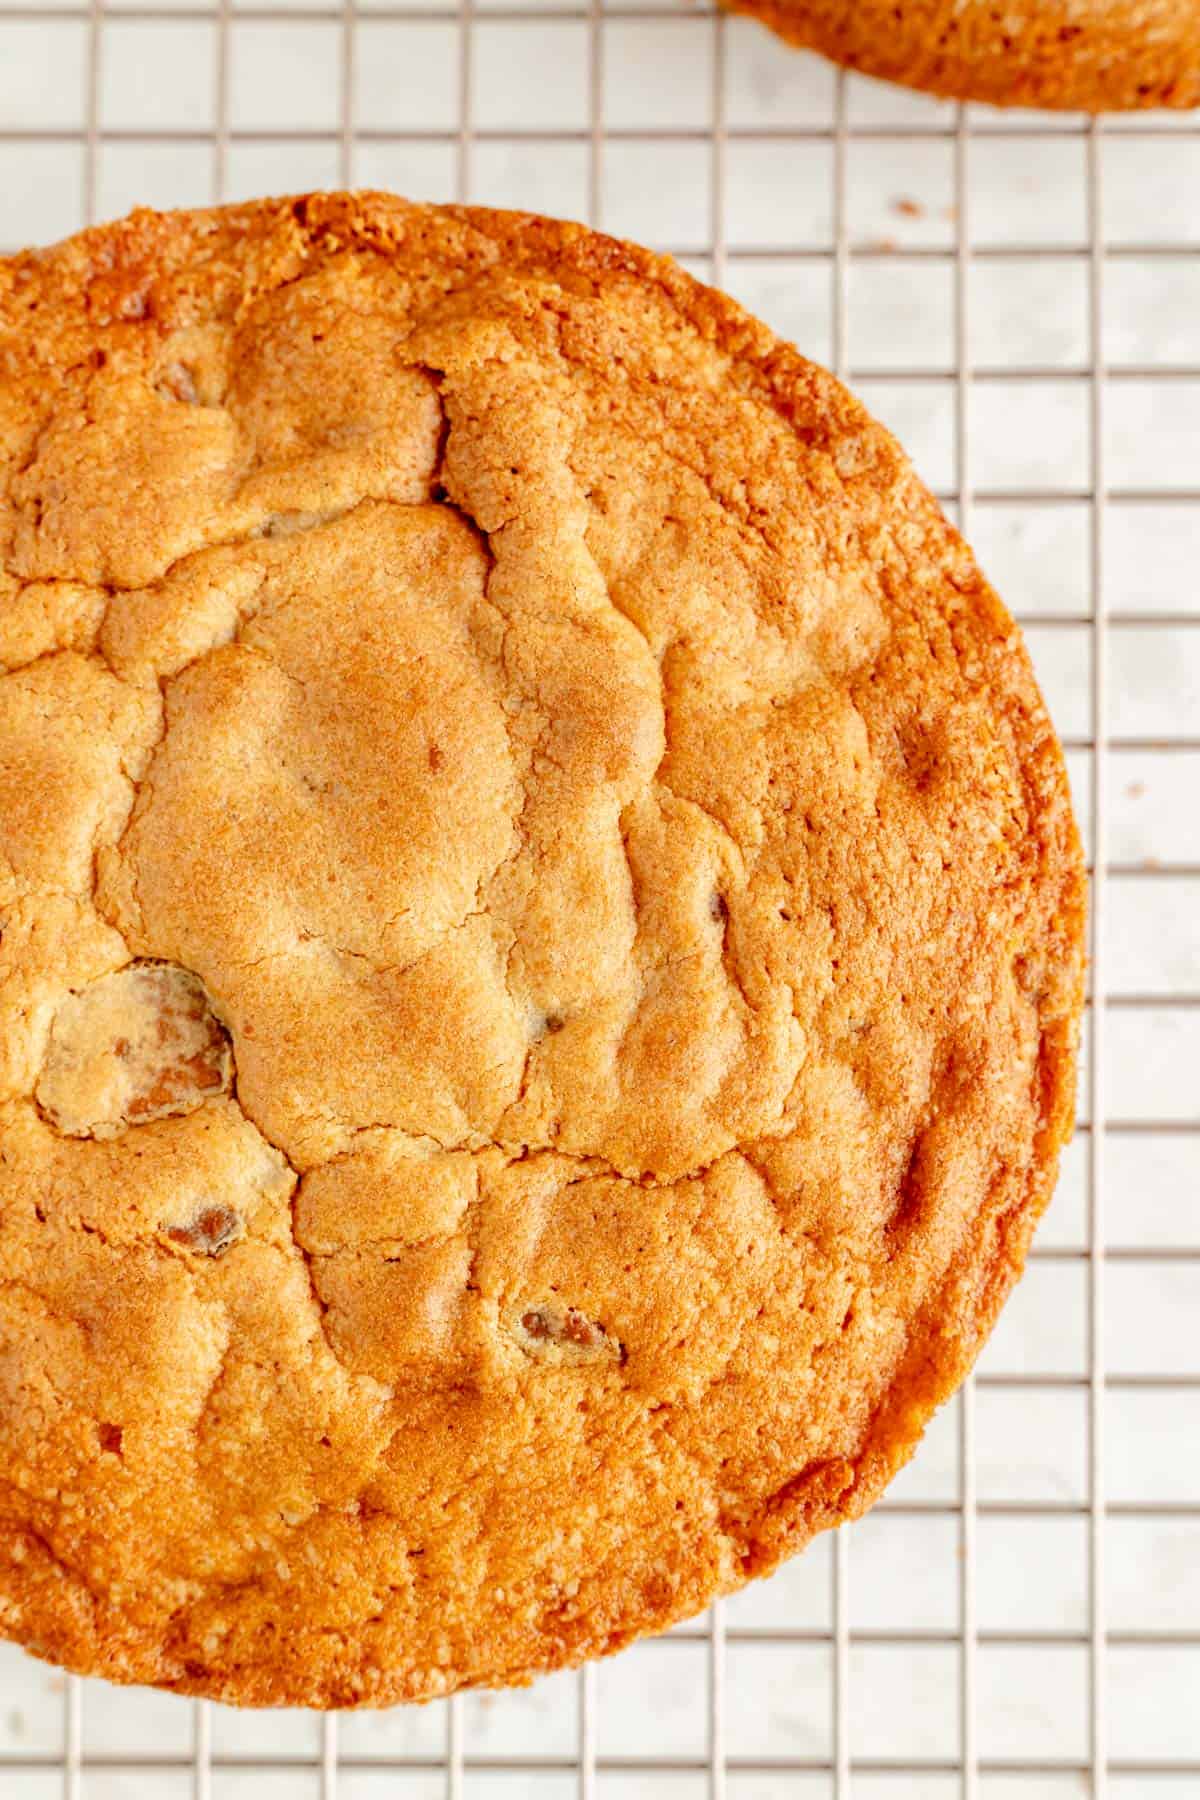
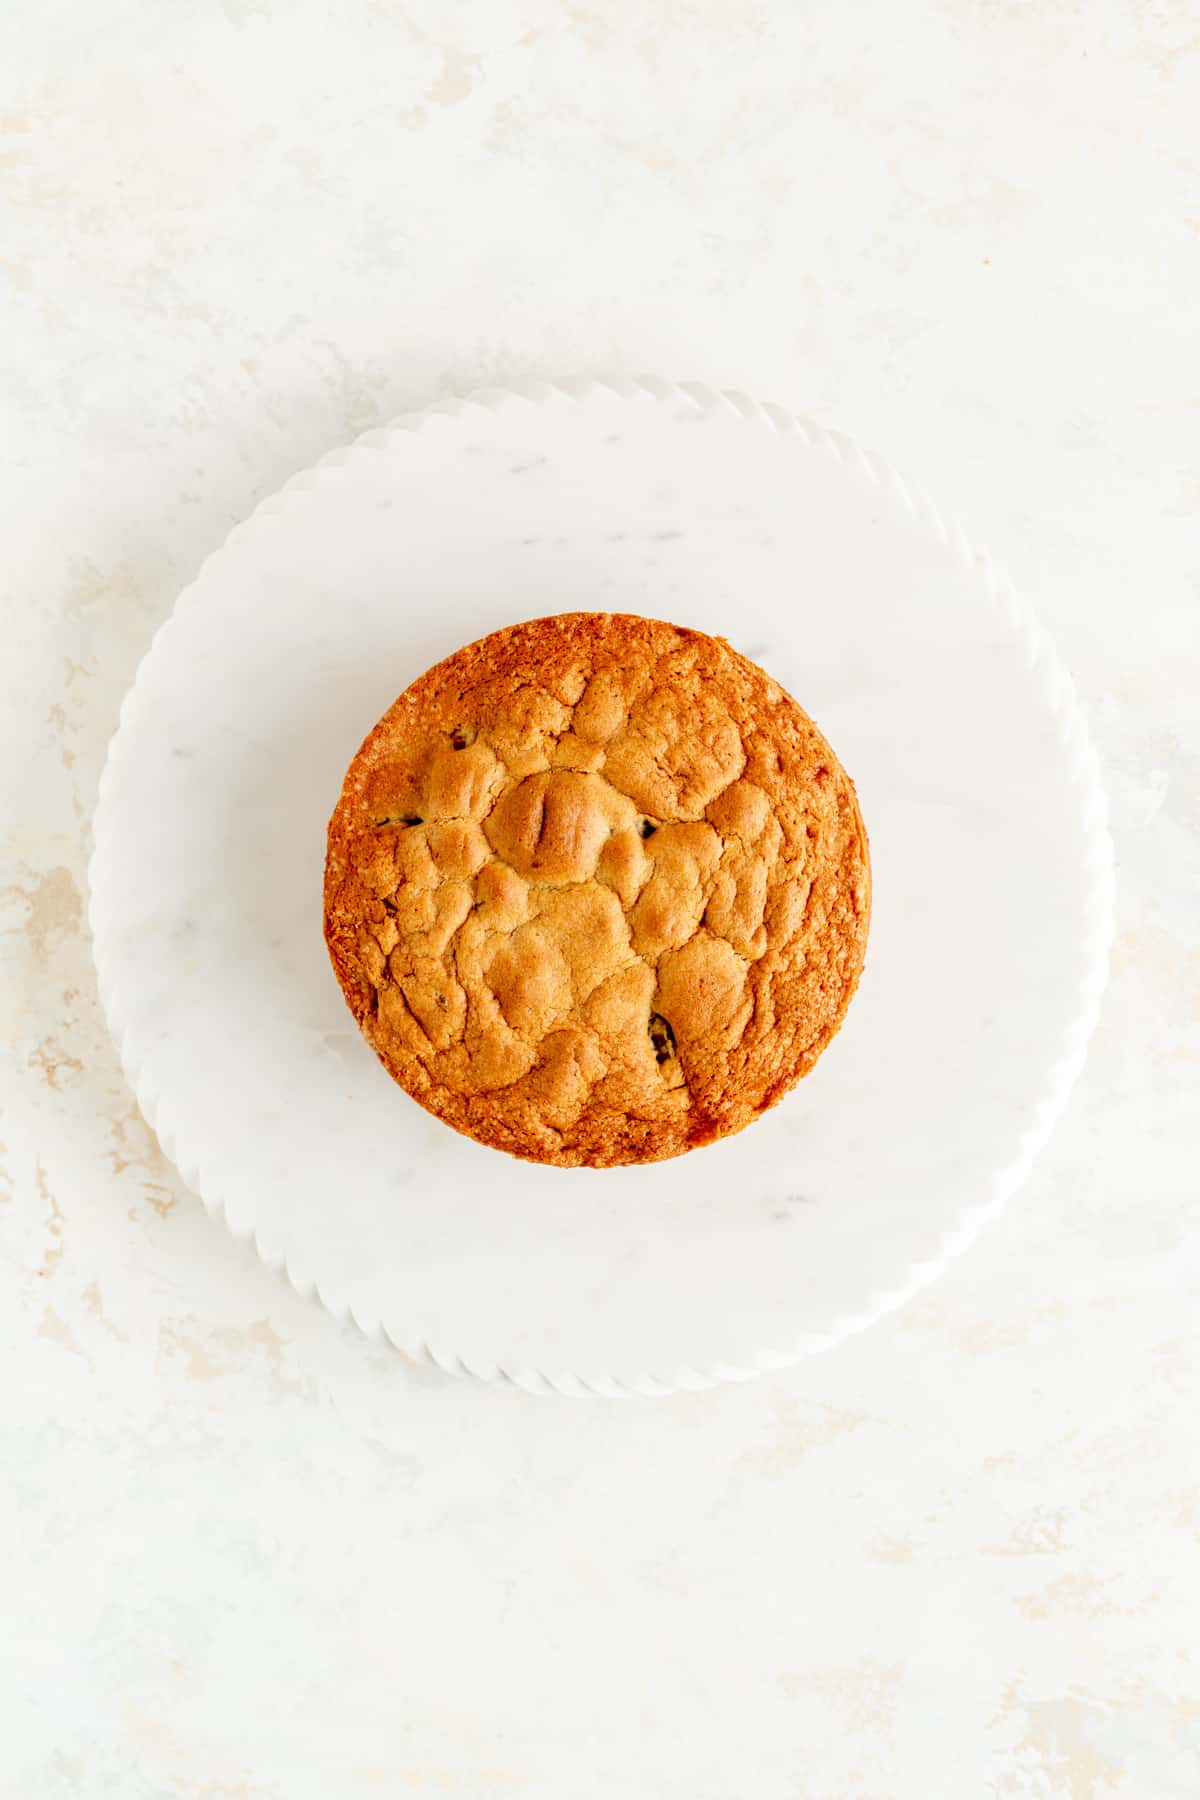
- Bake until deep golden brown, and fully set in the center. Allow to cool for 20 minutes, un-pan, then fully cool while preparing the frosting.
TO MAKE THE FROSTING:
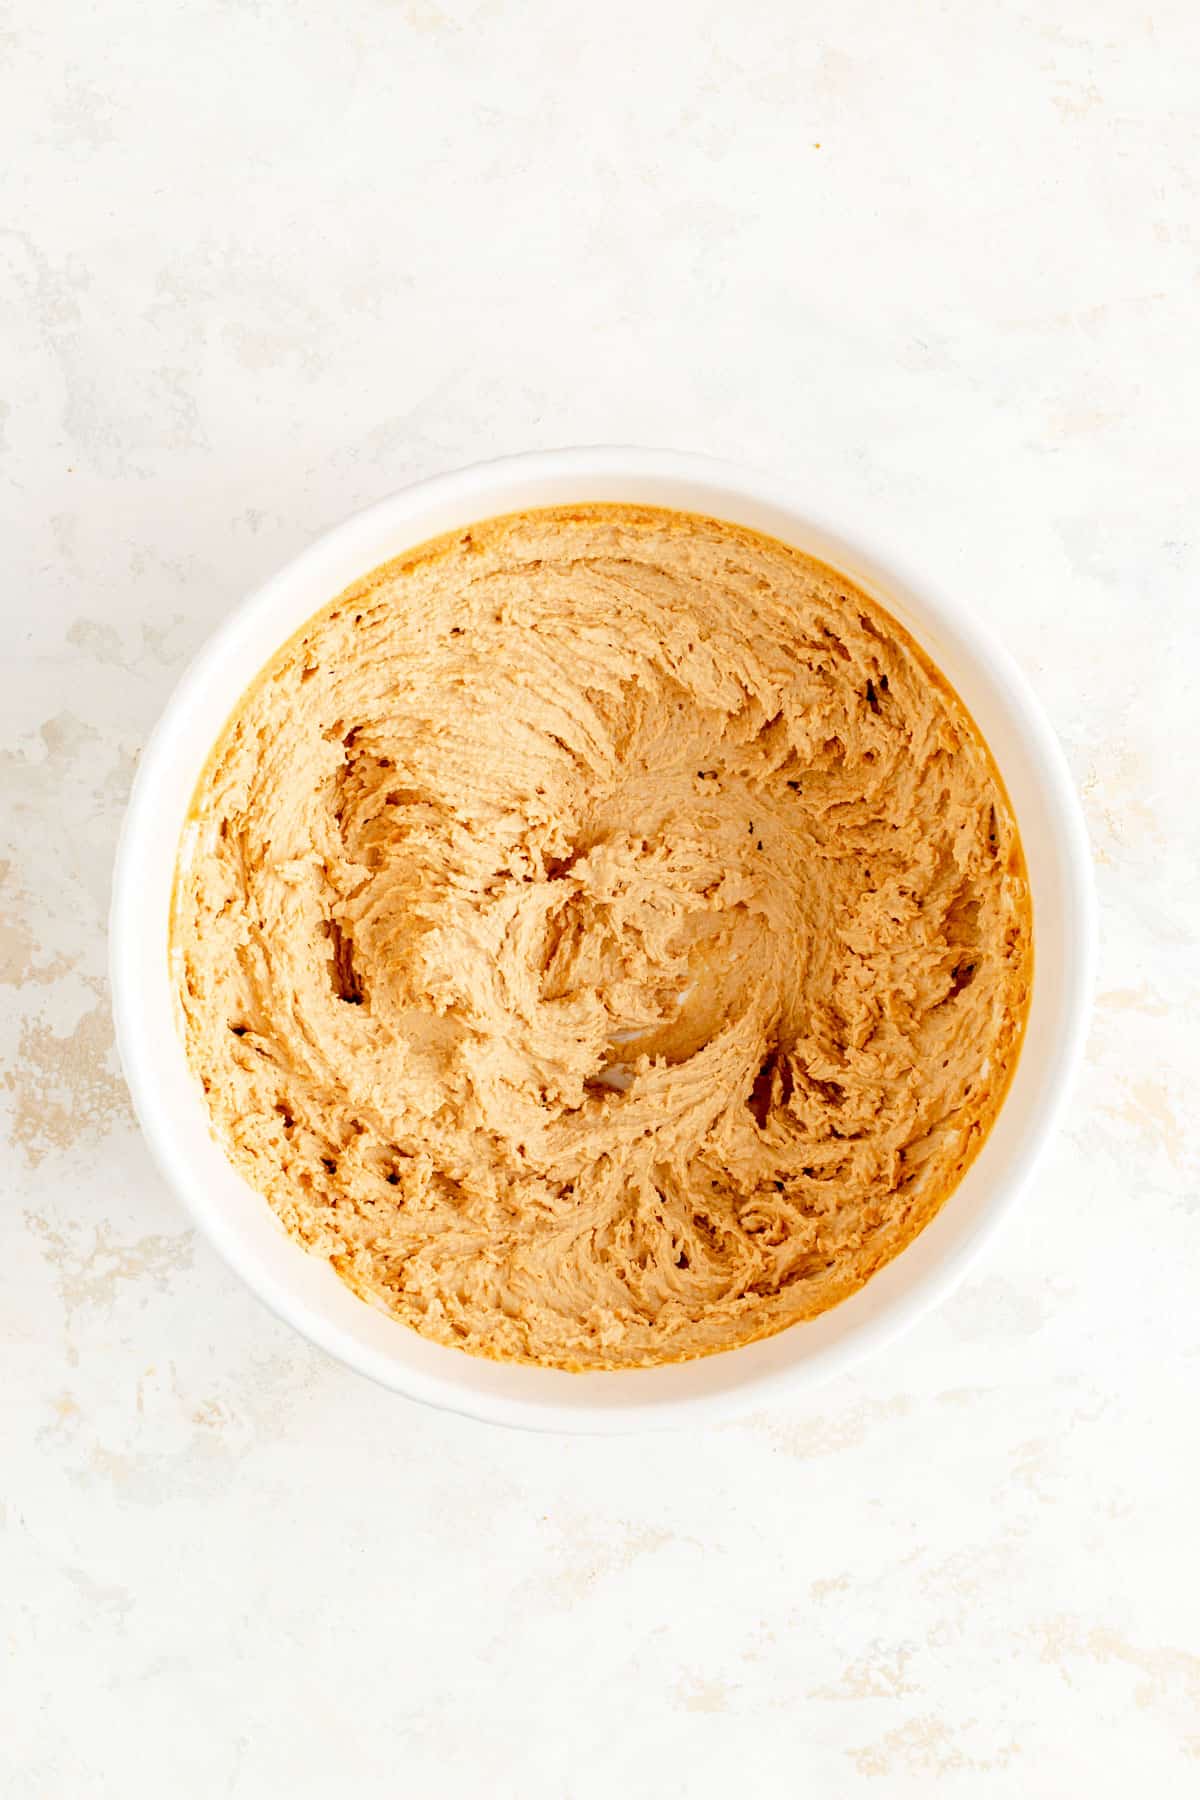
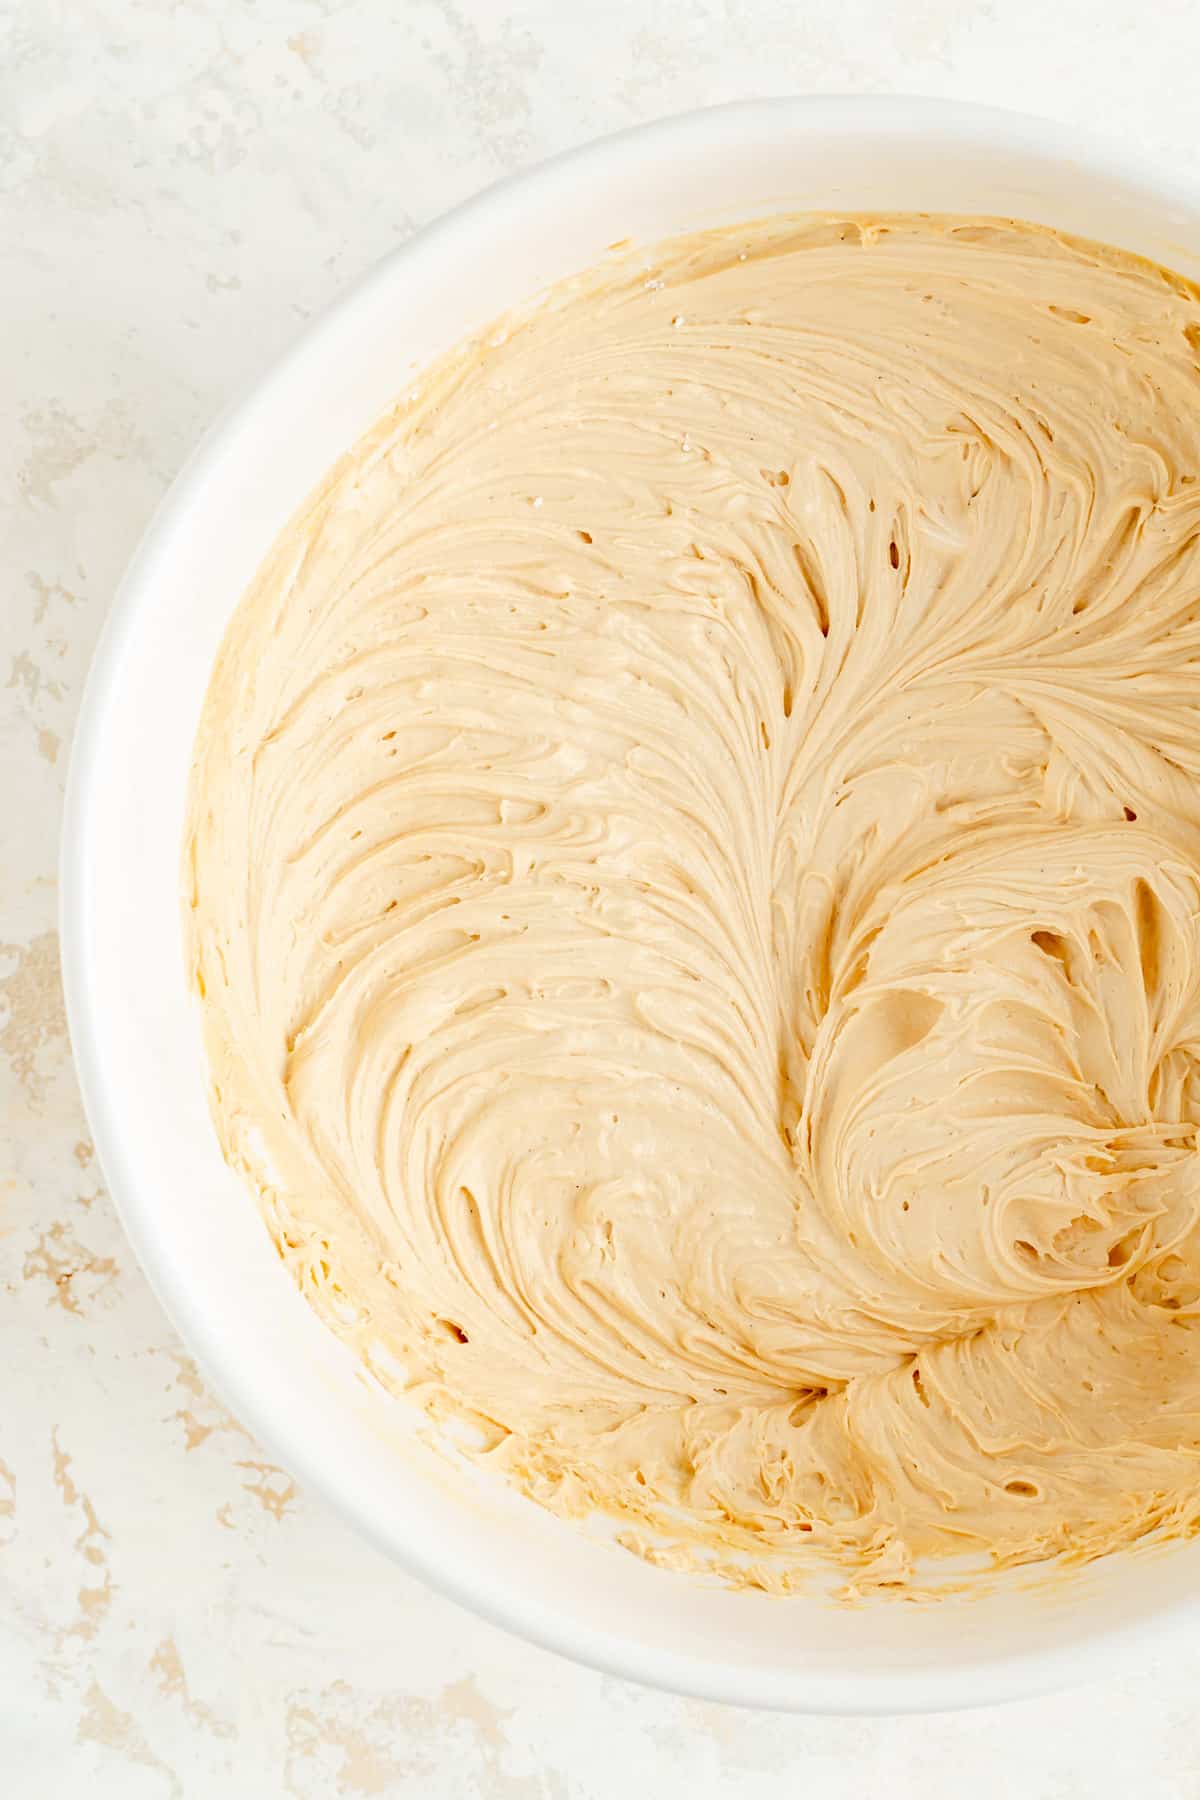
- Beat butter, Biscoff, and vanilla until lightened in color and fluffy.
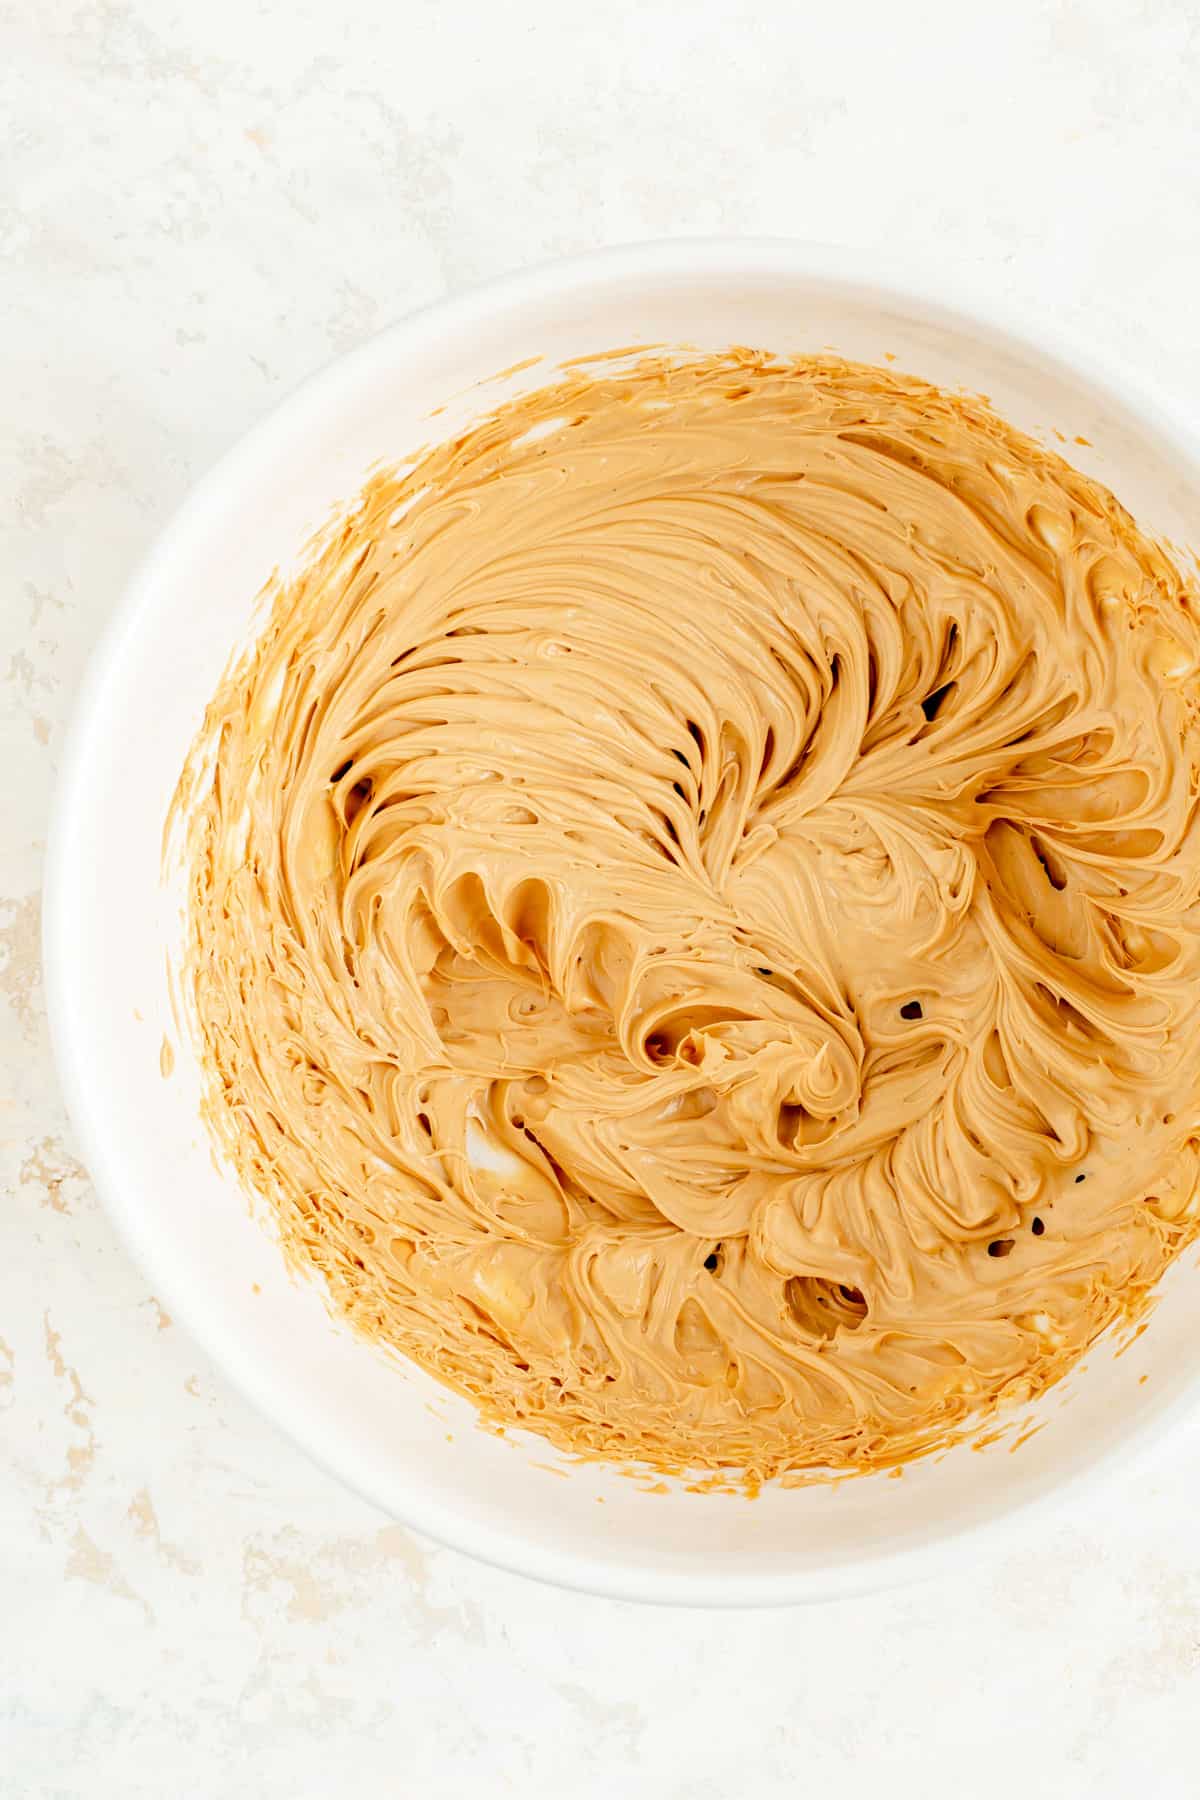
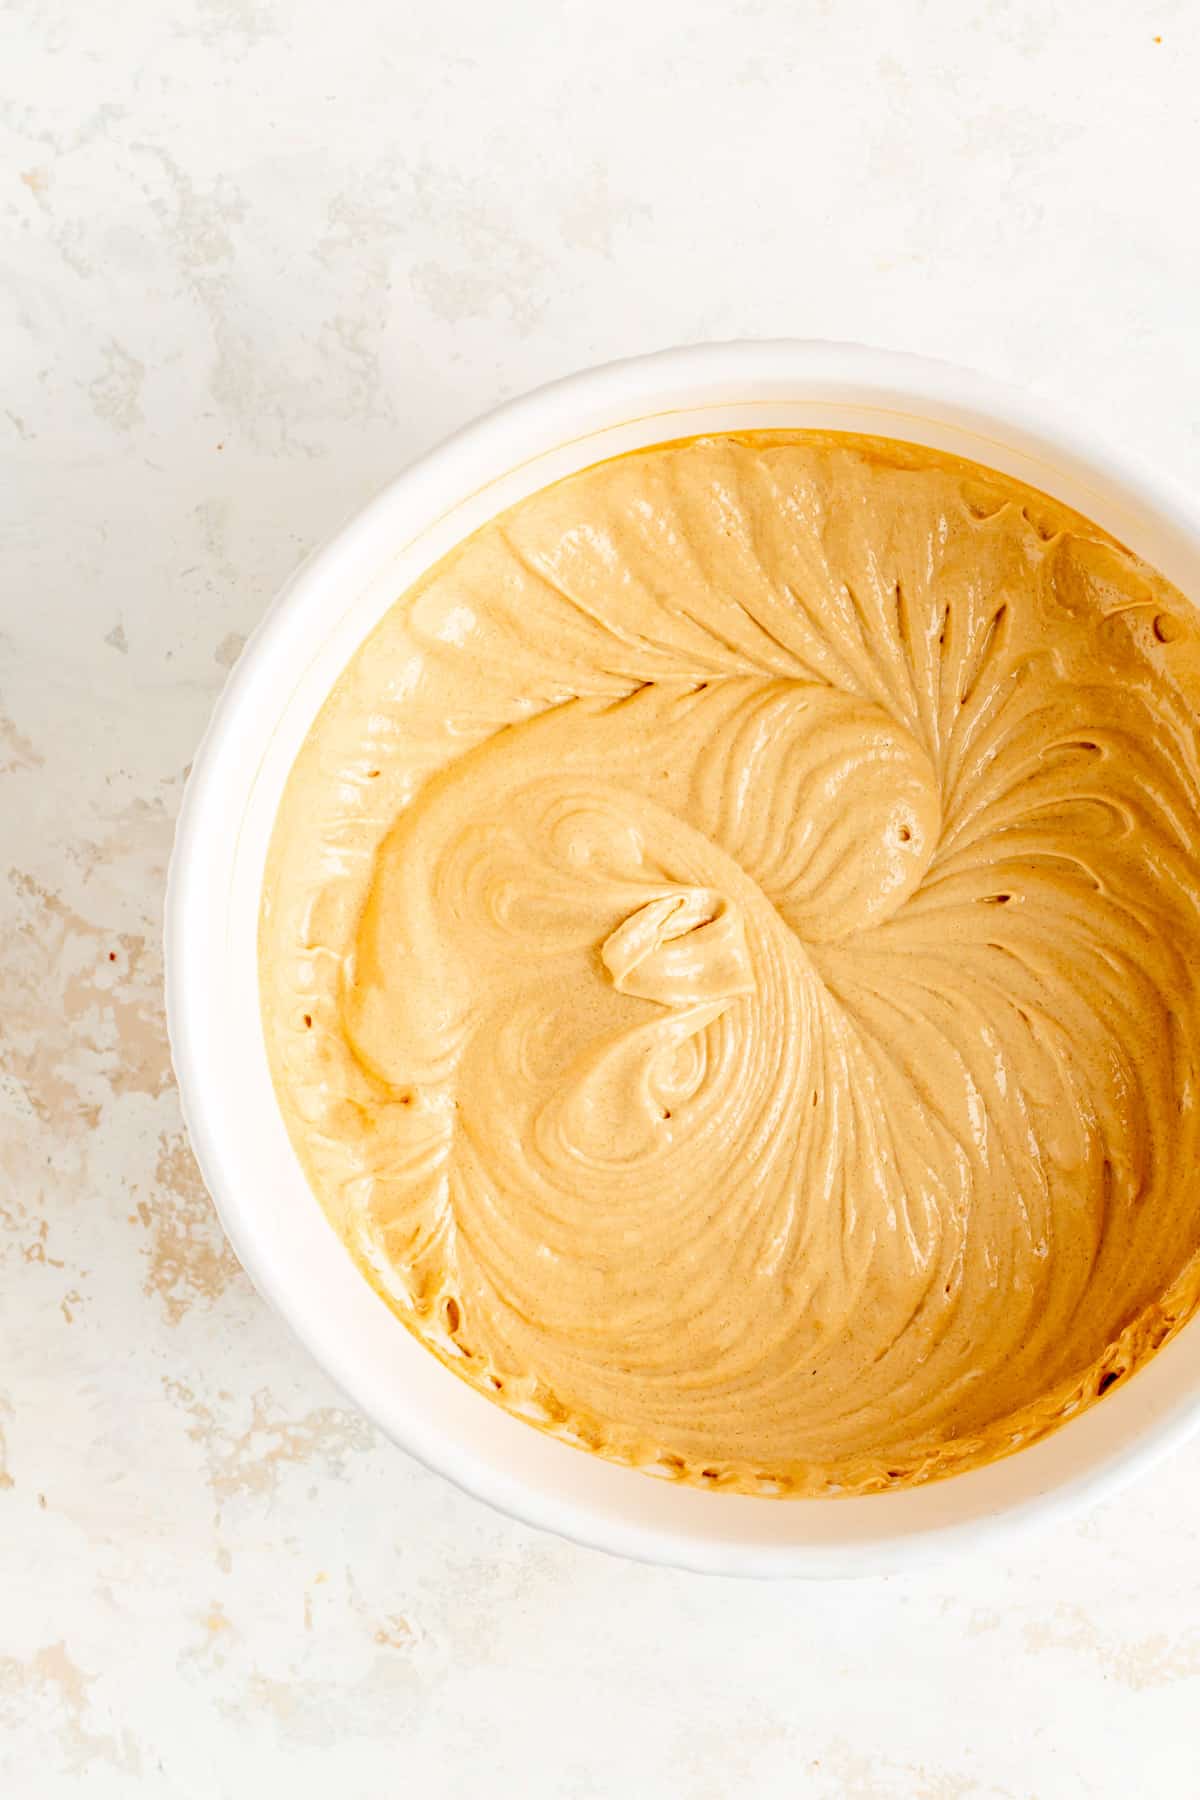
- Add sugar and milk and beat until very light and fluffy.
TO ASSEMBLE THE CAKE:
- Level cakes if needed. Adhere bottom layer to serving plate.
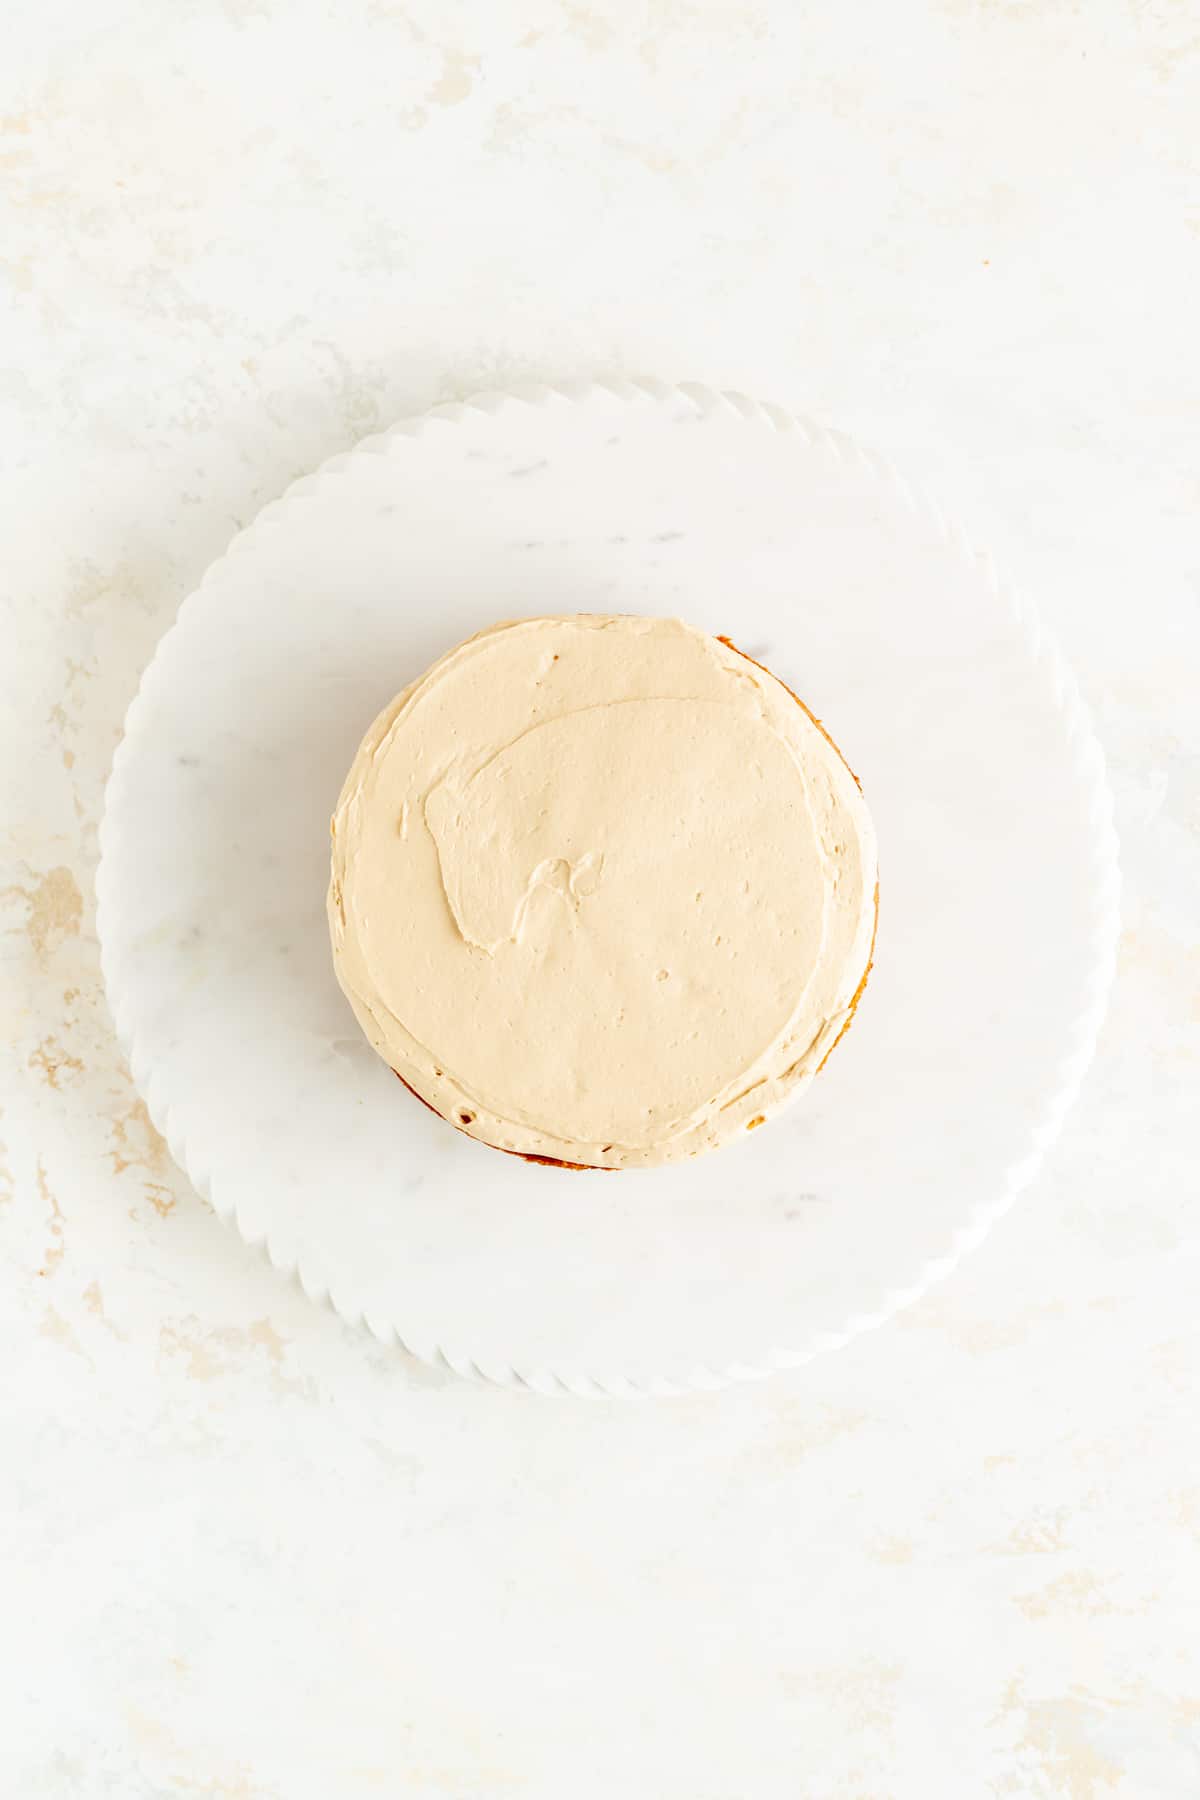
- Top with and even layer of frosting.
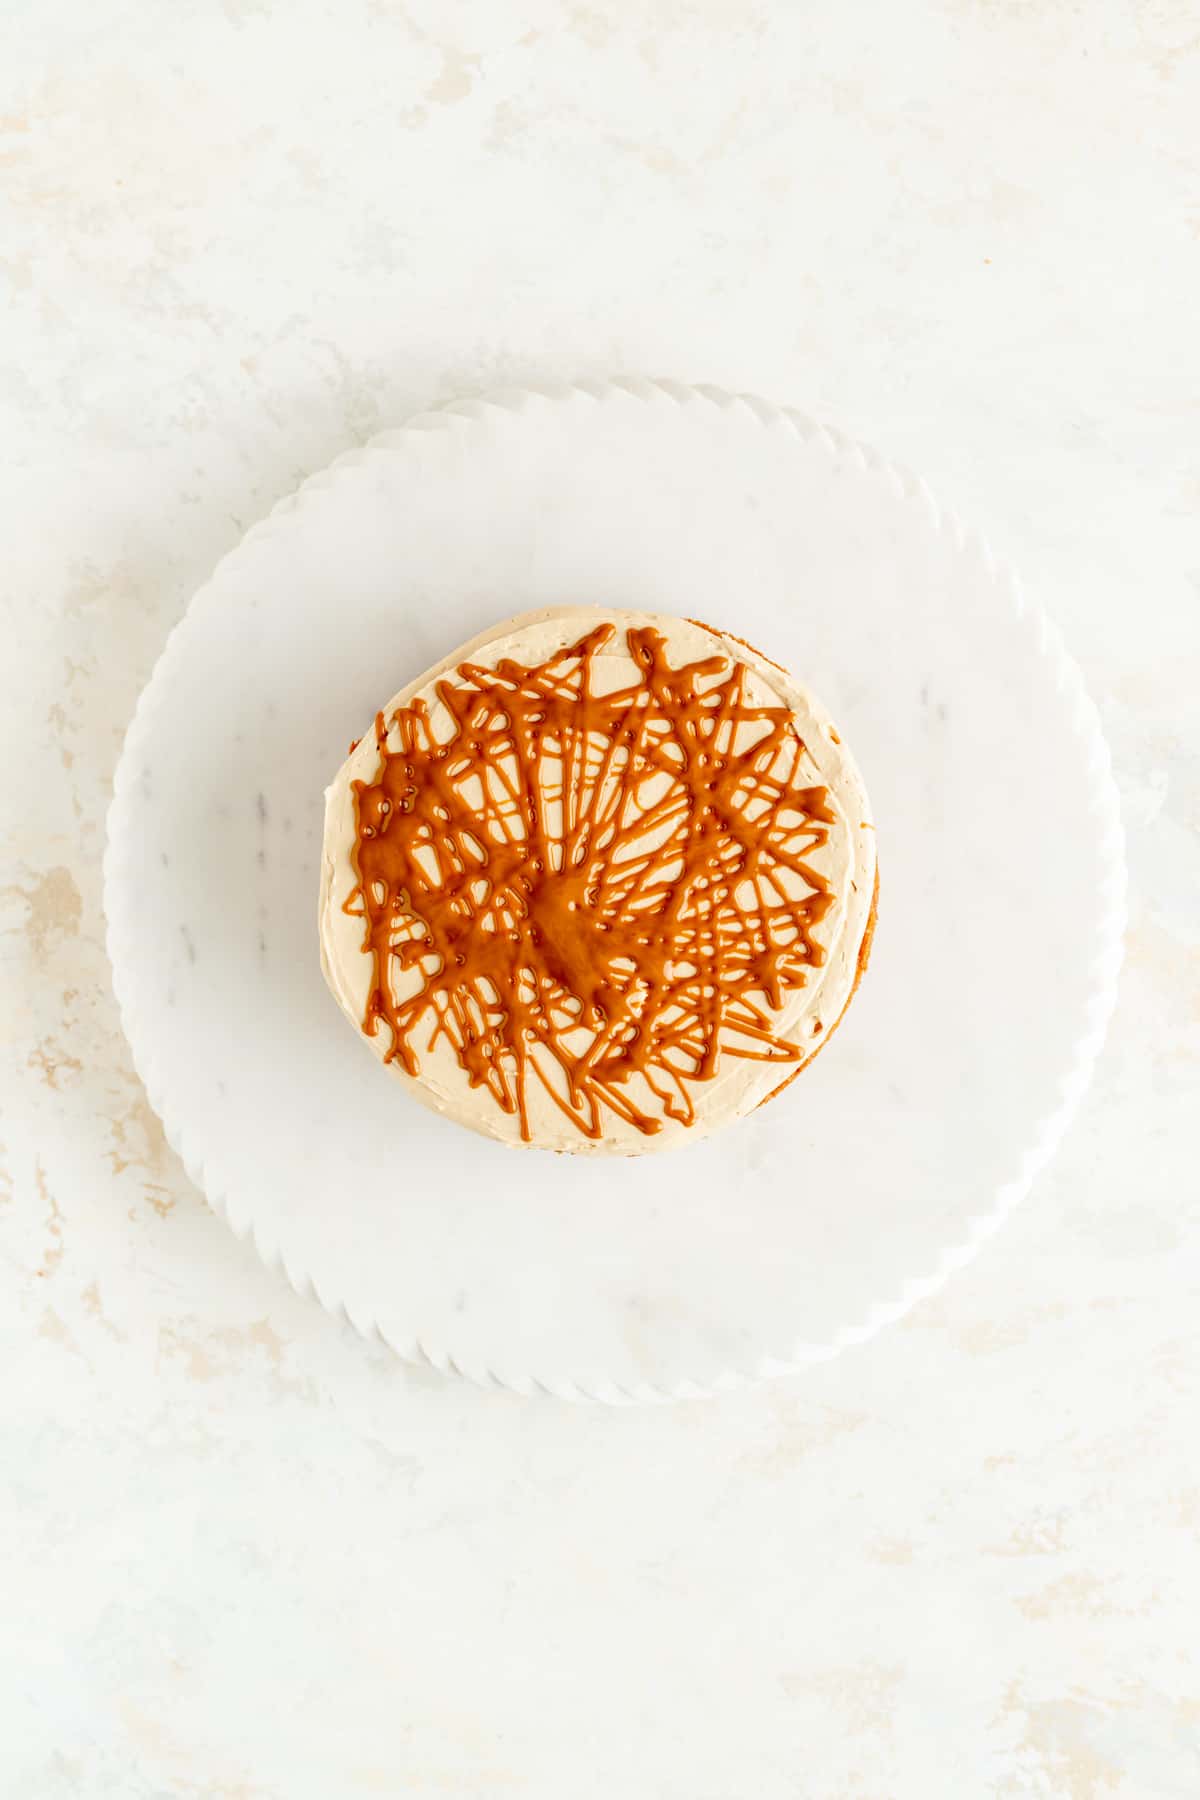
- Drizzle with melted Biscoff (optional).
- Repeat layering with another layer of cake, frosting, and melted cookie butter.
- Top with the last layer.
- Add a crumb coat if desired and chill for 30 minutes.
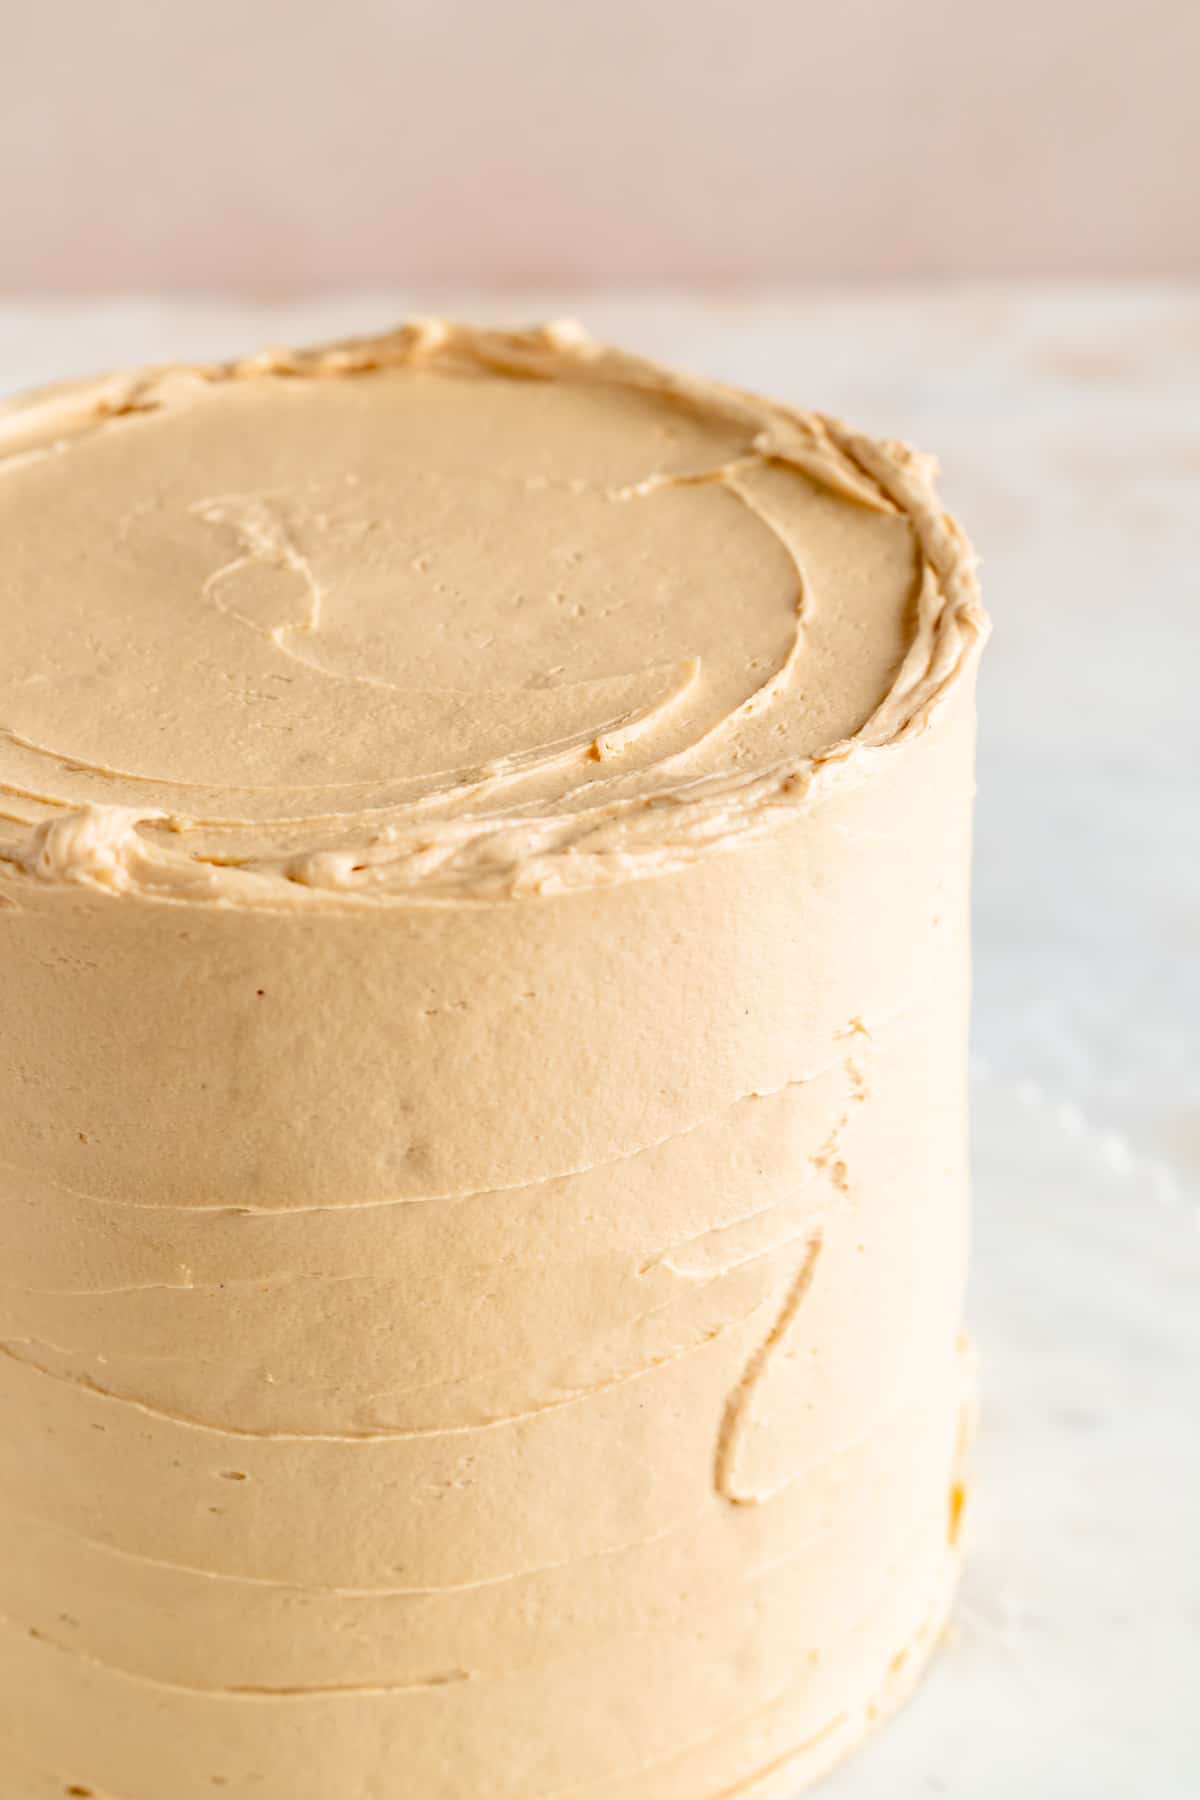
- Finish with a full final layer of frosting.
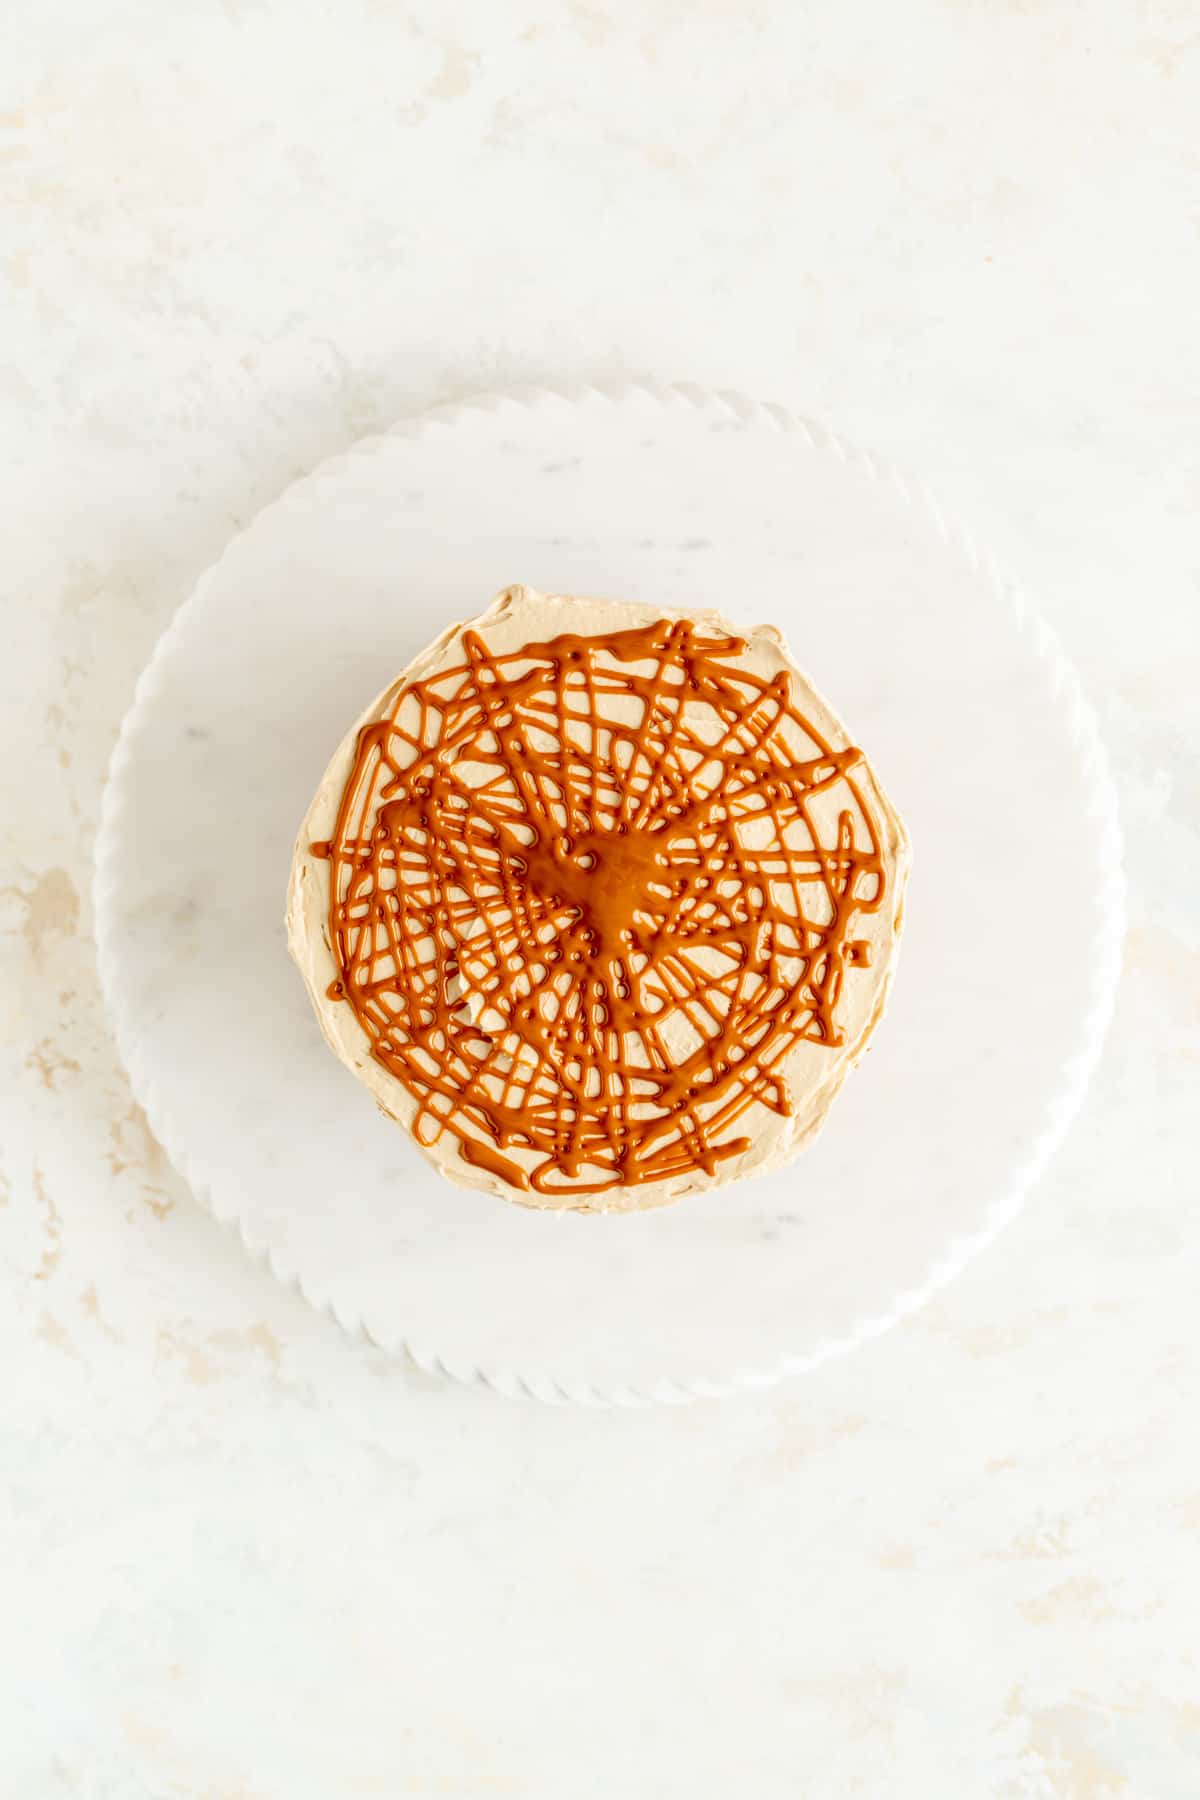
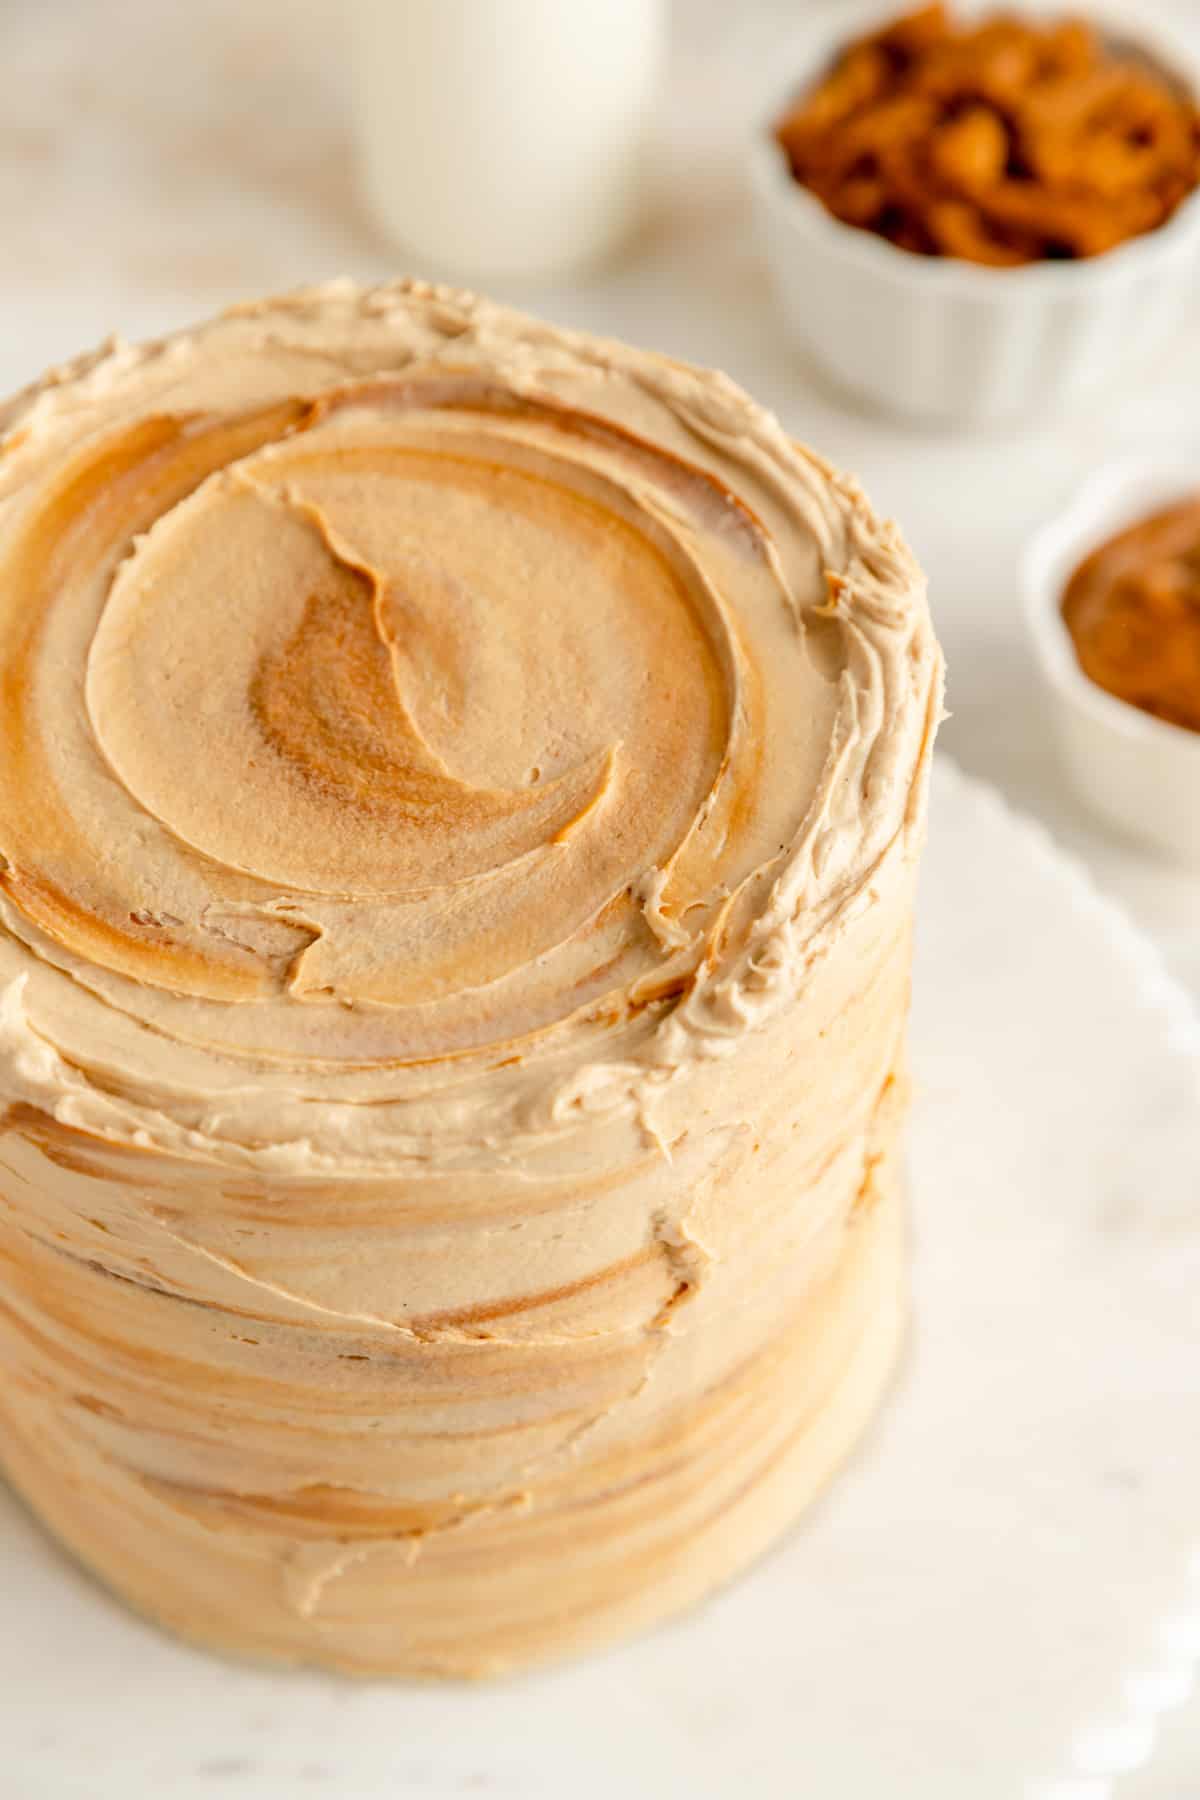
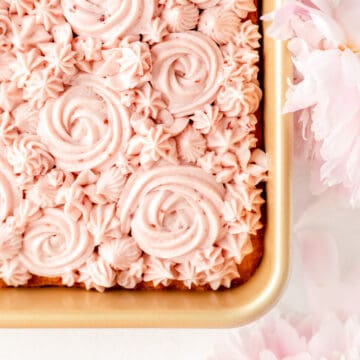
- For a simple, and extra tasty decoration, pipe 1" lines of melted cookie butter sporadically around the outside and on top of the cake.
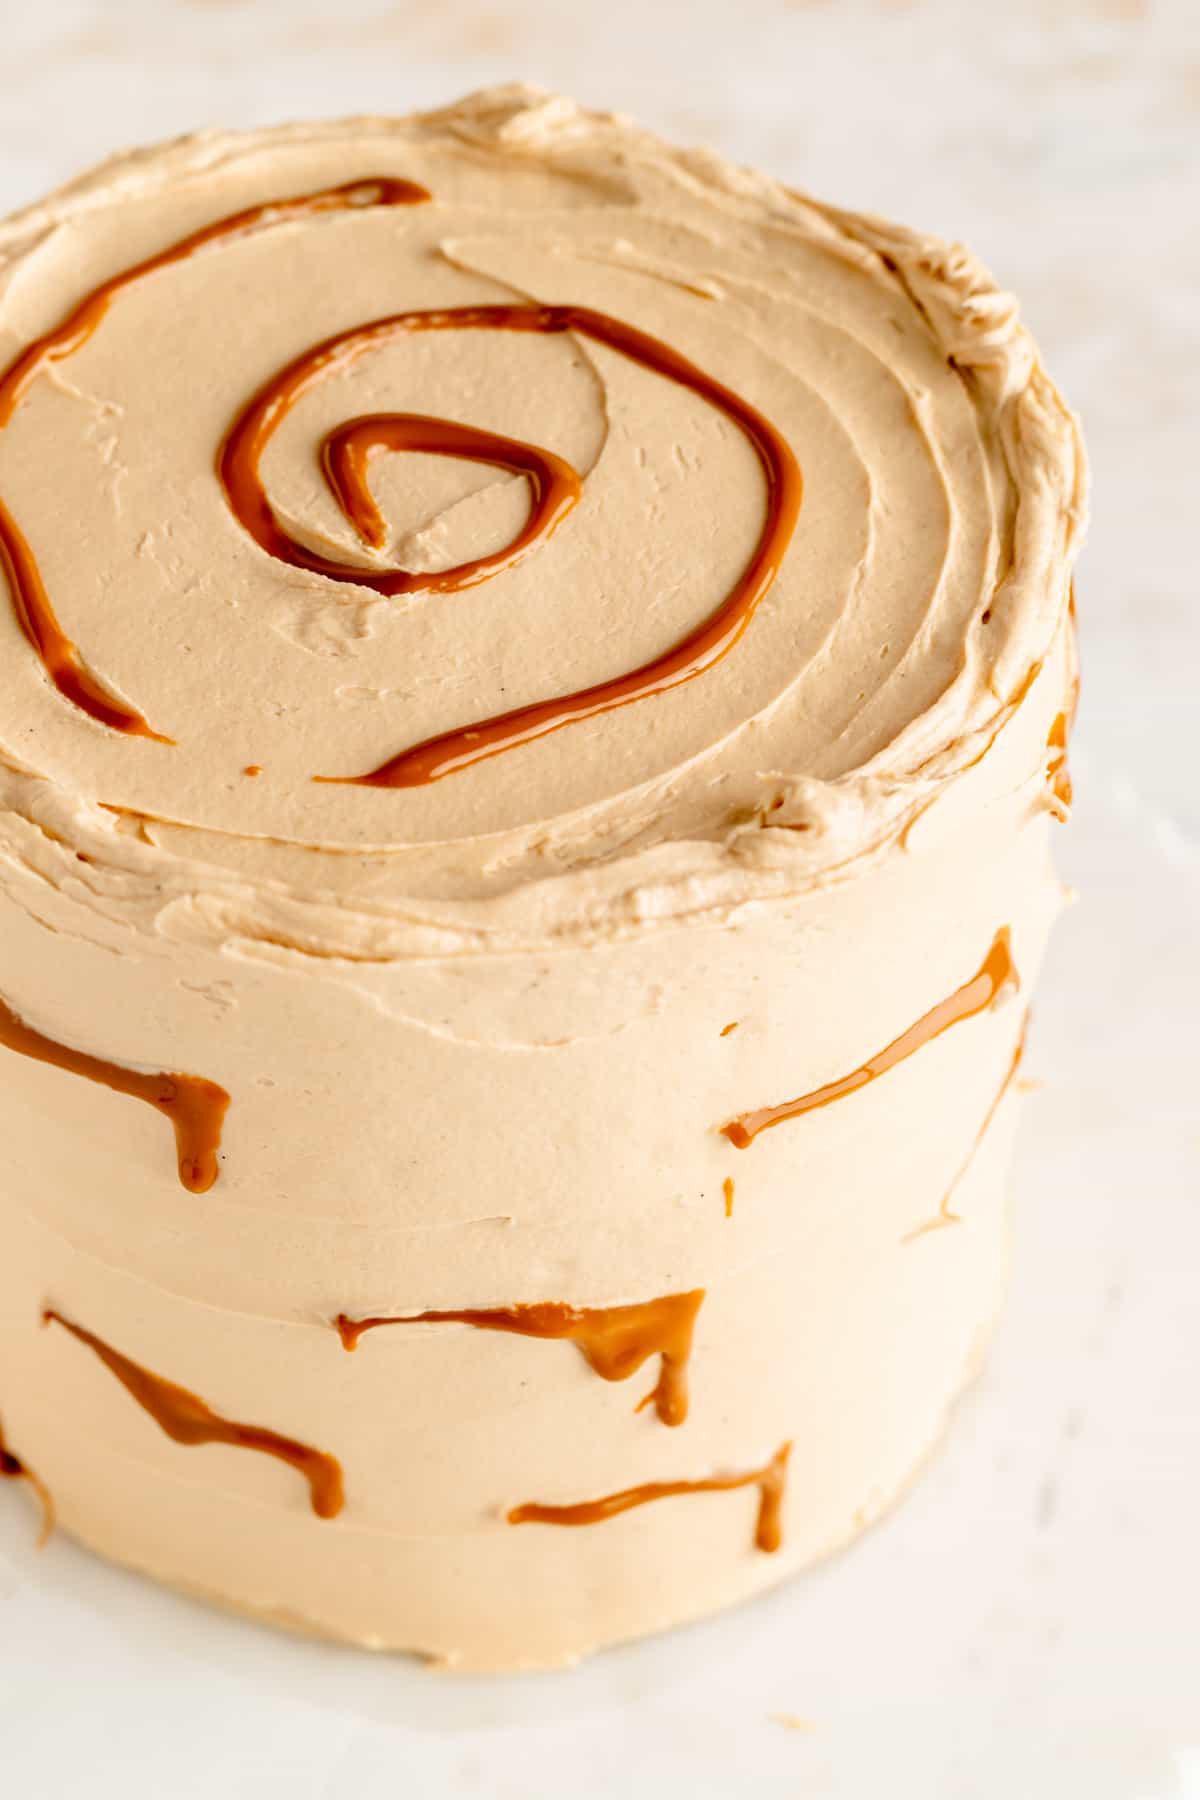
- Smooth one last time to partially incorporate the cookie butter into the frosting, Then slice and share for a perfectly spiced triple biscoff treat that will make any occasion feel extra special!
And check out the full RECIPE WEB STORY for a click-through tutorial!
Test Kitchen Tips for Sweet Success
- 6" layers or 8" layers? While I really like the tall and skinny proportions of this cake, you can split the batter into two 8" layers instead of three 6" layers if you like. Just note, you will need an addition 5-10 minutes of bake time, and should use the visual cues mentioned in the recipe to determine doneness.
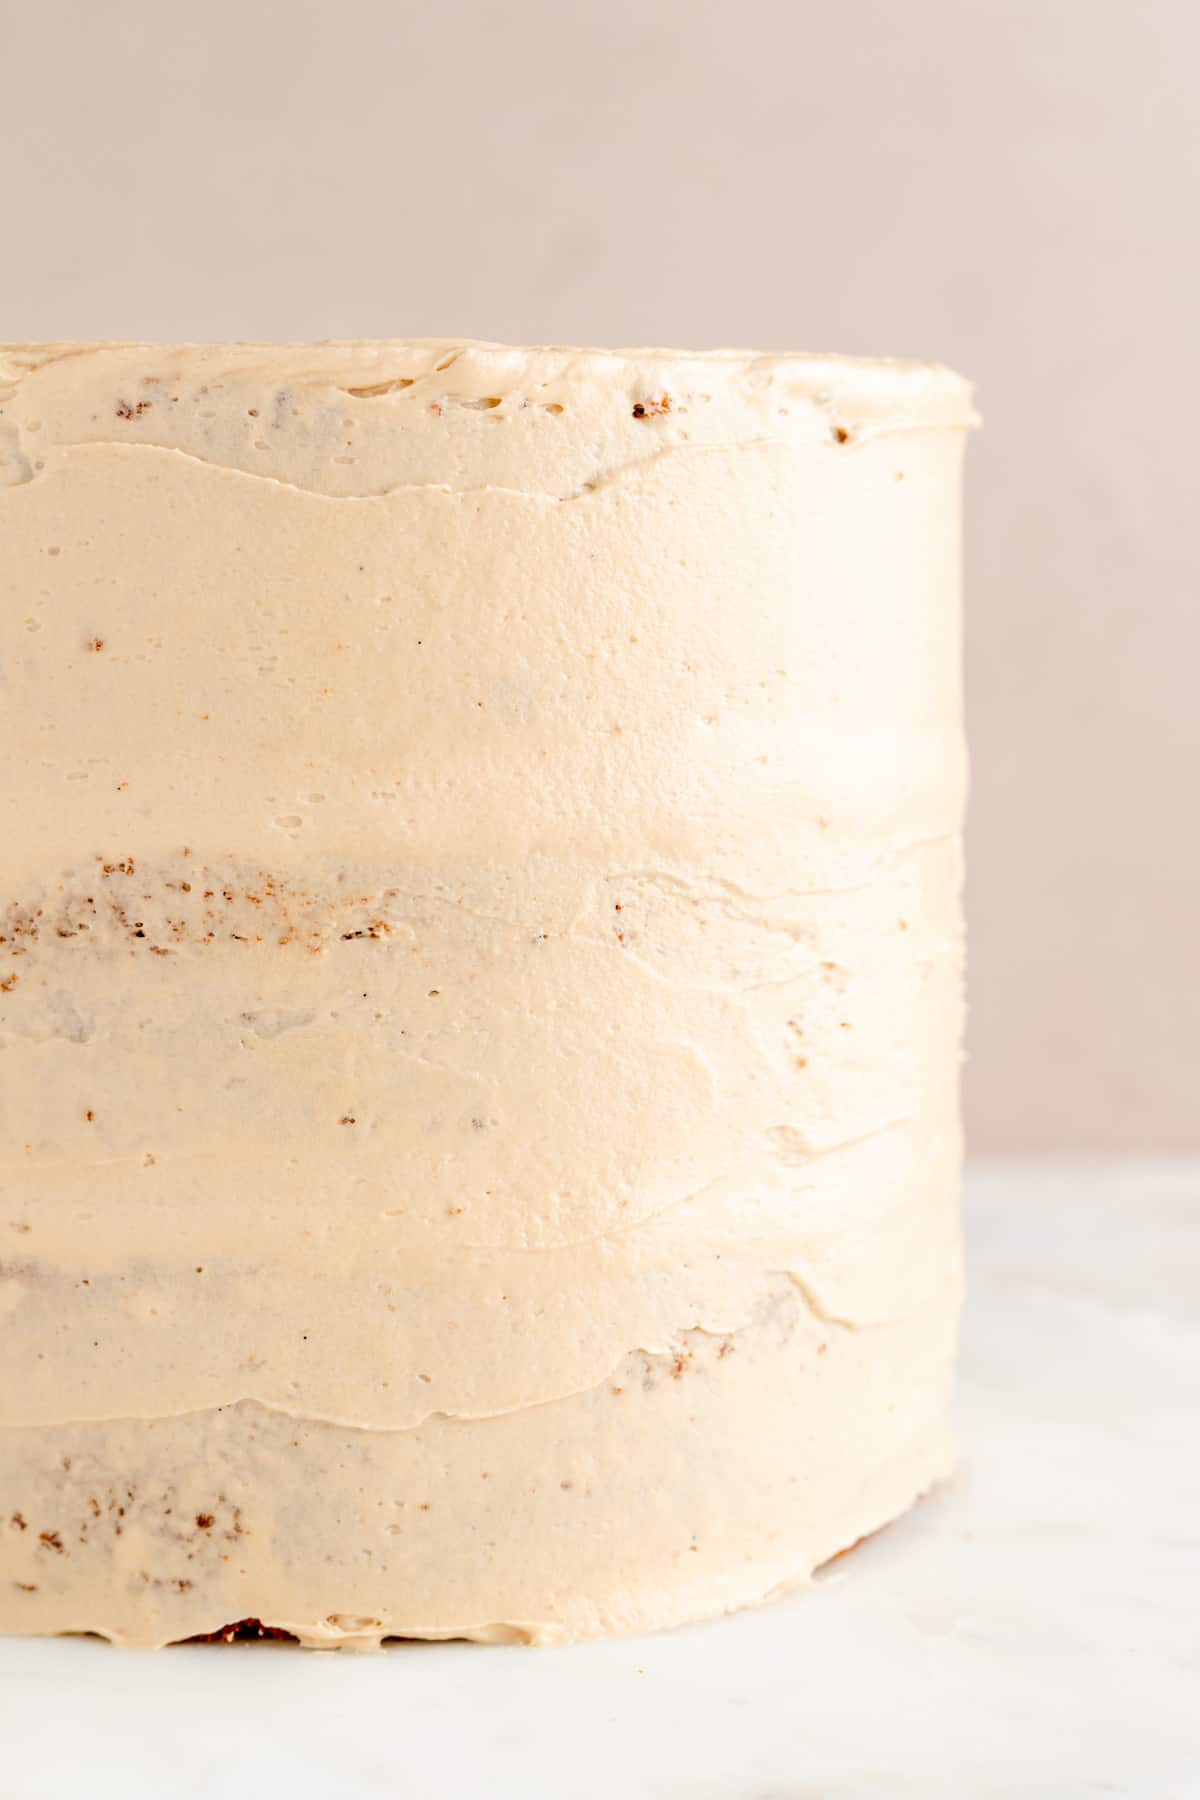
- To crumb coat or not to crumb coat? How to decorate this cake is really up to you. If you want a really clean, smooth finish, you can apply a crumb coat first (a super thin, quick layer of frosting applied right after stacking the cakes that catches all the crumbs). You can then chill the crumb coat for 30 minutes and continue on your decorating way after that. As long as you keep your crumb coat thin, there's enough frosting in this recipe for a crumb coat, final coat, and a little extra decoration too of course!
- Level cakes: any time you're stacking cakes, you want to make sure you're working with level tops. This recipe baked flat enough in my experience to not need to level any of my cakes. But, if you find that's not the case for yours, just use a serrated knife to remove any domed top on your layers (and enjoy my favorite mid-baking snack in the process!).
- Right-side up or upside down? When stacking cakes, we want to keep the flat-est side in the position that will help our cake look as pretty as possible. Because of this, we want the bottom and the middle layers to be right-side up (aka bottom down). The top layer, however, we want to be upside-down, with the flat, bottom surface facing up. This ensures we have a pretty, level surface for the top of our cake.
More Tips + FAQs
Can you make this cake ahead of time?
If you'd like - while I always recommend serving cake freshly bake and assembled, this cake will keep fully frosted for a day or two if needed.
The cake layers I recommend making and assembly on the same day so they're freshness is sealed in my the frosting.
But if you'd like to make the frosting ahead of time, feel free, and then just let it come to room temperature and give it a quick stir again before using it.
How do you store leftover cake?
You'll want to store this cake covered in the fridge with all the butter and milk in that buttercream. Once cut, I also like to place a piece of plastic wrap in full contact with the cut surfaces to keep them from drying out as much as possible.
Where can I find Biscoff cookie spread?
While it used to be tricky, you can now find Biscoff spread at most specialty food stores and even your run-of-the-mill grocery stores. If all else fails, you can also buy it online from Amazon, Target, or directly from Lotus.
What can I do with the leftover cookie butter?
I would be remiss if I didn't mention that Biscoff is delicious as a dip for apples or you can even carefully heat it up in the microwave and pour it over your ice cream.
Essentially anyway you can use peanut butter, you can use Biscoff spread too!
Is Biscoff butter and cookie butter the same thing?
Essentially, yes. My understanding is that Biscoff is the original cookie butter (essentially because it's seemingly made from crushing up Biscoff cookies and turning them into a spread).
Nowadays, there are several copy-cat versions from Trader Joe's Speculoos Cookie Butter, to a Cookie Butter from Walmart. But in my opinion, the original is still the best and worth searching out for these cookies!
Other Spiced and Cakey Recipes You'll Love
Craving more delicious treats? Here are a few of my other favorite cake recipes on the blog:
- Old-Fashioned Carrot Cake with Cream Cheese Frosting
- Red Velvet Cake with Cream Cheese Glaze
- White Chocolate Raspberry Bundt Cake
- Lemon and Orange Cream Cheese Pound Cake
- Golden Vanilla Sheet Cake
And if you're looking for more cinnamony goodness, be sure to whip up these spiced recipes soon:
- Fluffy Oreo Cinnamon Rolls with Cream Cheese Frosting
- Cinnamon Donut Muffins
- Cinnamon Streusel Apple Hand Pies
- Blueberry Muffins with Cinnamon Streusel
- Pumpkin Whoopie Pies with Cinnamon Cream Cheese Filling

⭐ If you gave this recipe a try please give it a ⭐ rating and tag me on Instagram @mint.and.mallow.kitchen so I can see what you're baking up! ⭐
📖 Full Recipe
Cookie Butter Cake (Biscoff Cake with Biscoff Buttercream)
Ingredients
FOR THE CAKE:
- ½ cup (1 stick) unsalted butter (softened)
- ½ cup smooth Biscoff cookie butter
- 1 ¼ cups sugar
- 2 teaspoons vanilla extract
- 3 large eggs
- 2 cups all-purpose flour
- 2 teaspoons baking powder
- ¾ teaspoon fine salt
- ¾ cup whole milk
- 1 ½ cups roughly crushed Biscoff cookies (14 cookies*1)
FOR THE FROSTING:
- ¾ cup (1 ½ sticks) unsalted butter (softened)
- ½ cup smooth Biscoff cookie butter
- 2 teaspoons vanilla extract
- 4 cups (1 lb) sifted powdered sugar
- ⅓ cup whole milk or cream
- ¼ cup smooth Biscoff cookie butter (optional, for assembly)
- 1 orange (zested)
Instructions
TO MAKE THE CAKE:
- Preheat and prep pans: preheat your oven to 350°F. Lightly grease three 6" round cake pans. Line each with a piece of parchment, cut to fit in the bottom of the pan, then lightly grease the top of the parchment paper.*2
- Cream butter, Biscoff, sugar and vanilla: cream together the butter, biscoff spread, sugar, and vanilla extract until well-blended, significantly lightened in color, and fluffy using a hand or stand mixer (about 2 minutes on medium-high speed).
- Add eggs: add in the eggs, and beat for 30 seconds on medium until the batter thickens and is slightly fluffy again.
- Beat in dries and milk: add in the flour, baking powder, salt, and lastly, the milk, and mix on low speed for 30 seconds. Continue mixing on medium-high for an additional 1-2 minutes until all ingredients are fully combined and batter is smooth and very fluffy.
- Fold in the cookies: add the crushed cookies to the batter and fold them in by hand just until evenly distributed.
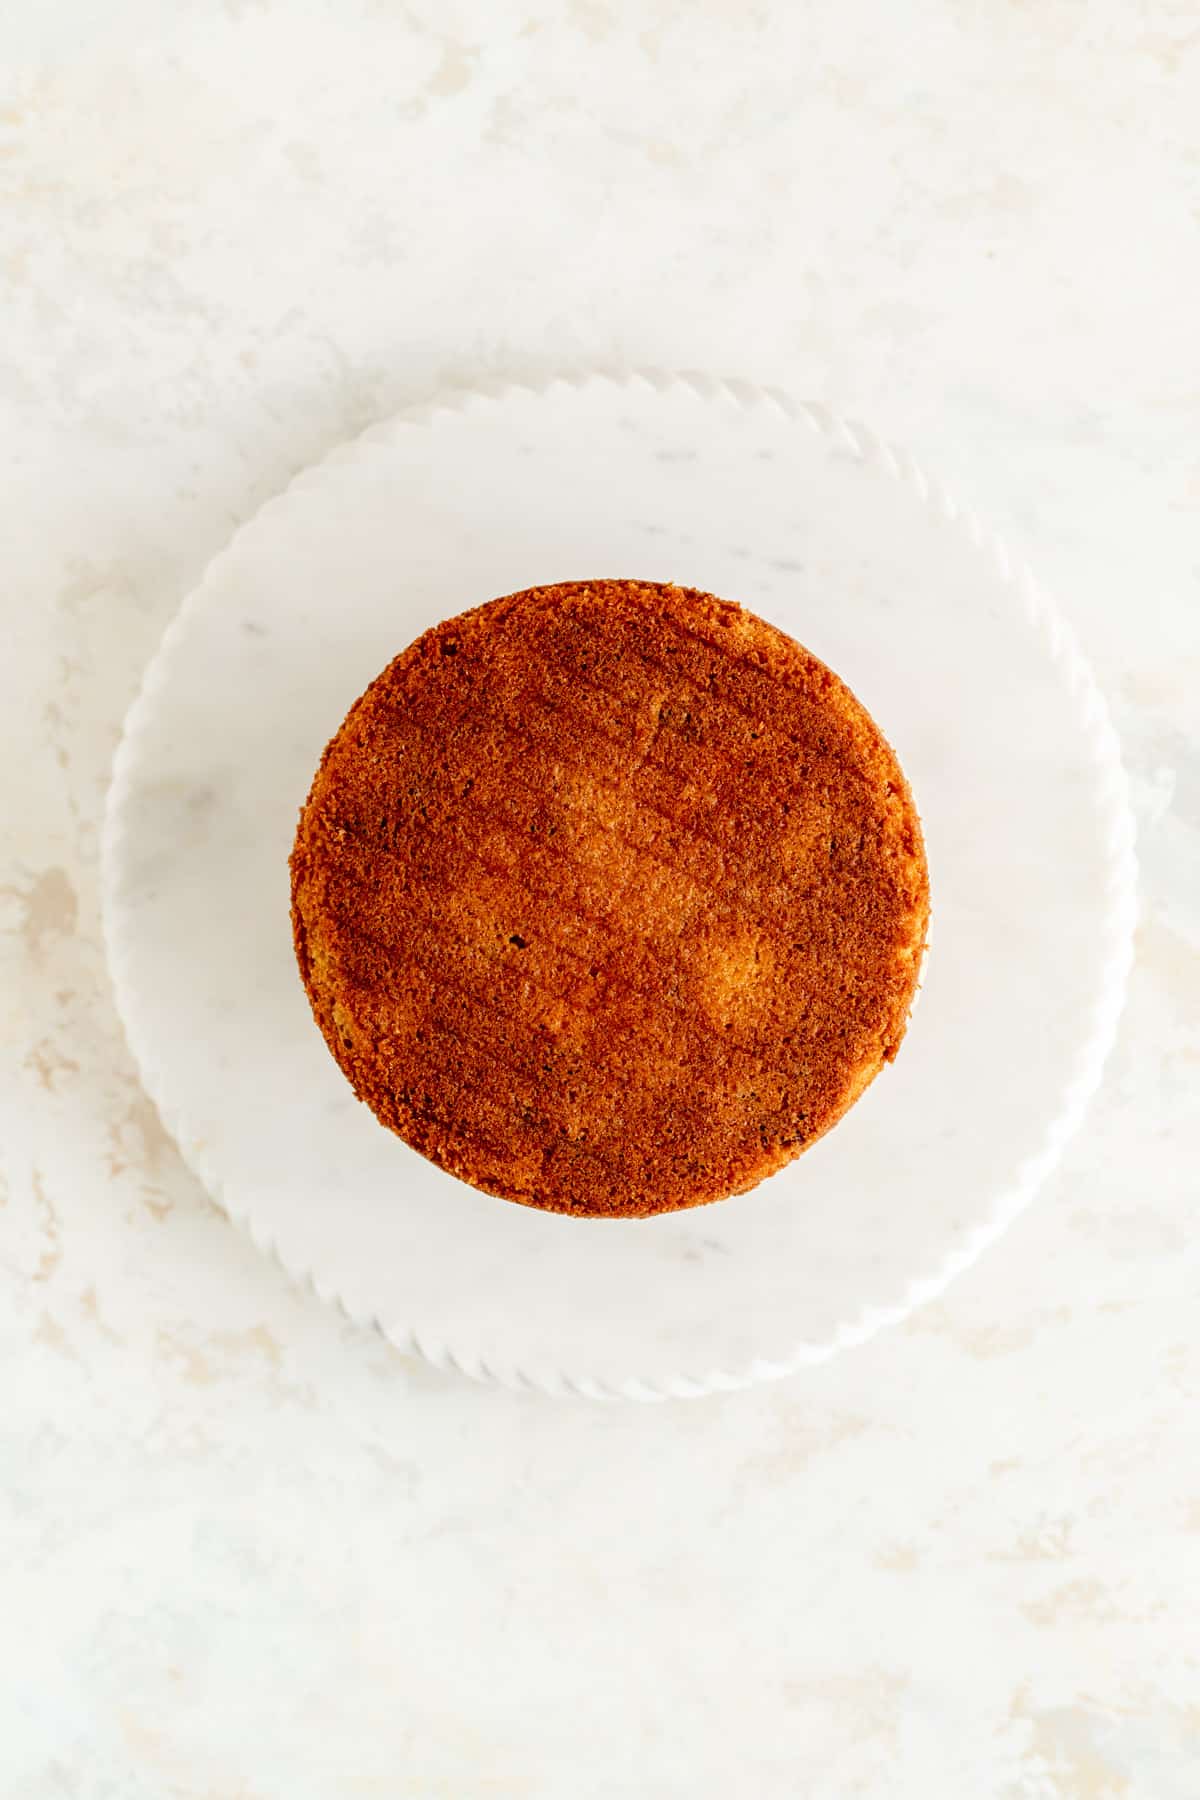
- Portion and bake: divide batter evenly between the prepared pans (about 390g per pan) and spread to level the surface all the way to the edges. Bake for 34-38 minutes*2 until top is a deep golden brown, fully set, and springs back when lightly touched.
- Cool, frost, and enjoy: allow cakes to cool for 20 minutes on a wire rack, then careful un-pan them and allow them to fully cool (about 45-60 minutes) while you prepare the frosting.*3
TO MAKE THE FROSTING:
- Beat butter, Biscoff, and vanilla: beat butter, ½ cup biscoff spread, vanilla extract, and orange zest (if using) with a hand or stand mixer for 1-2 minutes on medium-high speed until smooth, pale and fluffy, with no clumps of butter remaining.
- Add sugar and milk: add all the sifted powdered sugar and milk to the bowl and mix for 30 seconds on low to roughly combine. Then beat on medium-high speed for about 2 minutes until smooth, significantly lightened in color, and very fluffy.
TO ASSEMBLE THE CAKE:
- Level cakes (only if needed): if your cakes have a high dome, level by using a serrated knife and cutting horizontally across the cake while holding the knife parallel to your work surface. (If your cakes came out naturally level-ish, feel free to skip this step - I did!)
- Adhere cake to serving plate: smear a tablespoon of frosting on your serving plate and press one layer of cake firmly onto the plate.
- Melt Biscoff (optional): melt the ¼ cup of Biscoff spread in a small microwave safe dish, at 100% power for 15-20 seconds. Transfer to a zip-top bag and cut a super small hole in the corner. (You can skip this step if you don’t want to add the extra layer of biscoff in your cake).
- Fill and stack layers: using a pastry bag, offset spatula or knife, add about ½ cup of frosting on top of the base cake layer and spread into an even layer. Using the zip-top bag of Biscoff you just made, generously drizzle spread on top of the leveled frosting layer, leaving just ¼” clean around edges.
- Repeat layers: Top your stack with the second layer of cake (centering it and pressing it gently into the first layer of frosting), then add another layer of frosting, and another layer of drizzled Biscoff spread. Finally, top with the third layer of cake (placed on the frosting upside down for a nice, flat top). Check your layers from the side and wiggle them to the center until all lined up, then gently press down on the top again to fully adhere it to the frosting below. (Don’t worry if some frosting comes out between the layers - you can just smear that onto the sides of the cake.)
- Frost, decorate and enjoy! Use the remaining frosting to frost the entire cake to your desired level. Use a crumb coat (a very thin coat of frosting smeared all over the cake to lock down the crumbs), and chill your cake for 30 minutes before adding the final frosting layer if you like, or just frost fully right after stacking. Add extra swirls of biscoff spread*4, whole or crushed cookies, or whatever other festive decorations you like. Slice and share for a perfectly spiced triple biscoff treat that will make any occasion feel extra special!
Test Kitchen Tips
- *1Crushed Biscoff Cookies: these should be roughly crushed, so they are in quarter-sized pieces or smaller, but shouldn't be fully pulverized to crumbs either (check out the ingredient photo in the full recipe post for a visual example).
- *2Pan size - 6” or 8" layers? While I really like the tall and skinny proportions of this cake in 6” rounds, you can split the batter into two 8" layers (about 575g of batter each) instead of three 6" layers. Just note, you will need an addition 5-10 minutes of bake time, and should use the visual cues mentioned in the recipe to determine doneness.
- *3Did your dome drop? Please note, the cakes’ domes may settle to a flat top which is normal and exactly what we want for stacking, so don’t worry if you see this happen. You may find your cake comes out flat from the start which is totally fine too.
- *4Biscoff spread decoration: for a multi-toned, simple, and extra tasty decoration like the one shown in these photos, pipe 1” lines of the leftover melted cookie butter on various spots around the sides and on top of your cake once fully frost. Then gently smooth out your frosting one final time, to partially incorporate the spread into the biscoff buttercream to your desired level of stripey-ness.
- Storage: be sure to store any leftovers - not that you're likely to have any - in the fridge, and thaw your cake on the counter for at least an hour before enjoying for the tastiest experience.
Ali says
The BEST cookie butter recipe yet! Made this for church potluck-they’ll be thanking Jesus 💟✝️💟!
Jocelyn at M+M says
So happy this recipe was a hit for you, Ali! Thank you so much for taking the time to share your experience with me and happy baking!