


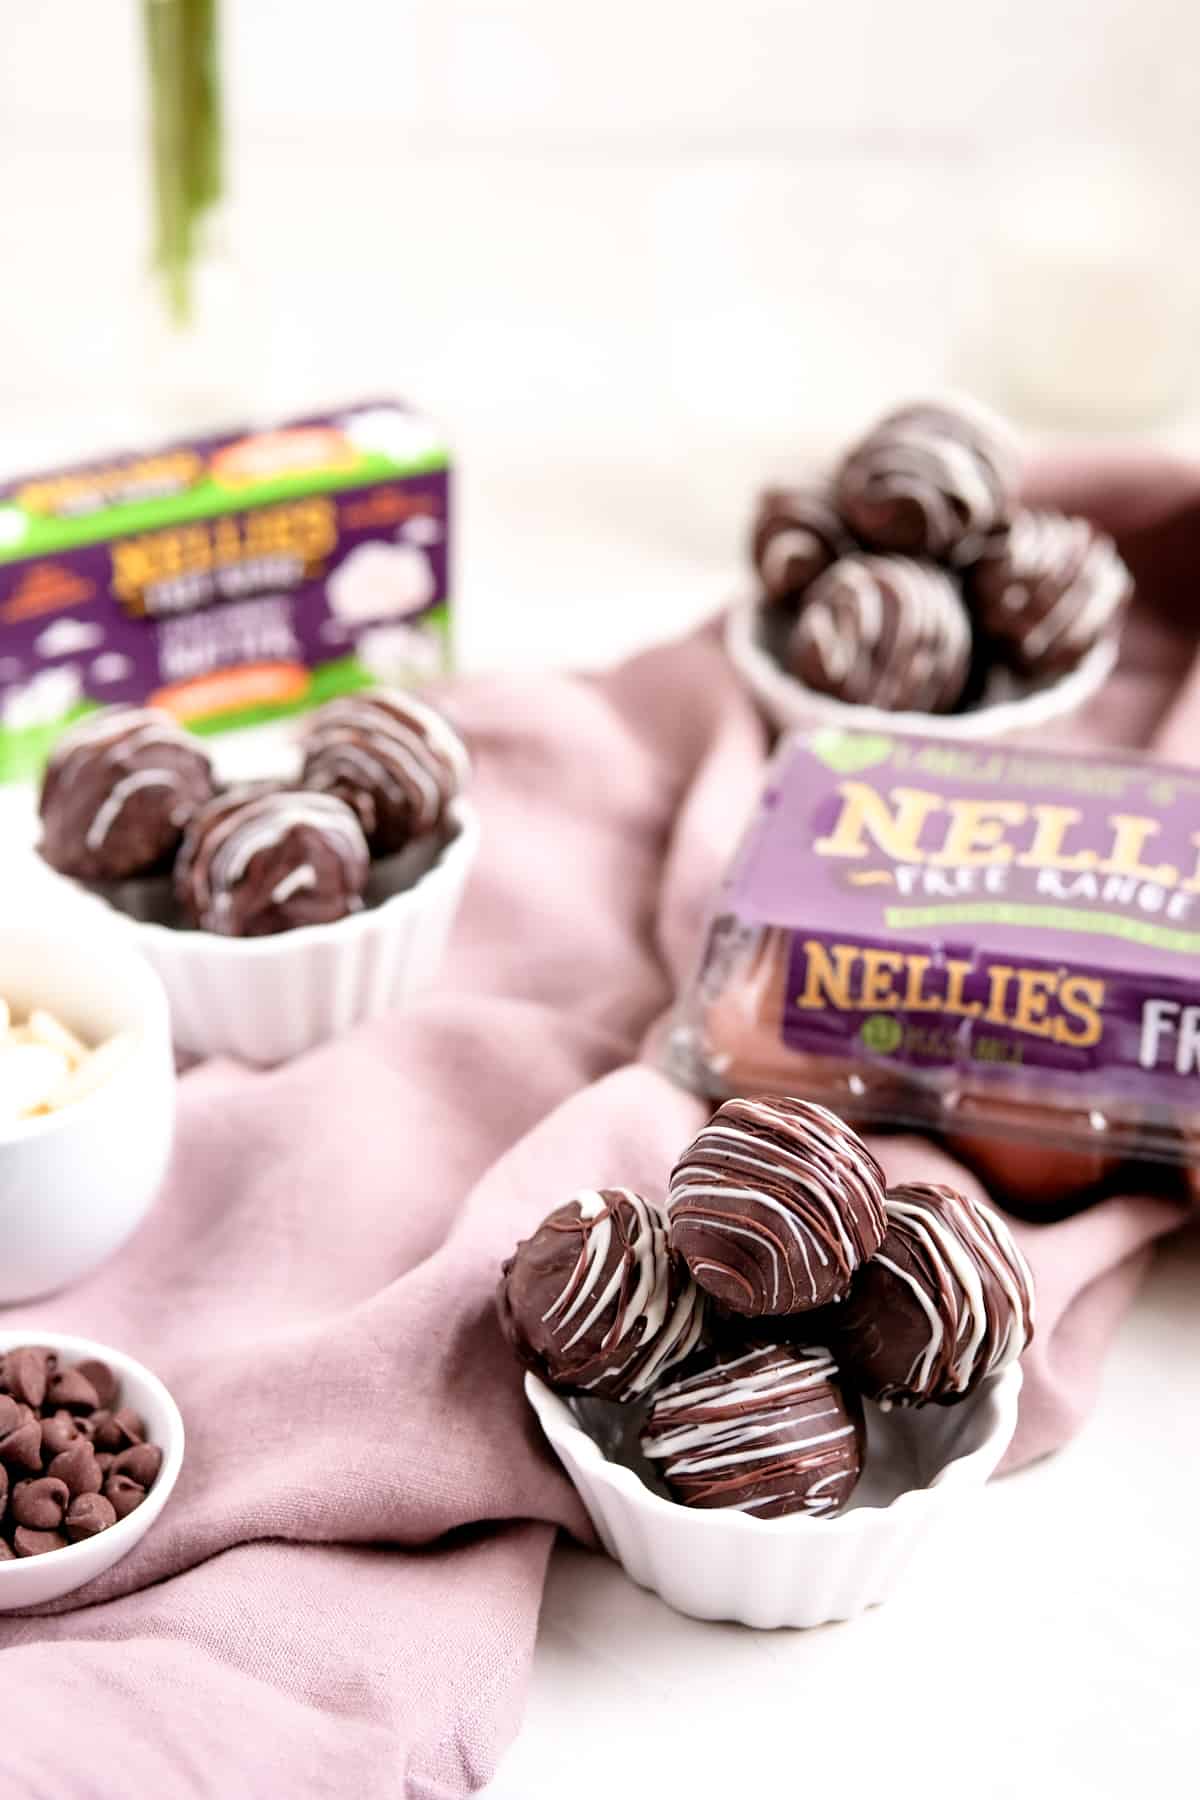
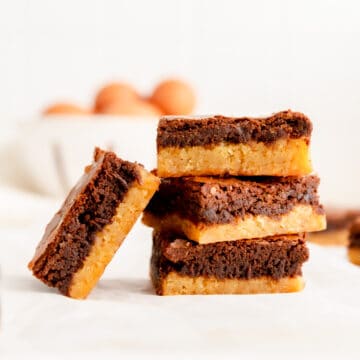
These Double Chocolate Brownie Truffles not only have big chocolate flavor packed in a cute little package but they can be customized with festive decorations perfect for any occasion (oh...and they can even be made gluten-free)! I'll share ideas for classic, Halloween, Christmas, and birthday decorations, but really, the sky's the limit!
Jump to (scroll for more!):
Double Chocolate Brownie...Truffles?
Until recently, I might have said double fudgy brownies were as good as it gets in the world of perfect chocolatey treats. But…I now stand corrected. Because the only thing that can make a super fudgy brownie even better is…more chocolate!
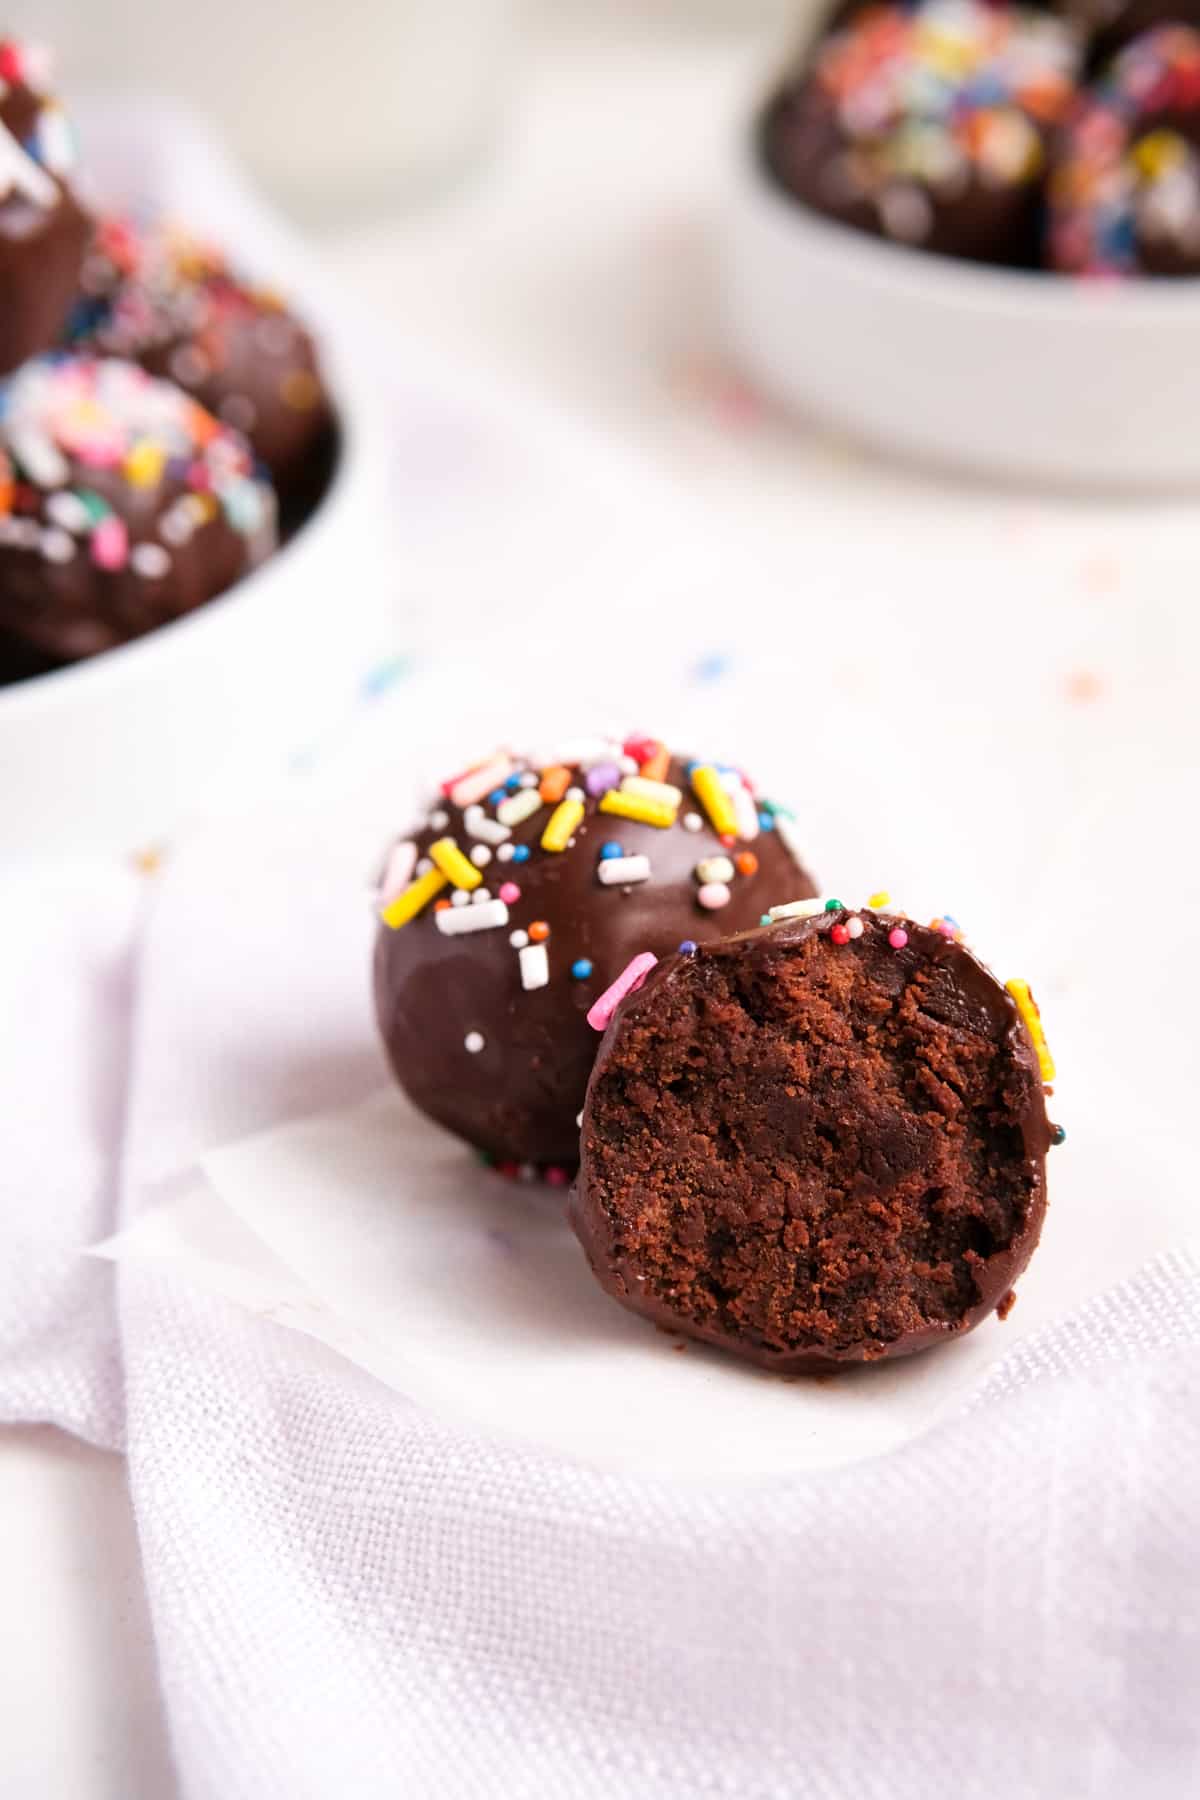
These brownie truffles are made of pure fudge brownie on the inside, with a delicious dark chocolate coating on the outside. (And a festive decoration on top too of course!)
Why This Recipe Leads to Sweet Success
Here is some key info you should know to understand why this recipe not only works but will be a deliciously sweet success.
- Foolproof brownies: because I wanted these brownies to be the only filling these chocolate bombs needed, I made them extra-fudgy and designed to turn out a little underbaked. That way, the super moist filling is easily rollable and doesn’t require any frosting, etc. to form a nice truffle filling. What this means for you, is that this recipe is super forgiving, and you really can’t mess it up!
- All the chocolate: I’m a dark chocolate fiend, so I go for dark chocolate both in my brownies and for my chocolate coating. That said, you are welcome to substitute milk chocolate in the brownies themselves. You can also use milk, white, or dark chocolate for the coating, or even candy melts if you prefer to not temper the chocolate.
- To temper or not to temper: tempering chocolate can be intimidating (honestly, I had never even tried to temper chocolate before pastry school). That said, it really isn’t too difficult if you have a good guide and an instant-read thermometer. I don’t have a tutorial post on tempering (...yet), but here’s a great article you can read through if you’d like to learn more. Alternatively, you can use candy melts (more on this below!).
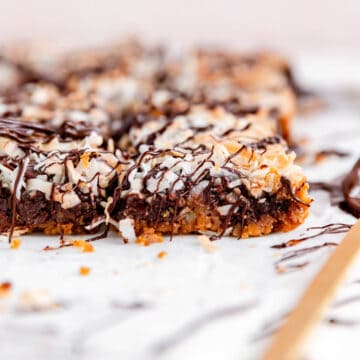
- Customizable decorations: the decoration options for these little guys are literally endless. I give suggestions for a drizzle, sprinkle, monster-theme, and holiday finish below, but feel free to let your imagination run wild. I’d love to see you customize these treats for every and all occasions!
Ingredient Tips to Bake it Better
(Pssst…if you're ready to just get baking, get all the details in the recipe card below!)
- Butter: make sure to use unsalted butter as there’s a lot of butter in these fudgy brownies, and salted butter will yield an overly salty brownie.
- Whole Grain Oat Flour: you can make these truffles gluten-free by confirming all your ingredients are manufactured in a gluten-free facility, and using oat flour instead of all-purpose flour.
- Couverture or candy melts? You have two options for getting a beautiful, clean coating on these candies: tempering couverture chocolate or using “candy melt” style chocolate. “Couverture” simply means a high-quality chocolate (at least 30%+ cocoa butter), which is required for tempering. Using a low quality or un-tempered chocolate to coat your truffles could result in a streaky, “bloomed” coating, with white chalky lines/circles on it. If you don’t feel like tempering , no worries! Just use candy melts or a similar coating chocolate which are designed to melt and coat flawlessly without any tempering needed.
- Sprinkles, chocolate drizzles, and googly eyes: the sky’s really the limit when it comes to these treats and the decorative possibilities. Feel free to do as many or as few different decorations as you like to really tailor the finish to your occasion.
- Peanut butter brownie truffles: if you’d like a peanut butter or butterscotch brownie truffle, you can always replace the chocolate coating with melted peanut butter or butterscotch baking chips instead.
(p.s. for all the basic tips that no one ever taught you, that are super important to help you bake your best, check out my Baking 101 series!)
Special Tools and Equipment You'll Need
For the coating step, you’ll want to make sure you have wax paper, parchment paper, or silicone mats to allow the dipped truffles to set on, as they’ll peel off all those materials easily.
If you have candy dipping tools like a candy fork or loop, that’s great. But if not, no worries! I actually just dipped mine with a good old-fashioned dinner fork and that works great too.
How to Make These Truffles From Scratch
(Pssst…if you're ready to just get baking, get all the details in the recipe card below!)
TO MAKE THE BROWNIES:
- Preheat your oven and melt the brownie chocolate and butter.
- Prep an 8” square pan and cool melted chocolate slightly.
- Combine all other brownie ingredients except the flour until smooth.
- Add in melted chocolate mixture.
- Add in flour, stirring just until combined.
- Pour batter into pan and bake 35-38 minutes until fully set.
- Cool brownies to room temperature (about 1 hour).
TO FORM THE TRUFFLES:
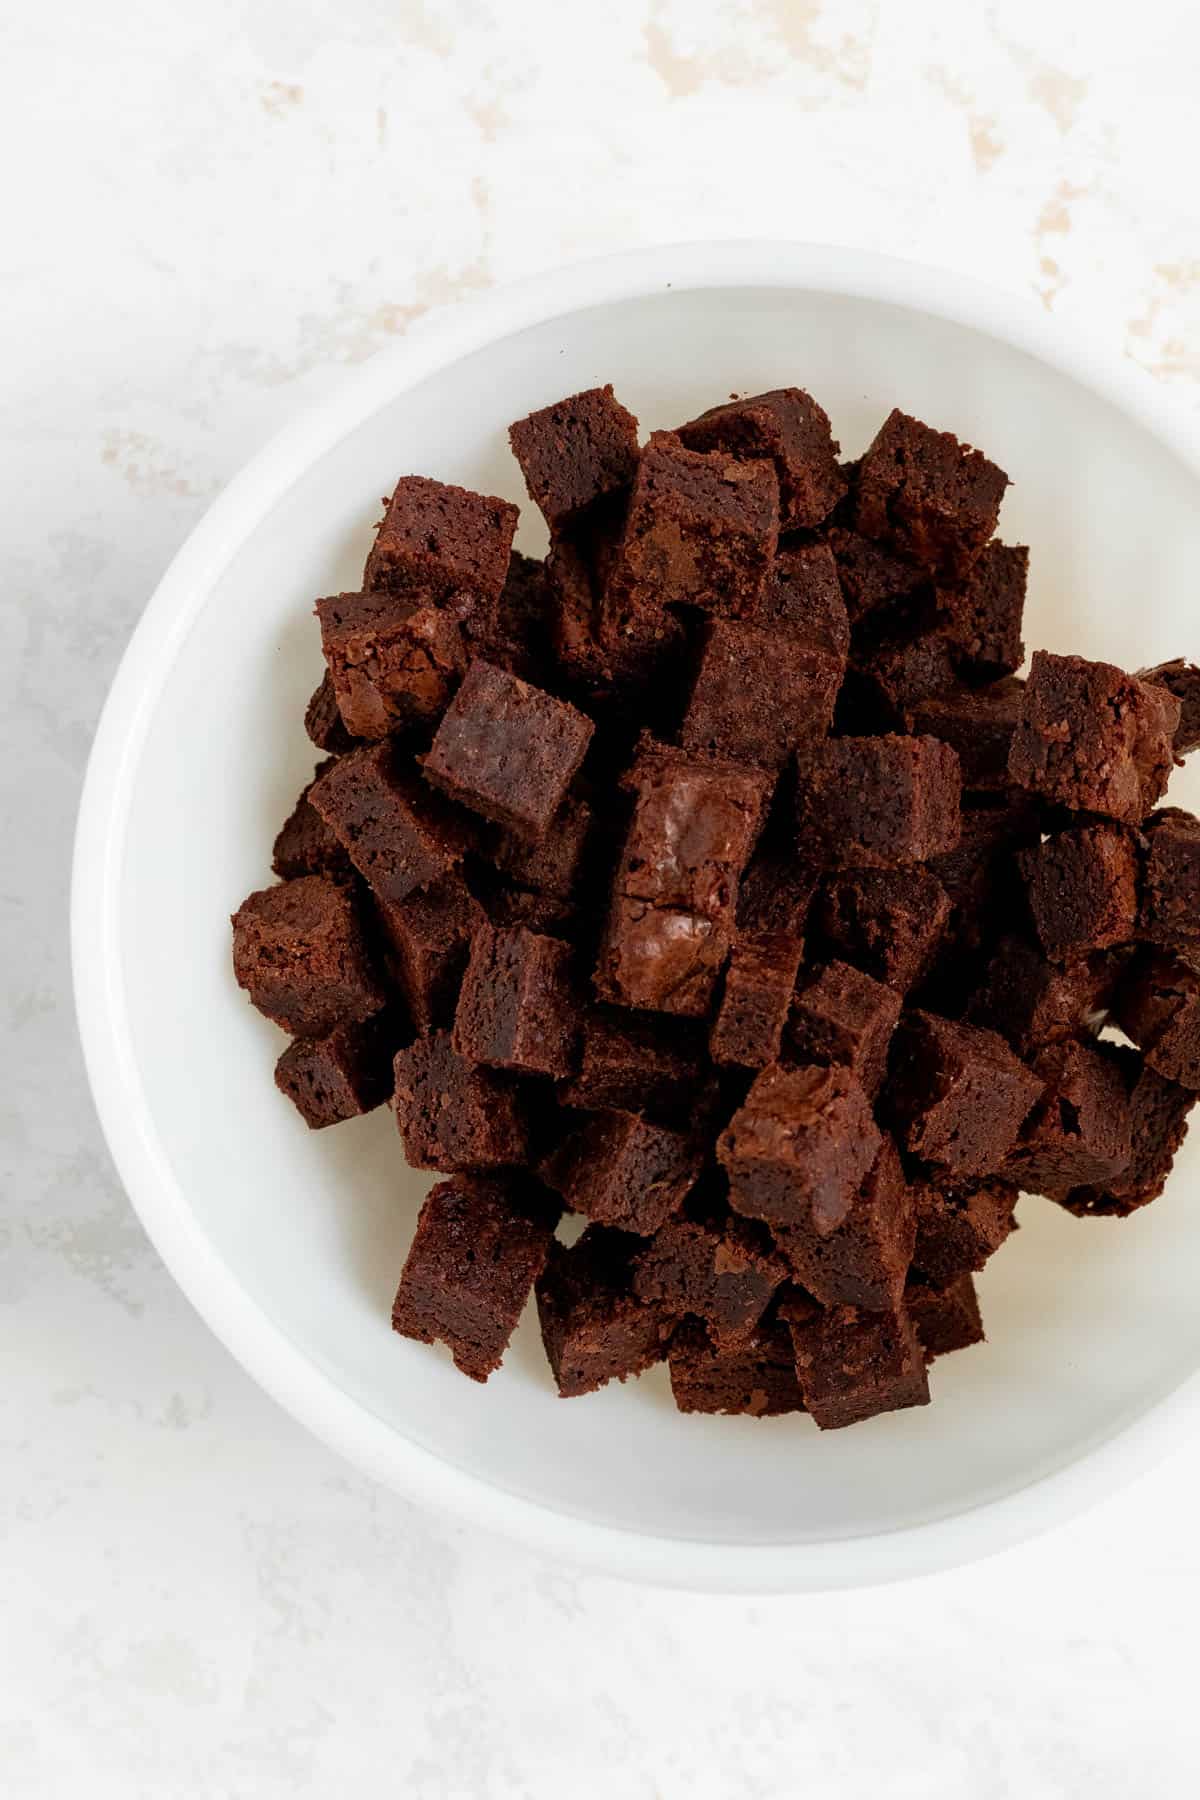
- Remove brownies from the pan and trim edges.
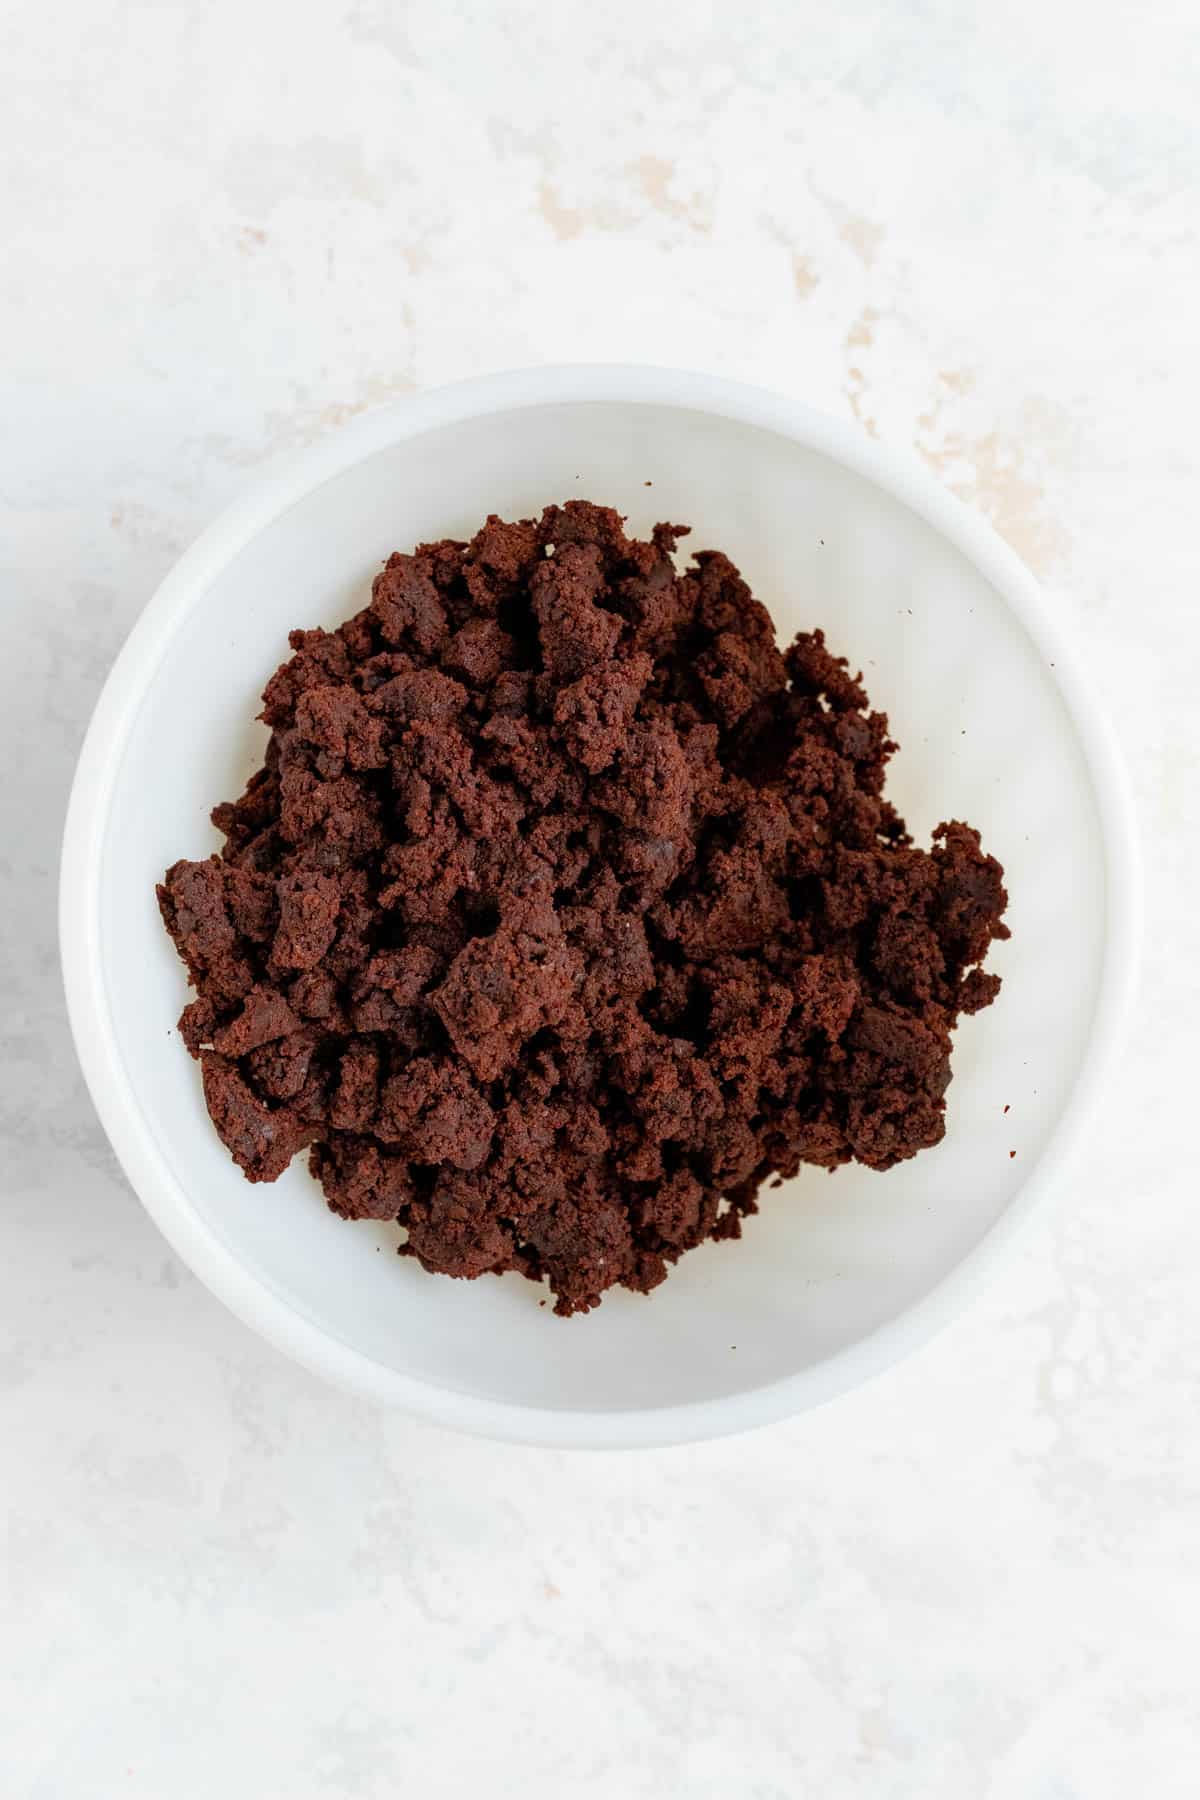
- Cut brownies into ½” squares and fully crumble.
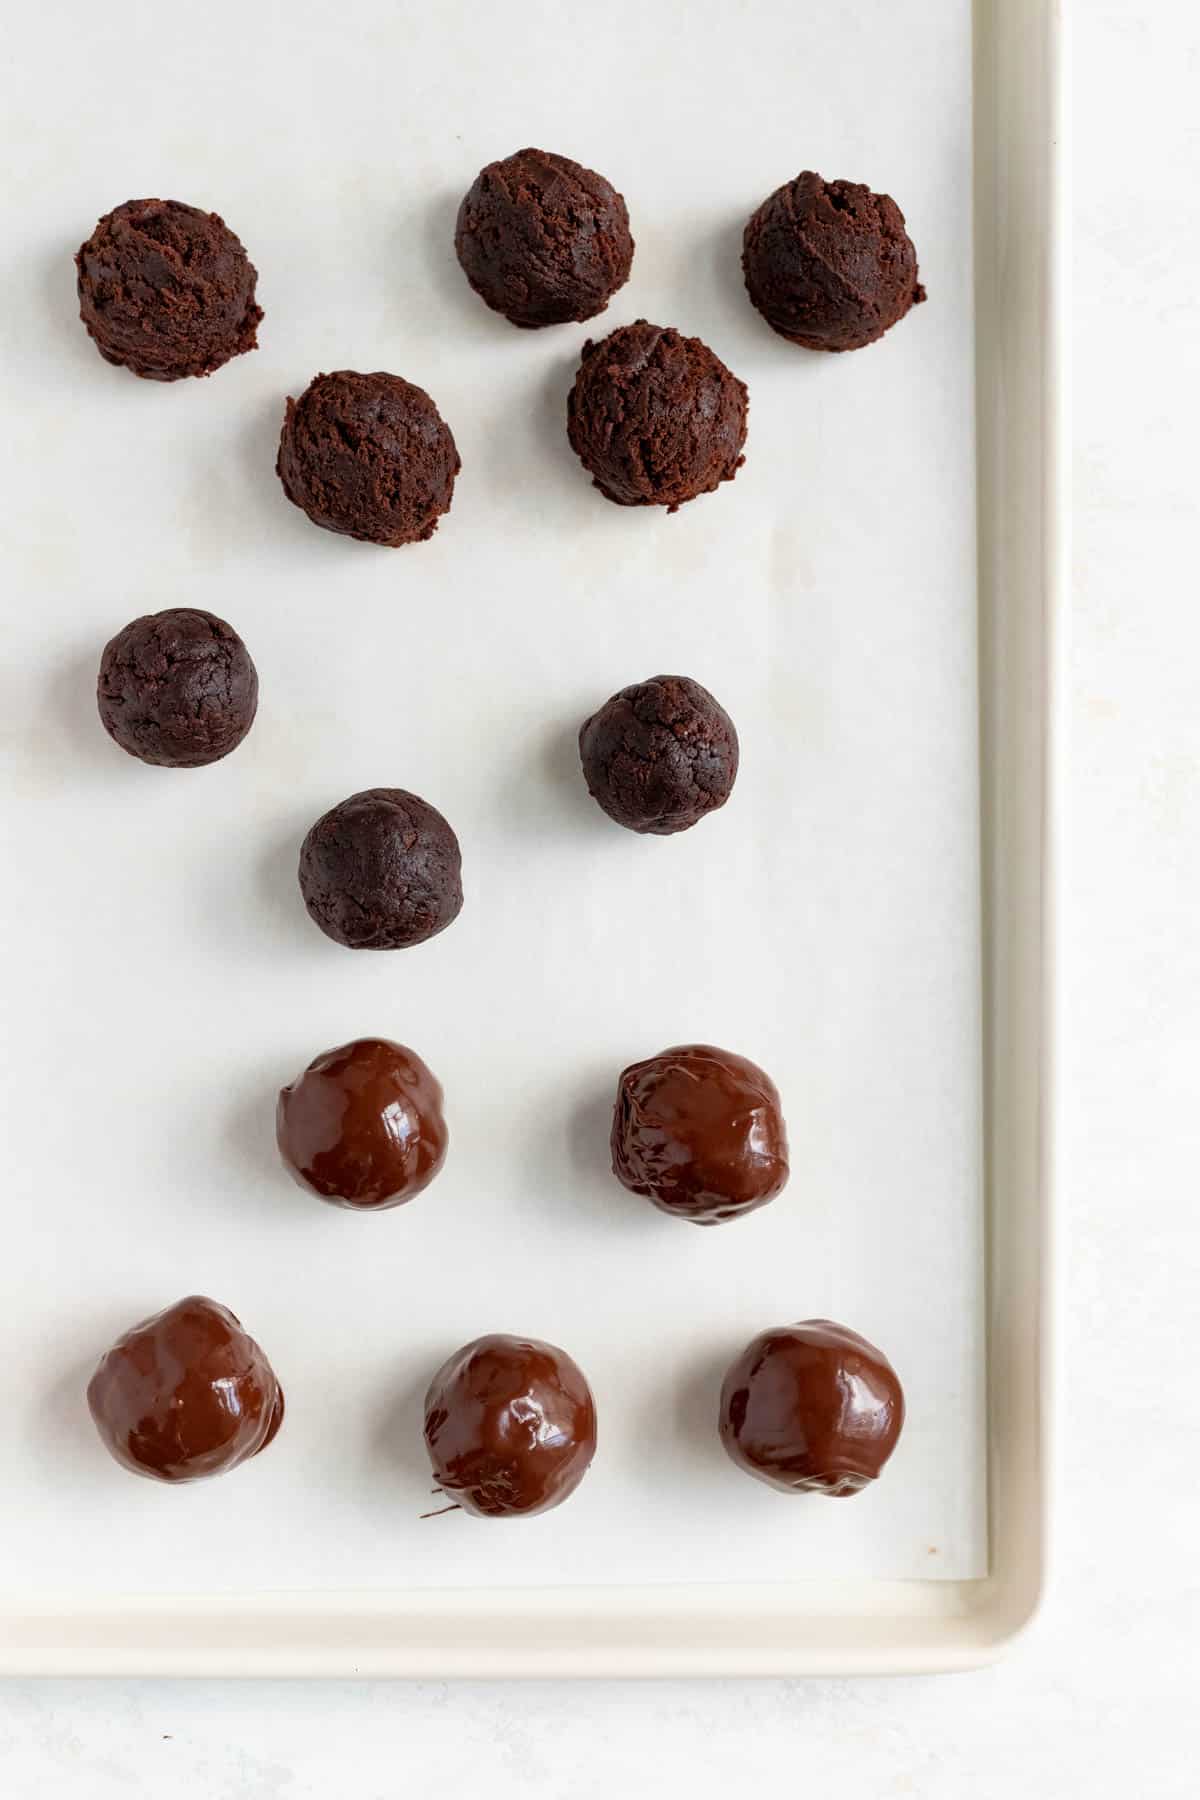
- Form truffles into 1.5” rounds, rolling between hands to shape as needed.
TO COAT THE TRUFFLES:
- Temper chocolate or melt candy melts coating (see above on more details on this!).
- Dip truffles to fully coat in chocolate, then set on a parchment, wax paper, or a silicone mat to set.
- Finish according to your selected decoration’s instructions (in recipe card below) and allow to fully set. Enjoy!
And here's the RECIPE WEB STORY for a click-through tutorial!
*Expert Tips and Tricks* for Better Baking
Well, the most important thing is to start with a nice fudgy brownie to make forming the truffles easy. Luckily, I’ve already taken care of that for you with this delicious recipe!
Other than that, I’d just make sure you’re tempering your chocolate if you’re planning on using regular chocolate. Alternatively, again, you can always use candy melt chocolate in its place without tempering. However, making sure you don’t use regular chocolate without tempering is really important because there’s nothing worse than putting all this hard work into your truffles just to have them turn out chalky and streaked.
Can you make brownie truffles ahead of time?
Yes! The brownies can keep for 2 days before rolling and coating, and once coated, the finished truffles will keep for at least a week if coated fully in chocolate (which keeps them from drying out as well).
How do you store leftover truffles?
You can keep them in an airtight container at room temperature for up to a week
Can you use another kind of chocolate, like milk or white chocolate?
For the brownies themselves, you can use milk chocolate in place of the dark chocolate if you like (I wouldn’t use white though as its composition is too far from dark chocolate to work well in this particular recipe). For the coating, you’re welcome to use white, milk or dark chocolate or even peanut butter or butterscotch baking chips!
Can I make these without needing to roll them?
Yes! If you'd like to skip the step of crumbling up the brownies and forming them into balls, you could just cut the brownies in 1 x 1 inch squares, or even use a cookie cutter to make fun shapes. Then you’d just dip those pieces as is. Just note, you may end up with more crumbs in your chocolate and you will have a rougher finish to your coating, so I suggest forming them into rounds if possible.
Other Recipes You'll Love
Be sure to check out my original Fudgy Brownie Recipe for a 9" x 13", and if you're looking for another delicious chocolate fix, be sure you don't miss out on my Chewy Double Dark Chocolate Cookies either!

⭐ If you gave this recipe a try please give it a ⭐ rating and tag me on Instagram @mint.and.mallow.kitchen so I can see what you're baking up! ⭐
📖 Full Recipe
Double Chocolate Brownie Truffles (3 ways!)
Ingredients
FOR THE BROWNIES:
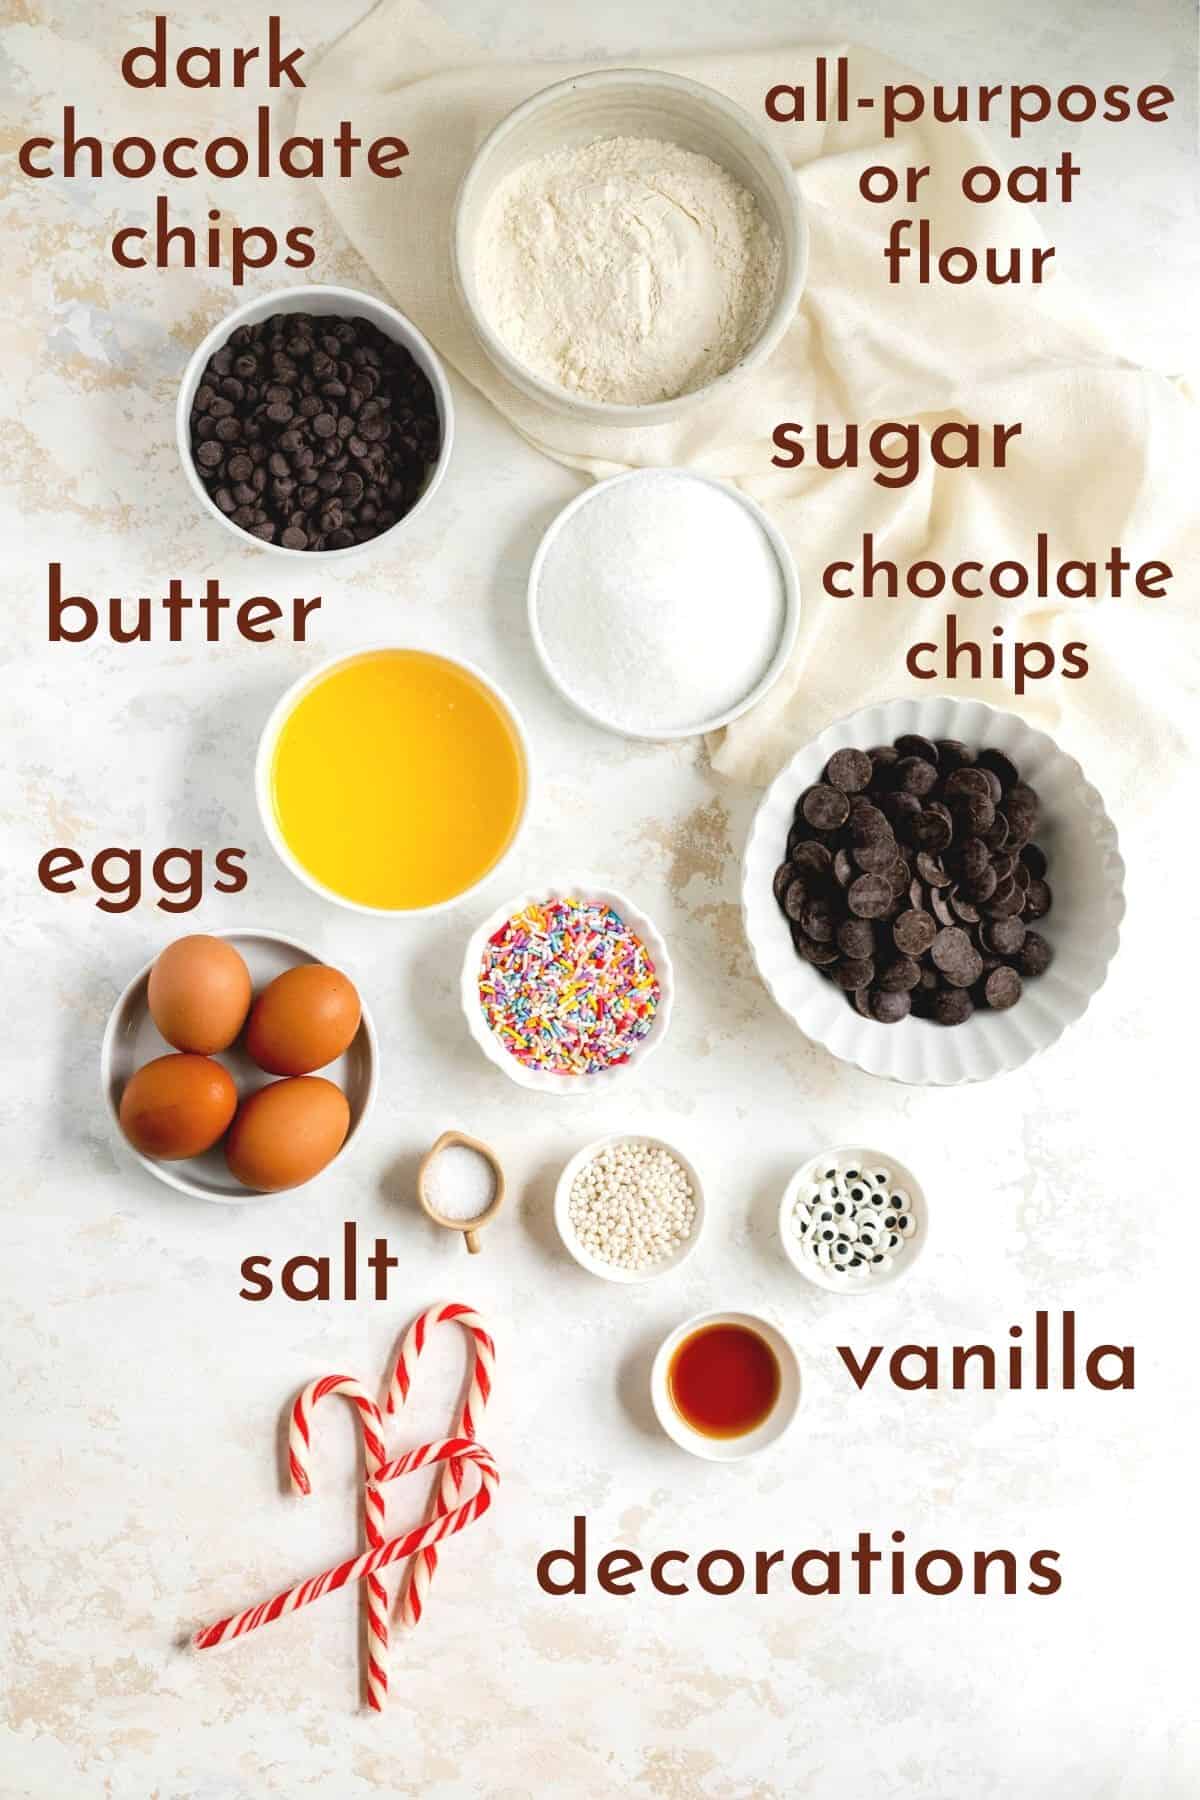
- ½ cup (1 stick) Nellie's Free Range Unsalted Butter
- 1 cup dark chocolate chips
- ¾ cup sugar
- ½ teaspoon salt
- 2 teaspoons vanilla extract
- 2 large Nellie's Free Range Eggs
- ½ cup all-purpose or whole grain oat flour*
FOR THE COATING:
- 1 ½ cups chocolate chips, chopped chocolate, or candy melts
FOR THE DECORATIONS (feel free to mix and match the options below to make these truffles the perfect treat for your special occasion!):
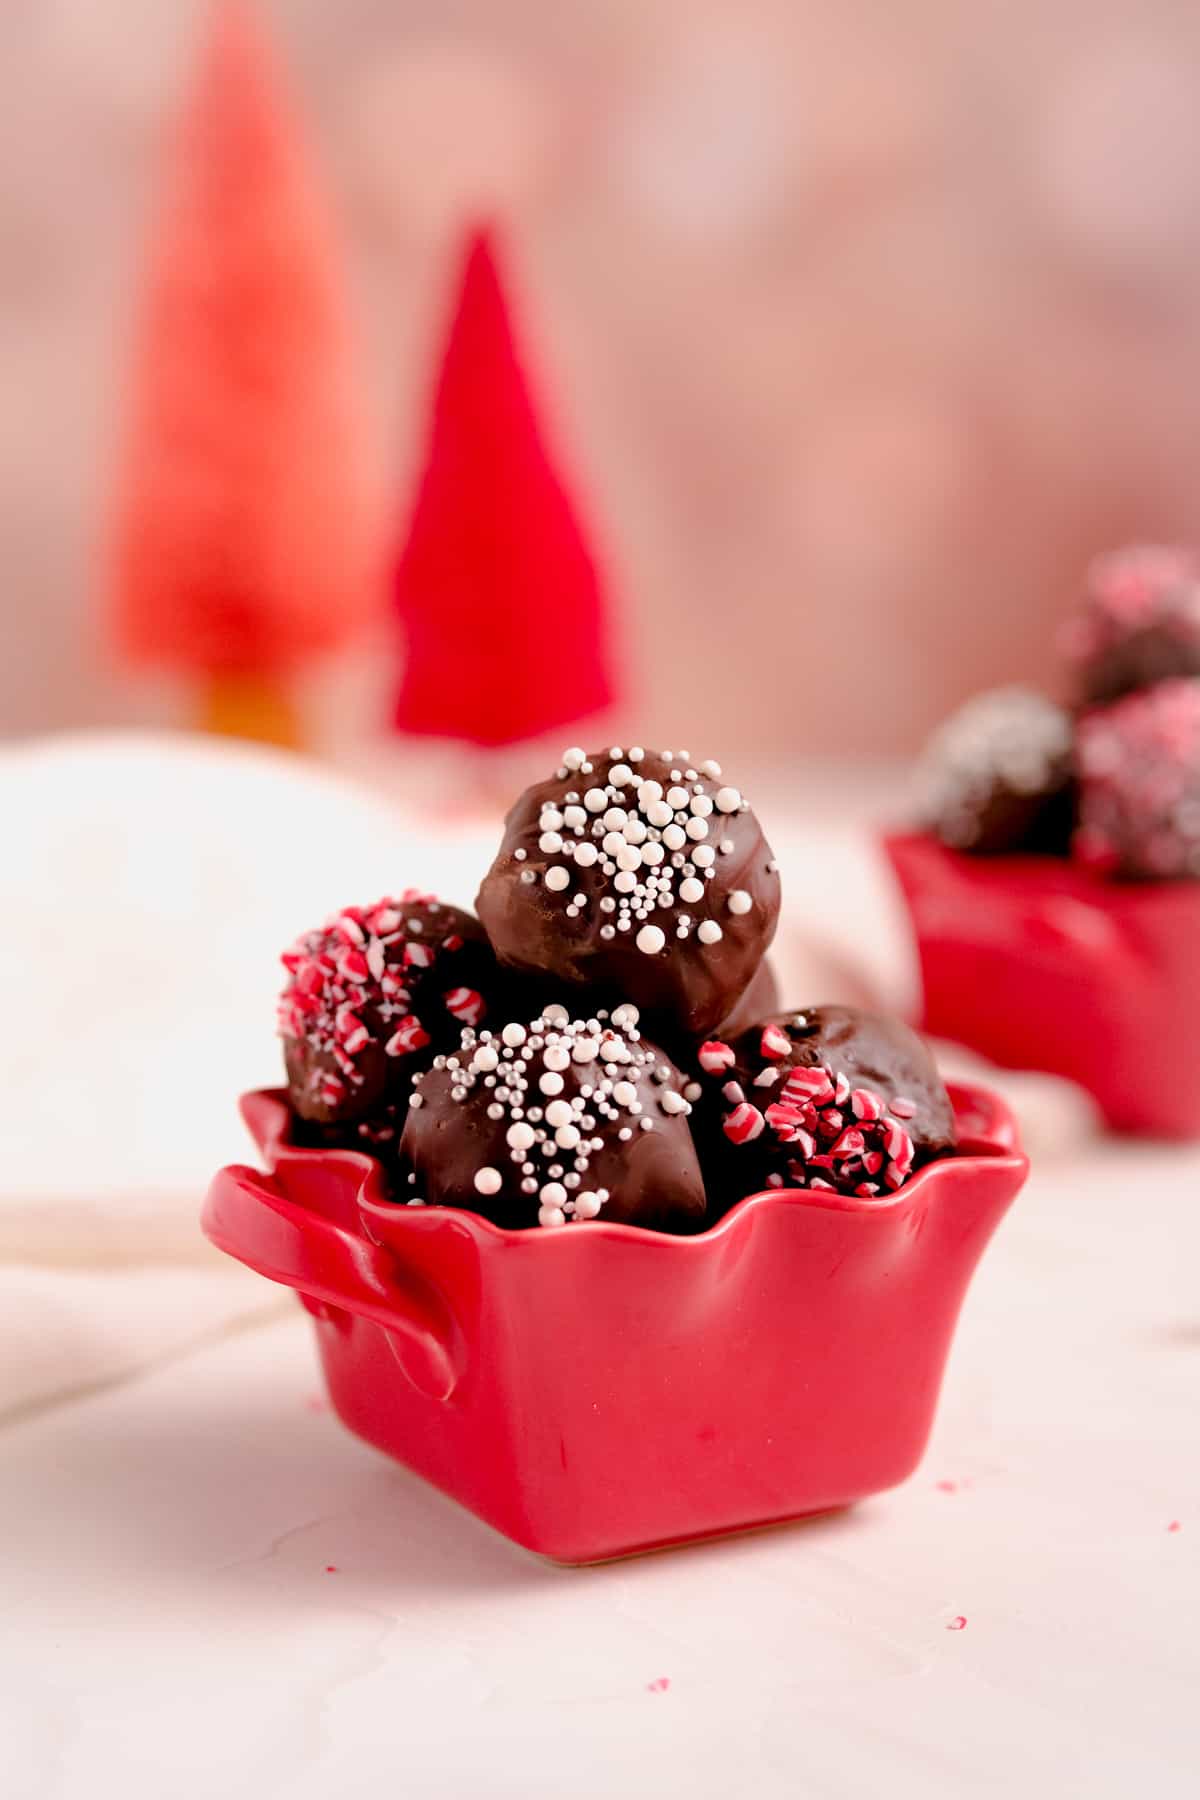
- Holiday: white and silver nonpareil sprinkles; crushed candy cane pieces
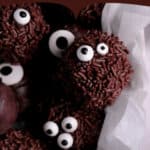
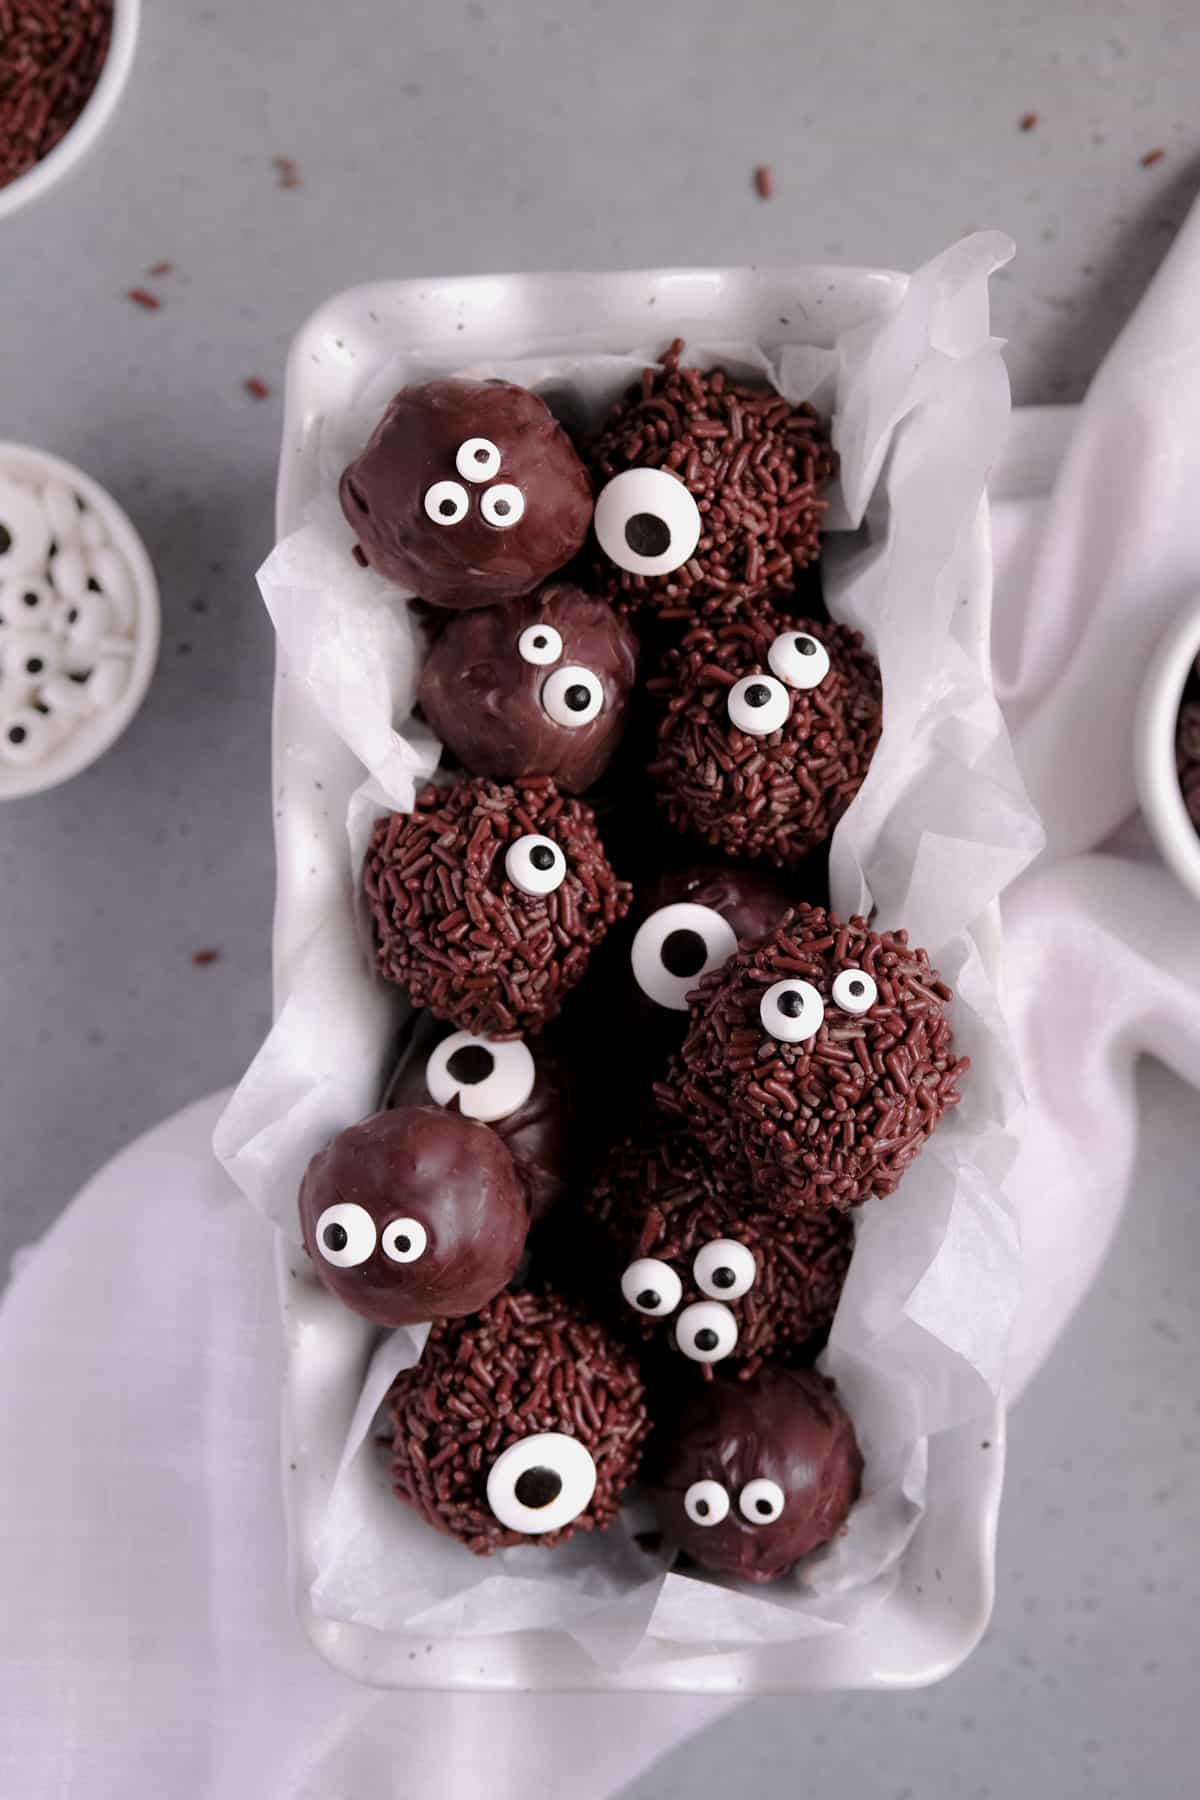
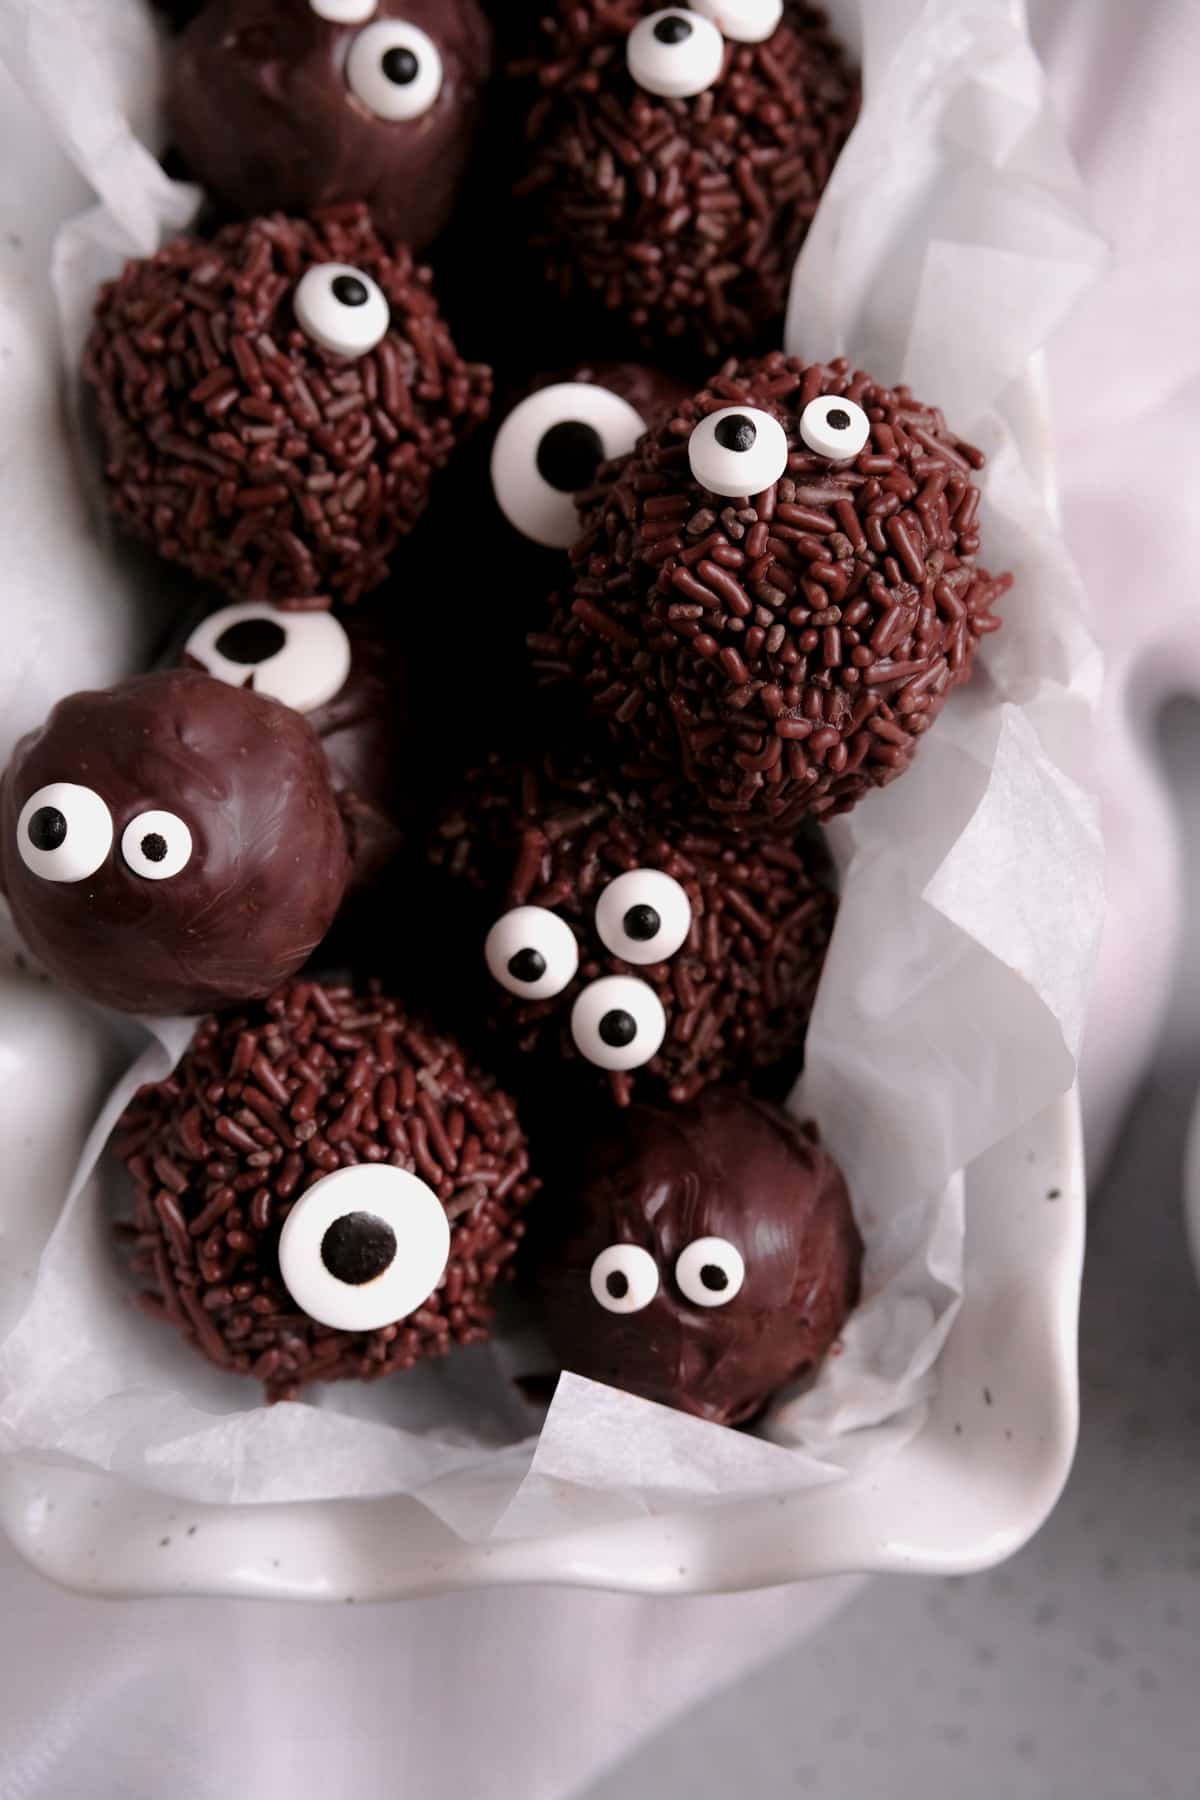
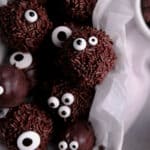
- Halloween: candy eyes and/or chocolate sprinkles
- Classic: multi chocolate drizzle, white chocolate, milk chocolate, dark chocolate, and/or colored candy melts
- Flavored: chopped nuts, cocoa nibs, sea salt
- Traditional: cocoa powder
Instructions
TO MAKE THE BROWNIES:
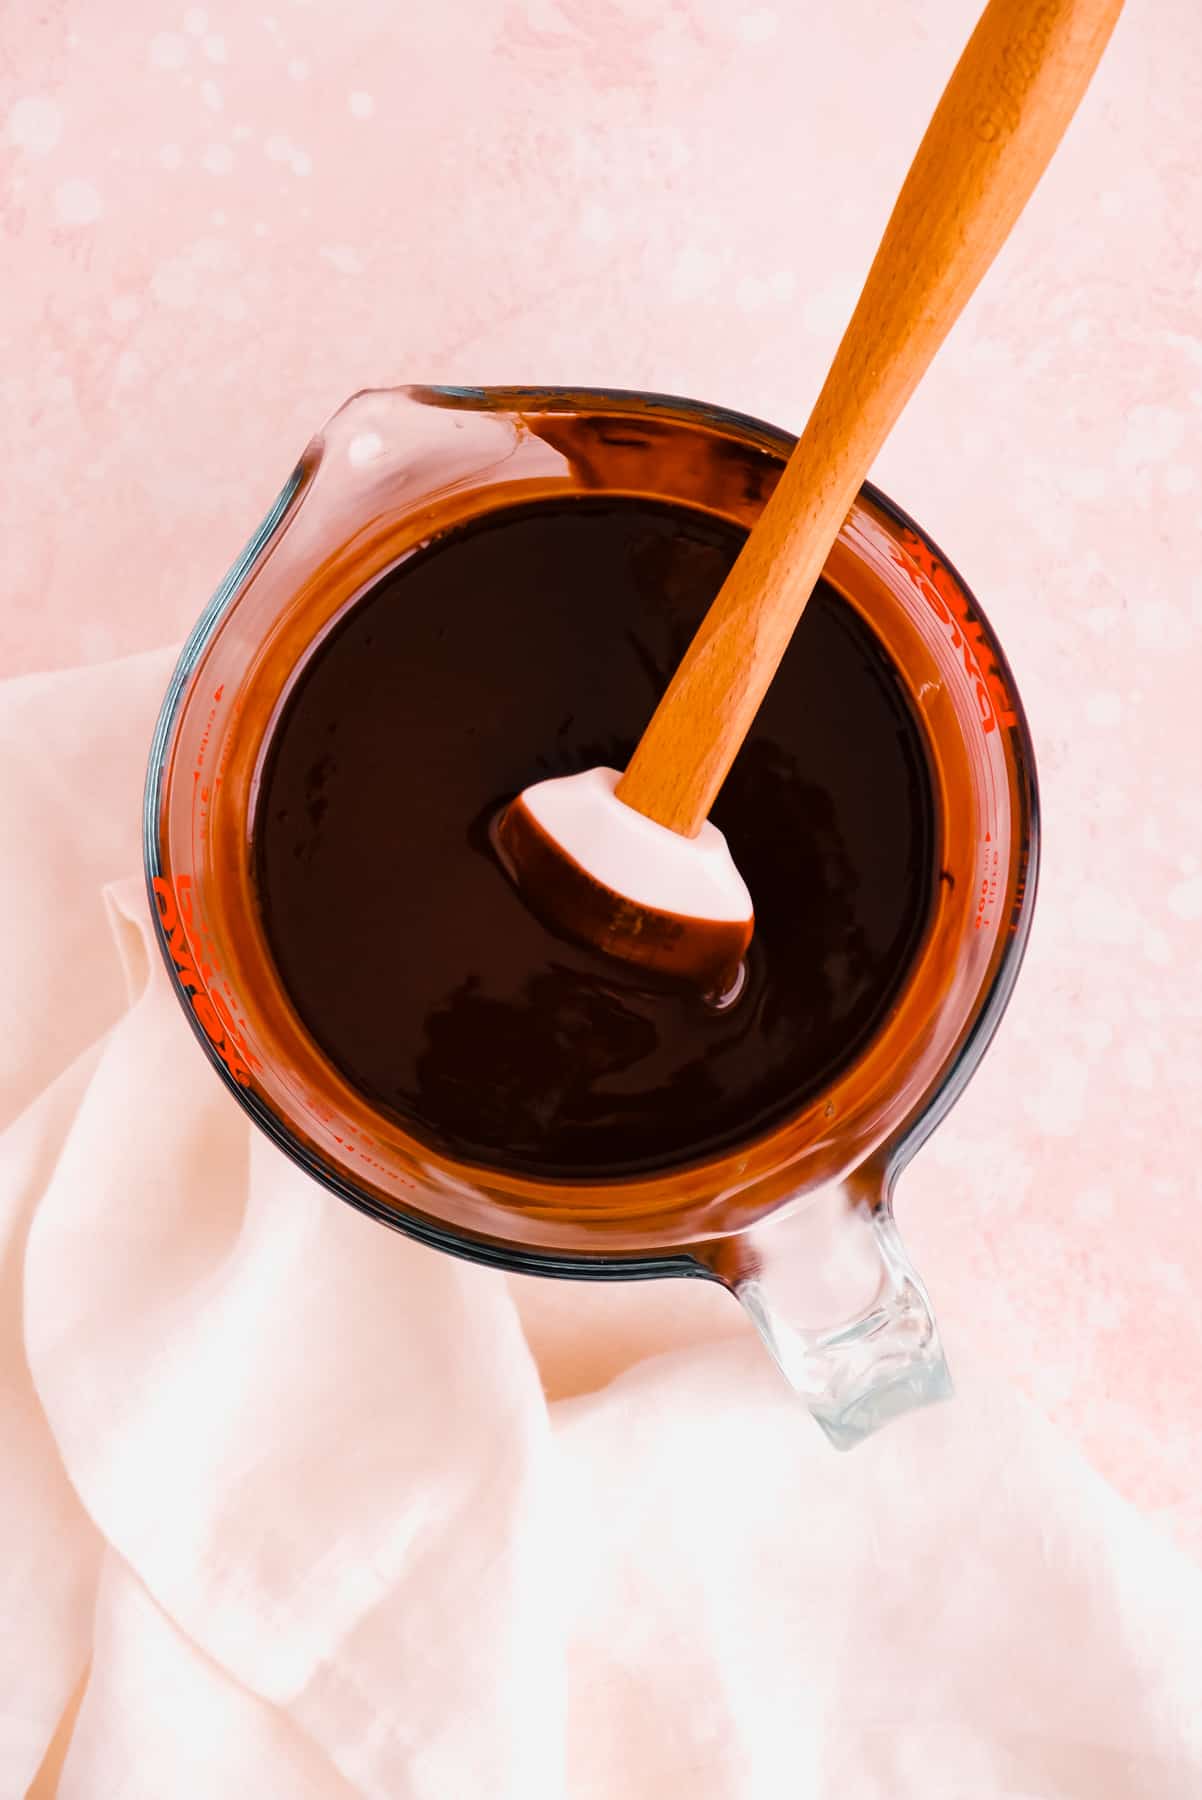
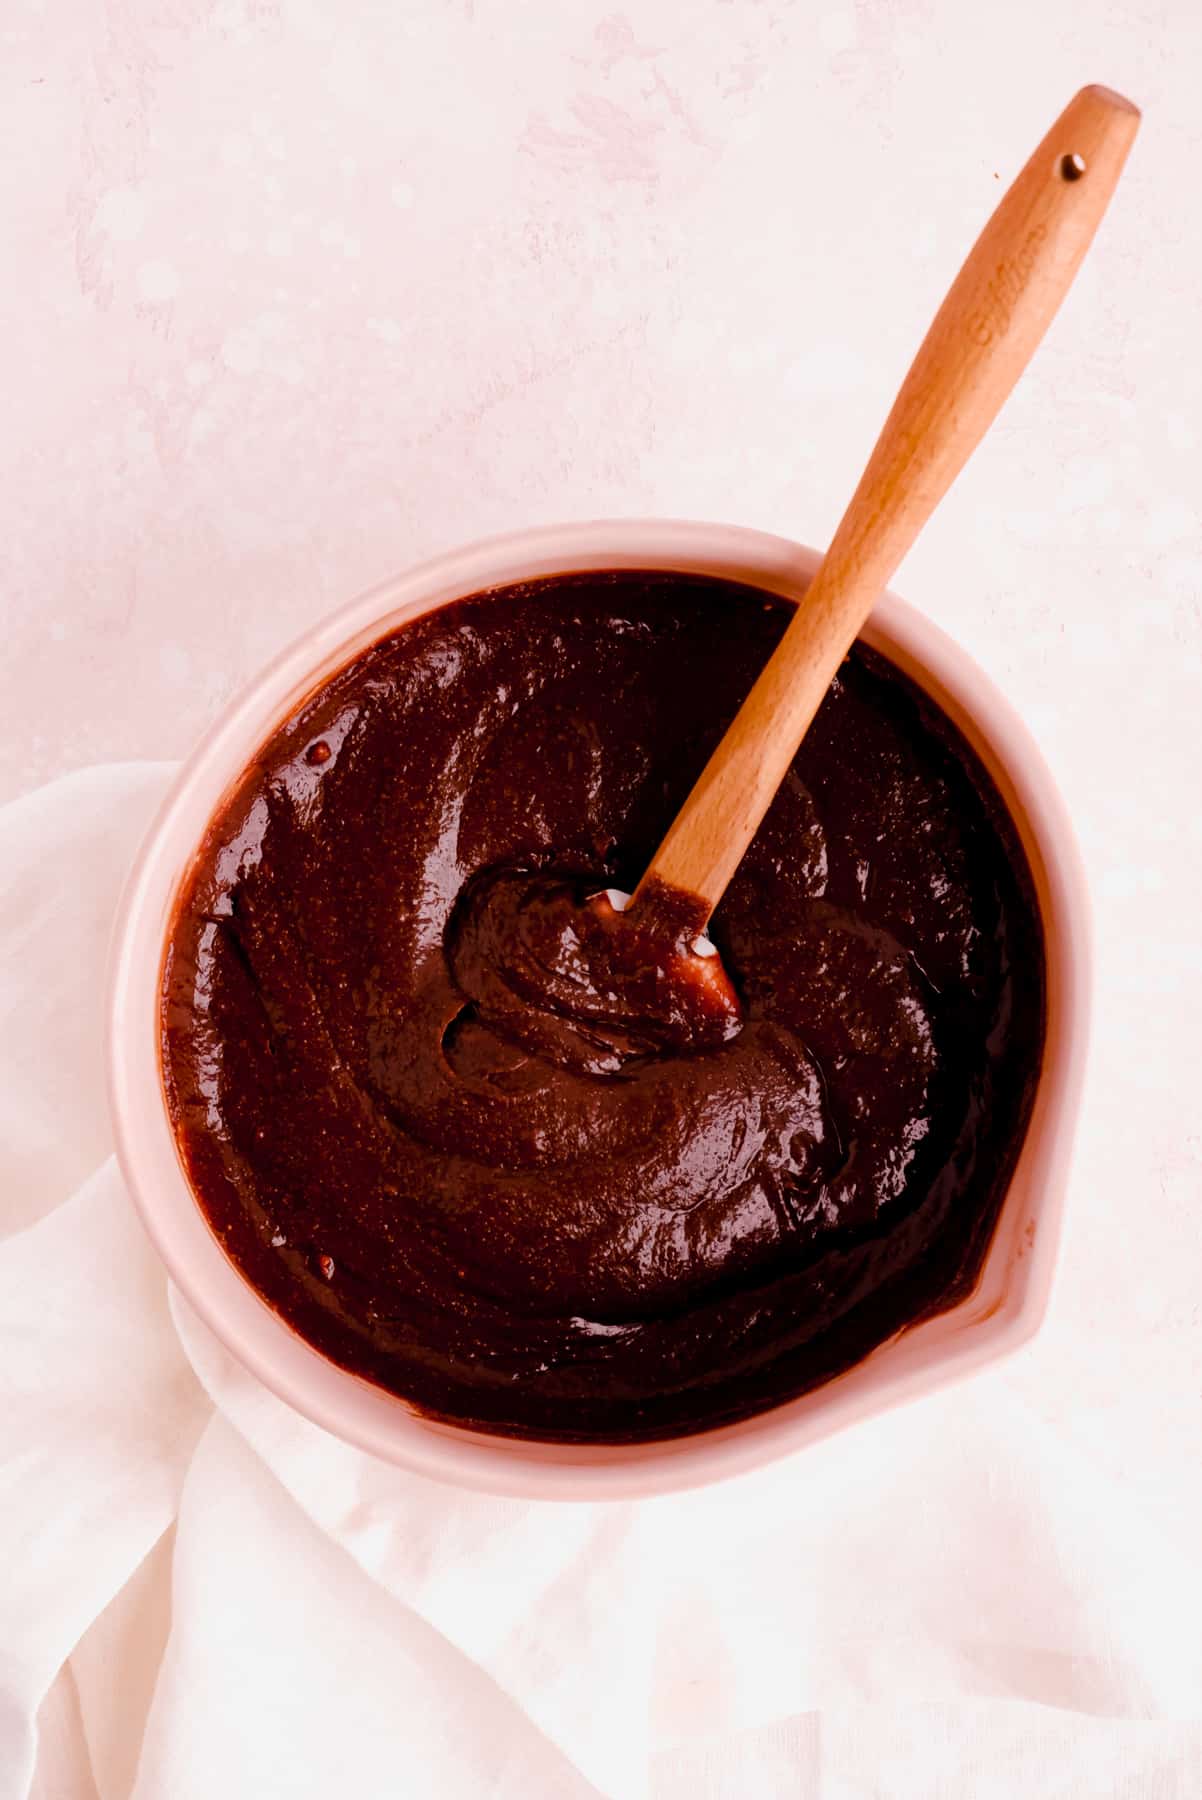
- Preheat, and melt chocolate: Preheat oven to 350°F. Over a double boiler or in the microwave, melt butter and dark chocolate chips together, mixing until fully combined, shiny, and smooth.**
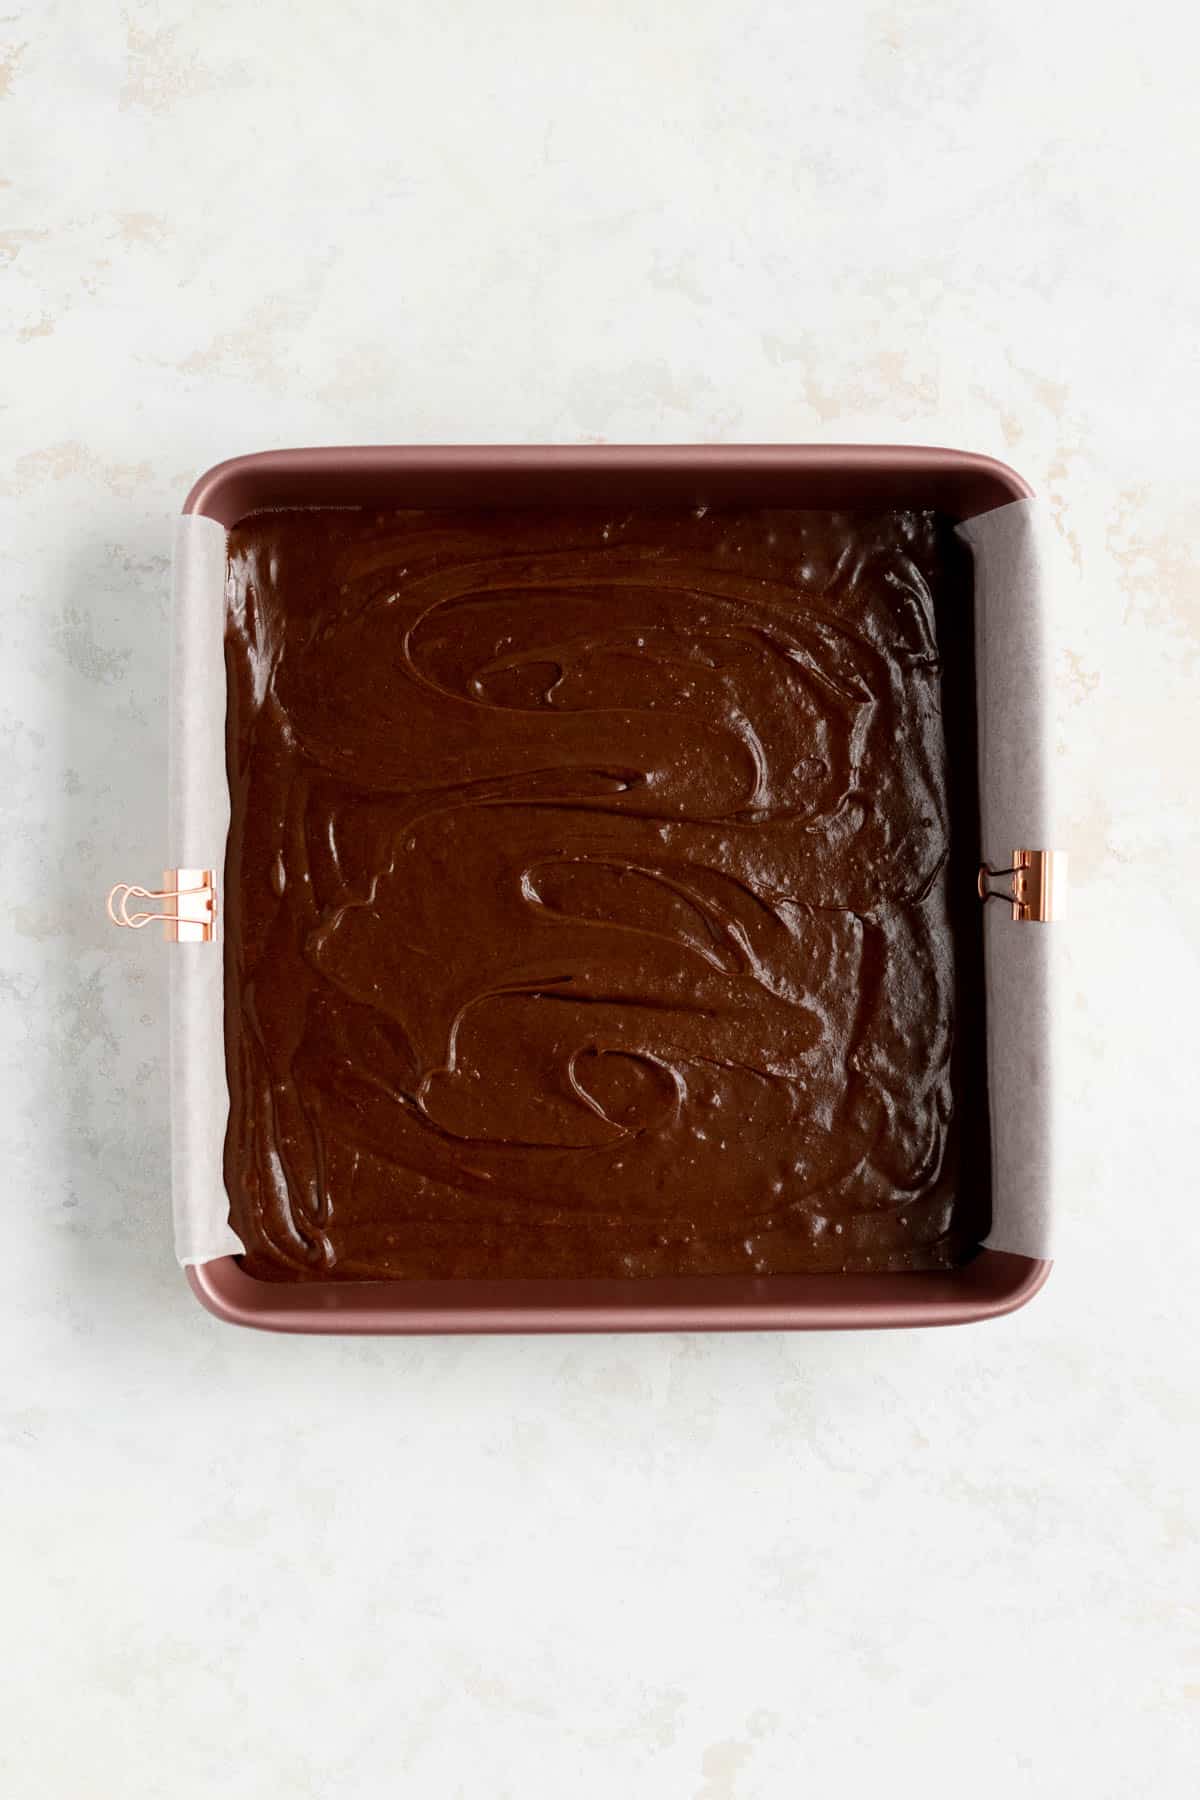
- Prep and cool chocolate: Let chocolate cool for 5-10 minutes. While chocolate cools, line an 8” square pan with parchment paper, leaving a 1" overhang on each side, and lightly grease with baking spray.
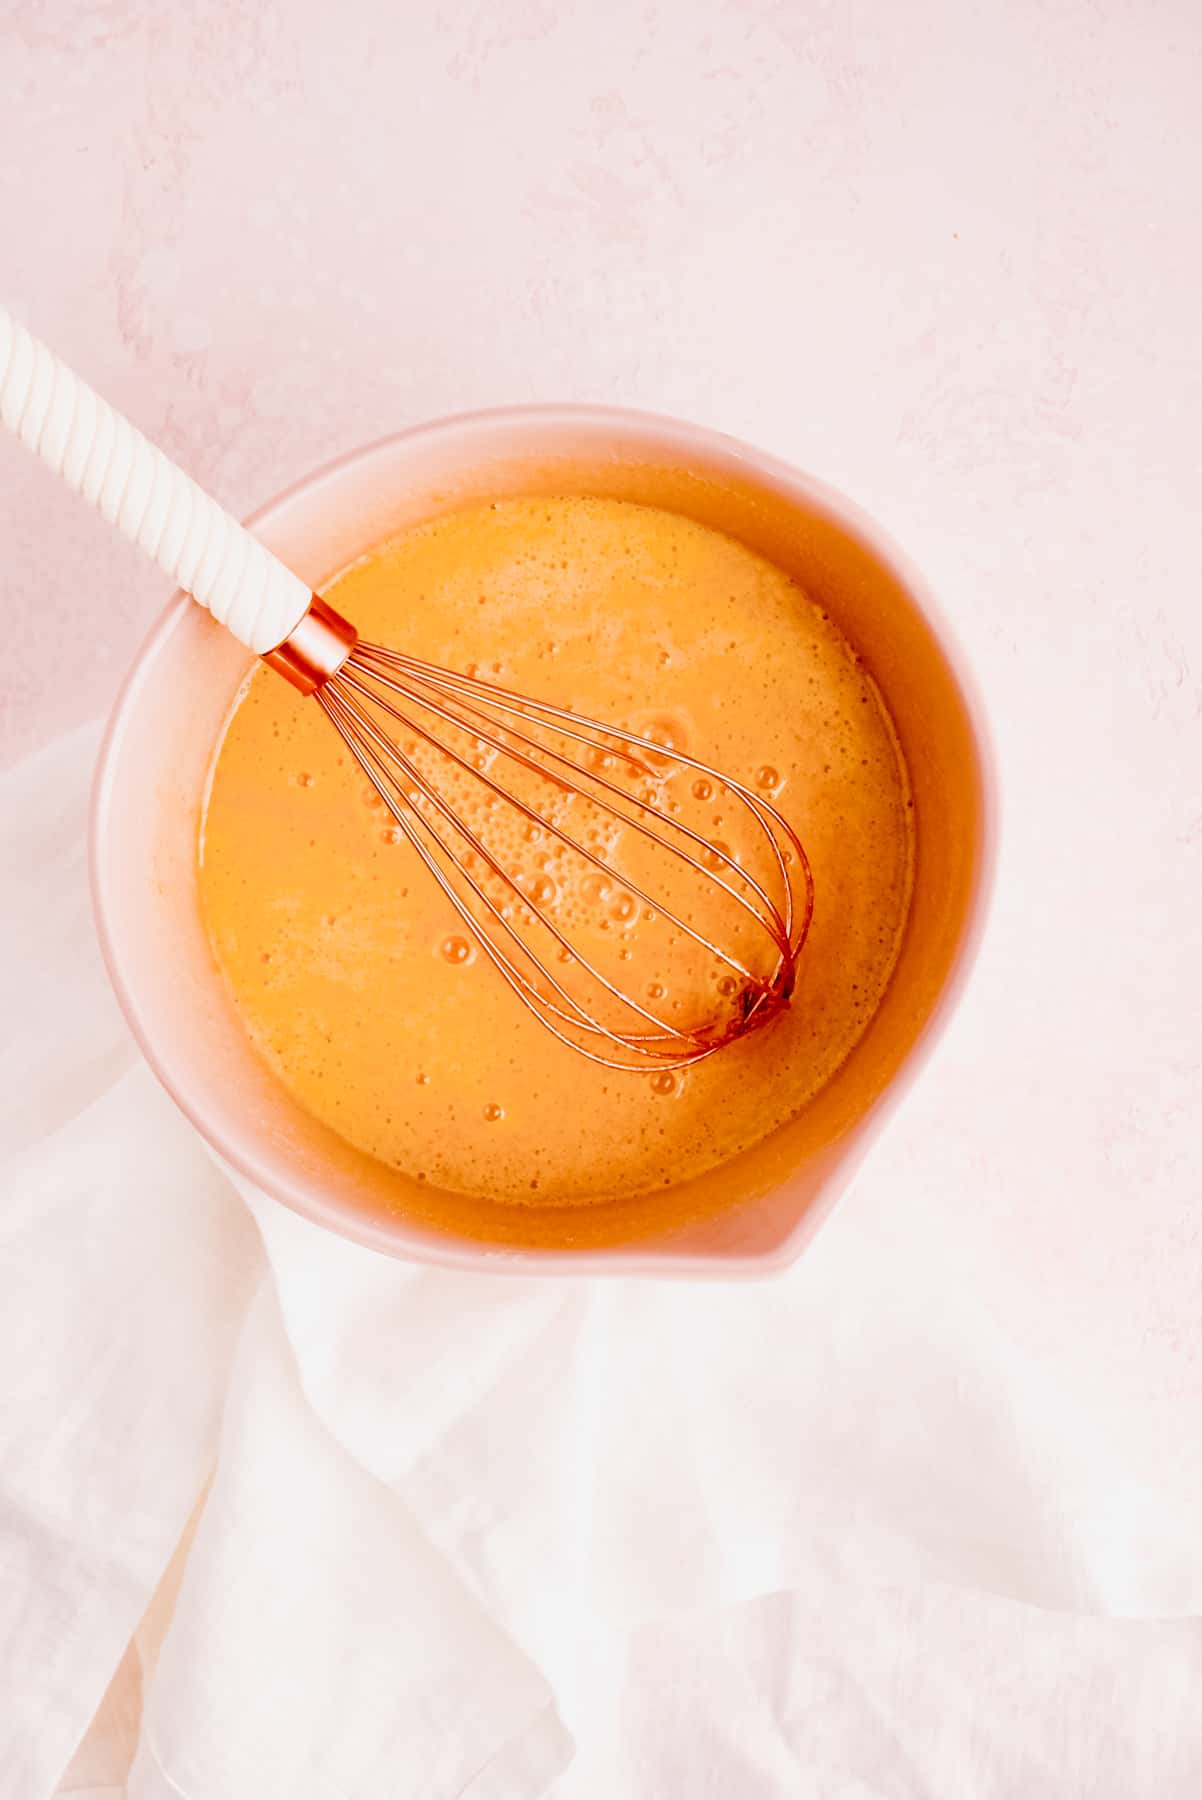
- Combine ingredients: whisk together sugar, salt, vanilla, and eggs until smooth.
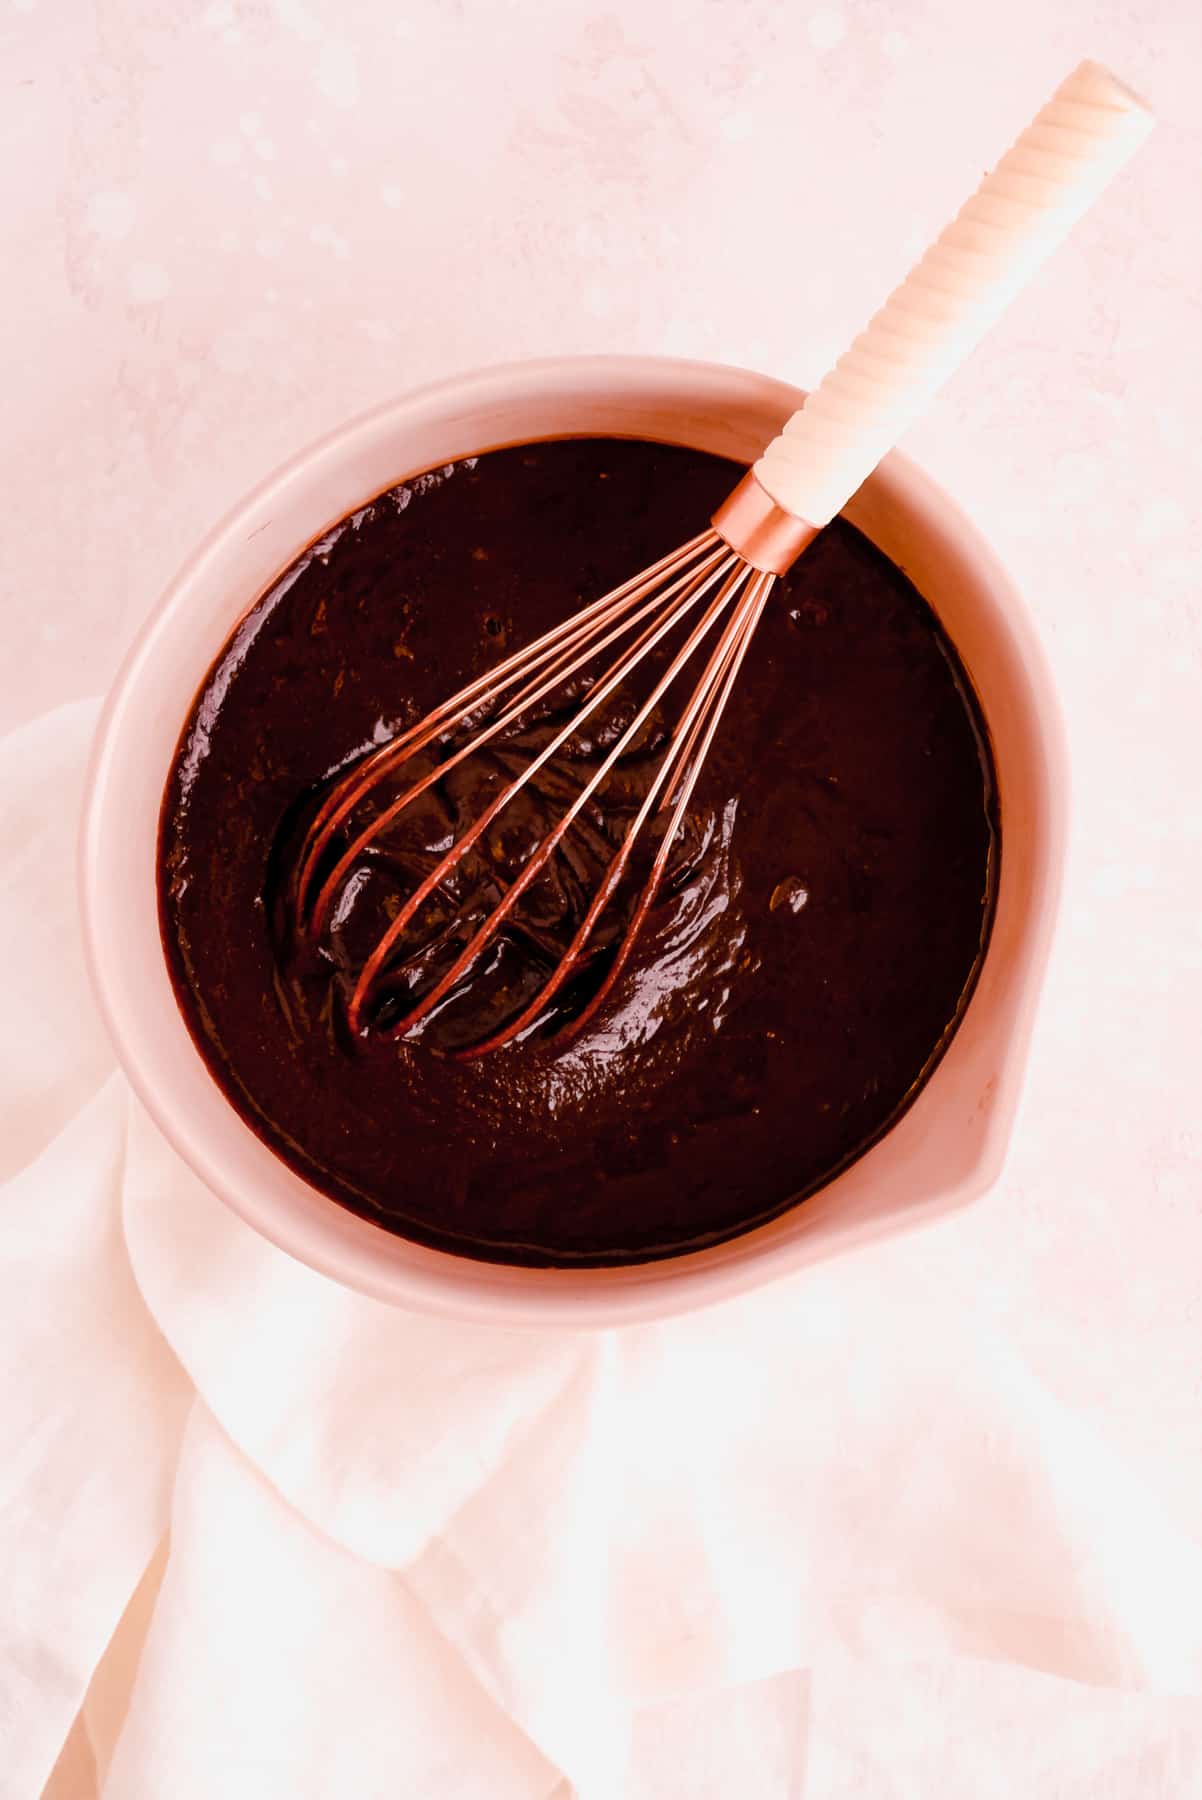
- Add chocolate: add melted and cooled chocolate mixture to the wet ingredients and mix until fully combined.
- Add flour: mix in the flour just until fully incorporated.
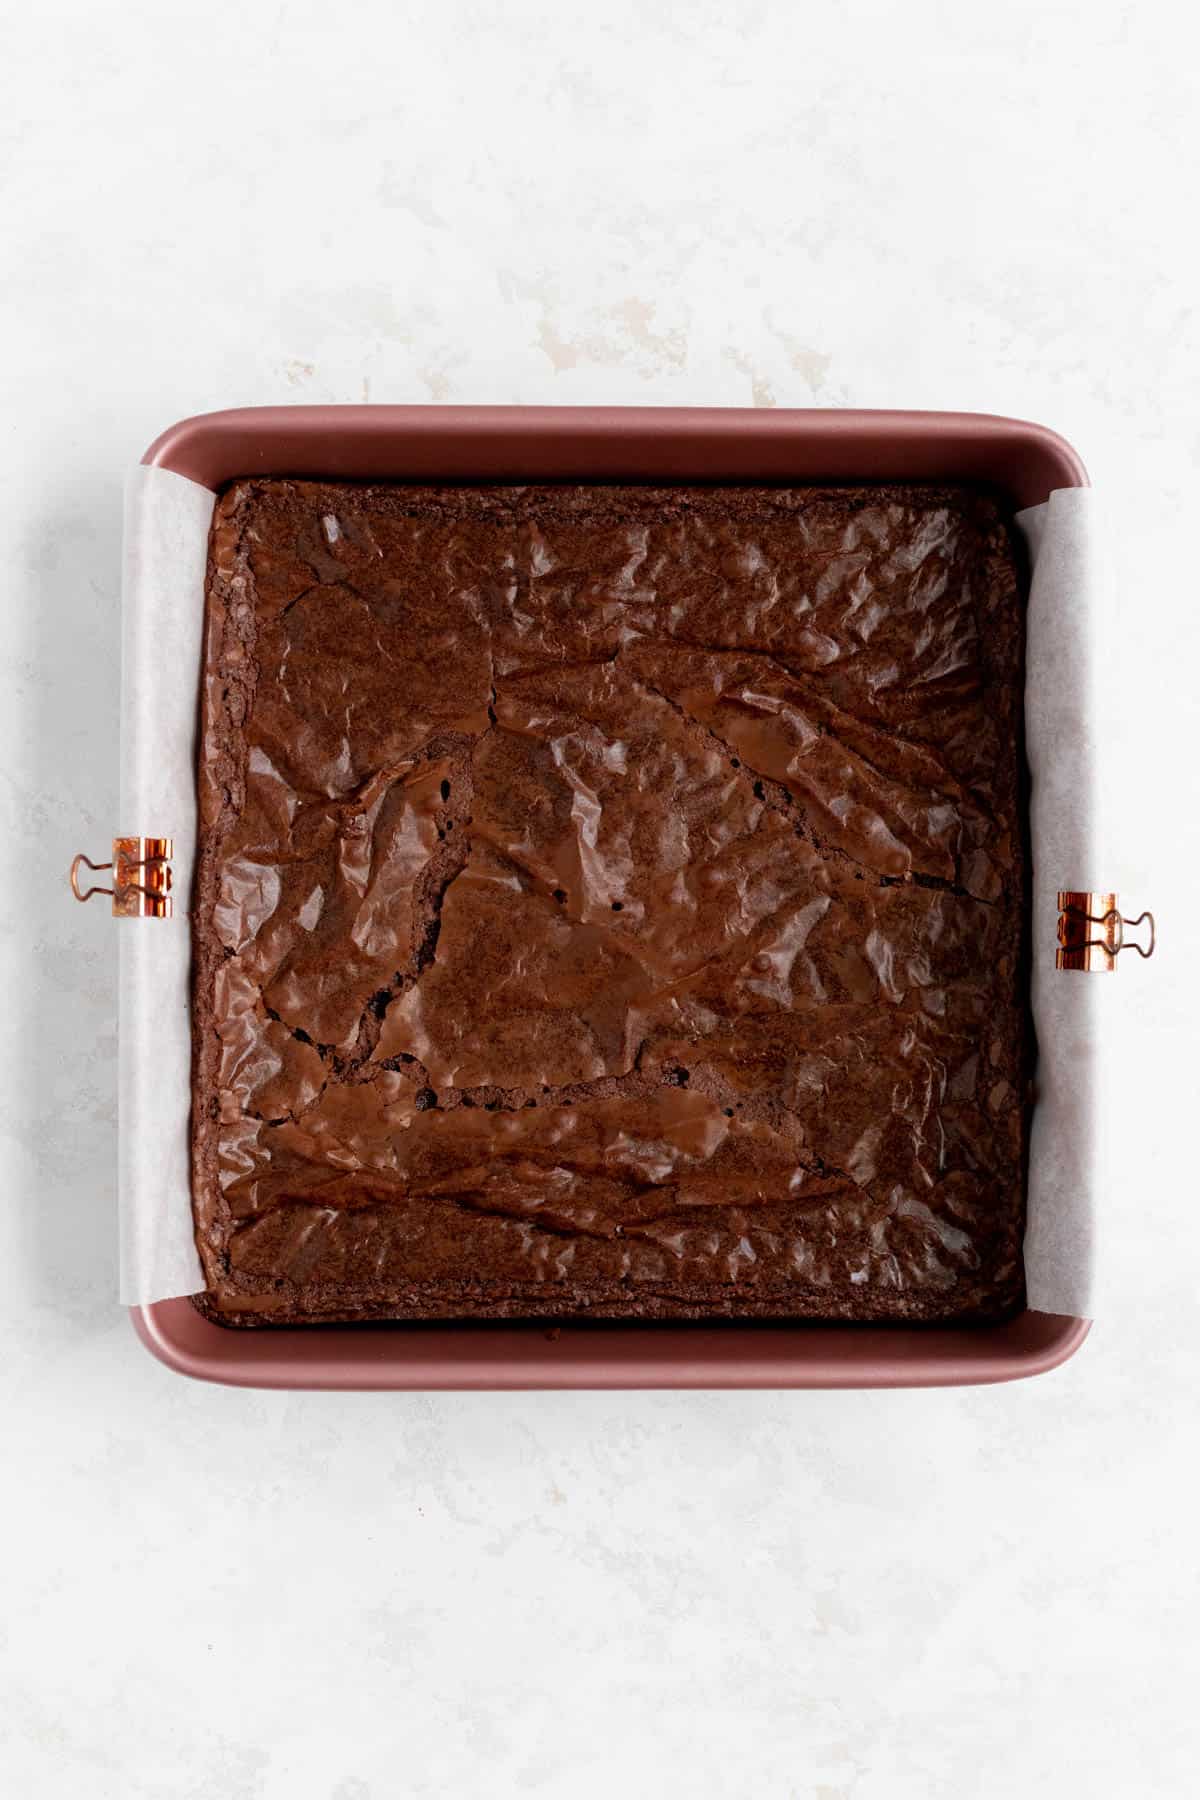
- Pour and bake: pour batter into prepared pan and use a spatula to spread evenly. Bake for 35-38 minutes, until the surface of the brownies looks dry and fully set, and a toothpick inserted into the center comes out clean.
- Cool to room temperature: cool brownies until just slightly warm to the touch or at room temperature, about 1 hour.
TO FORM THE TRUFFLES:
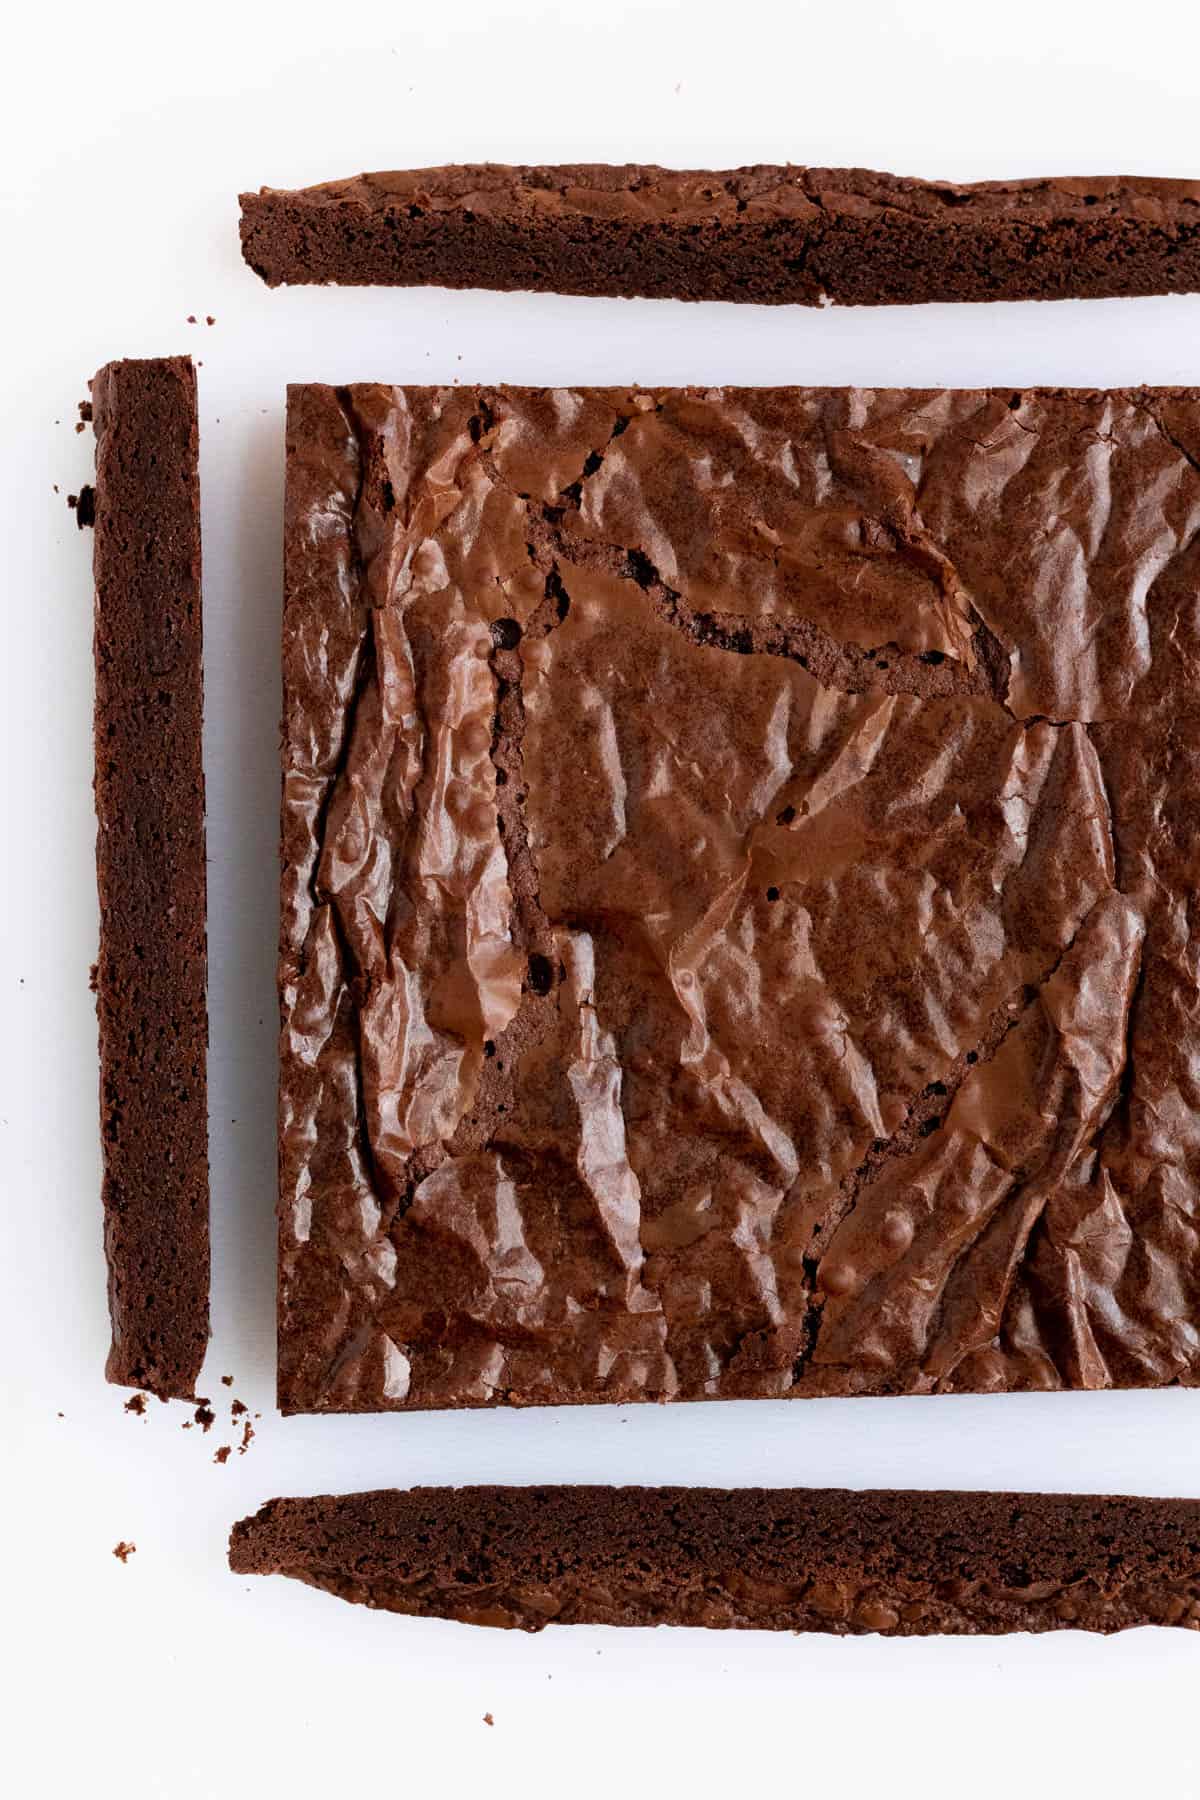
- Un-pan and trim brownies: loosen cooled brownies from the sides of the pan. Remove the full batch from the pan using the parchment paper overhang and place on a cutting board. Trim ¼"-strip off each edge (these crispy pieces don't work well in truffle filling, so just enjoy them as a chef's treat or save for topping your ice cream!).
- Cut and crumble: Roughly cut brownies into ½" pieces, then transfer into a medium-sized bowl. By hand or with a fork, break up the brownie chunks into smaller crumbs, making sure no big pieces remain.
- Form truffles: using an ice cream scoop or spoon, squeeze together some of the crumbs into 1.5” dough balls, using your hands to compact and round each ball as much as possible. Place formed truffles on a parchment-lined baking sheet.
TO COAT THE TRUFFLES:
- Melt coating chocolate: use a double boiler or microwave to fully melt the chocolate chips, chopped chocolate, or candy melts.**
- Dip truffles: working with one truffle at a time, drop each truffle into the melted chocolate and toss around the bowl using two forks until fully coated. Use a fork to scoop the brownie ball out of the melted chocolate and gently shake it over the bowl to allow any excess chocolate to drip off.
- Decorate and set: decorate as desired (see details below). Let truffles dry and fully set for a few hours, then remove from the baking sheet. Break any excess pooled chocolate off the bottoms, then share and enjoy!
TO DECORATE THE TRUFFLES:
- With a chocolate drizzle: place the coated truffle carefully on the lined baking sheet to set. Repeat dipping process until all truffles have been dipped and are drying on the baking sheet. Let truffles dry and fully set for a few hours, then melt your drizzling chocolate and use a fork or a chocolate-filled zip-top bag with a very small hole cut in the corner to drizzle the tops of the truffles. Allow drizzle to fully set before serving.
- With sprinkles and candy eyes: immediately after dipping roll coated truffle in a bowl of chocolate sprinkles before setting it on the lined baking tray. To apply the candy eyes, simply add a dab of melted chocolate to the back of each eye (a toothpick works well here!) and press onto the sprinkles to adhere. Let truffles dry and fully set for a few hours, then remove from the baking sheet. Allow chocolate to fully set before serving.
- With candy cane pieces or sprinkles: as you're dipping the truffles in their coating chocolate, stop every 5 truffles or so to sprinkle on candy cane pieces or nonpareils. Allow chocolate to fully set before serving.
- With cocoa or powdered sugar: roll the fully set chocolate-coated truffles in a bowl of cocoa powder or powdered sugar for a rustic finish, then knock them around in a sifter over the bowl to remove any excess.
Test Kitchen Tips
- *Gluten-Free Truffles: If you'd like to make these tasty truffles gluten-free, you can use gluten-free oat flour in place of the all-purpose flour in a 1:1 swap!
- **Melting Chocolate: If using the microwave to melt your chocolate, set it to 50% or lower power and heat for 30-second intervals, stirring well between each round to prevent the chocolate from burning.
- Chocolate Puddles: If you notice a big puddle forming under your dipped truffle a minute or two after you place it on the baking sheet, you can simply pick it up using the fork or even roll it over slightly out of the puddle so you don’t have a big chunk on the bottom of your truffle when the chocolate sets.
- Double Batch: if you'd like a yield of 30 instead of 15 truffles, you can mix up a double batch of brownies and bake them in a 9" x 13" pan for about 40 minutes (just check for a toothpick to come out of the center clean). Then you can melt down 2 ½ cups of chocolate for coating and continue on with the recipe as directed.
Comments
No Comments