


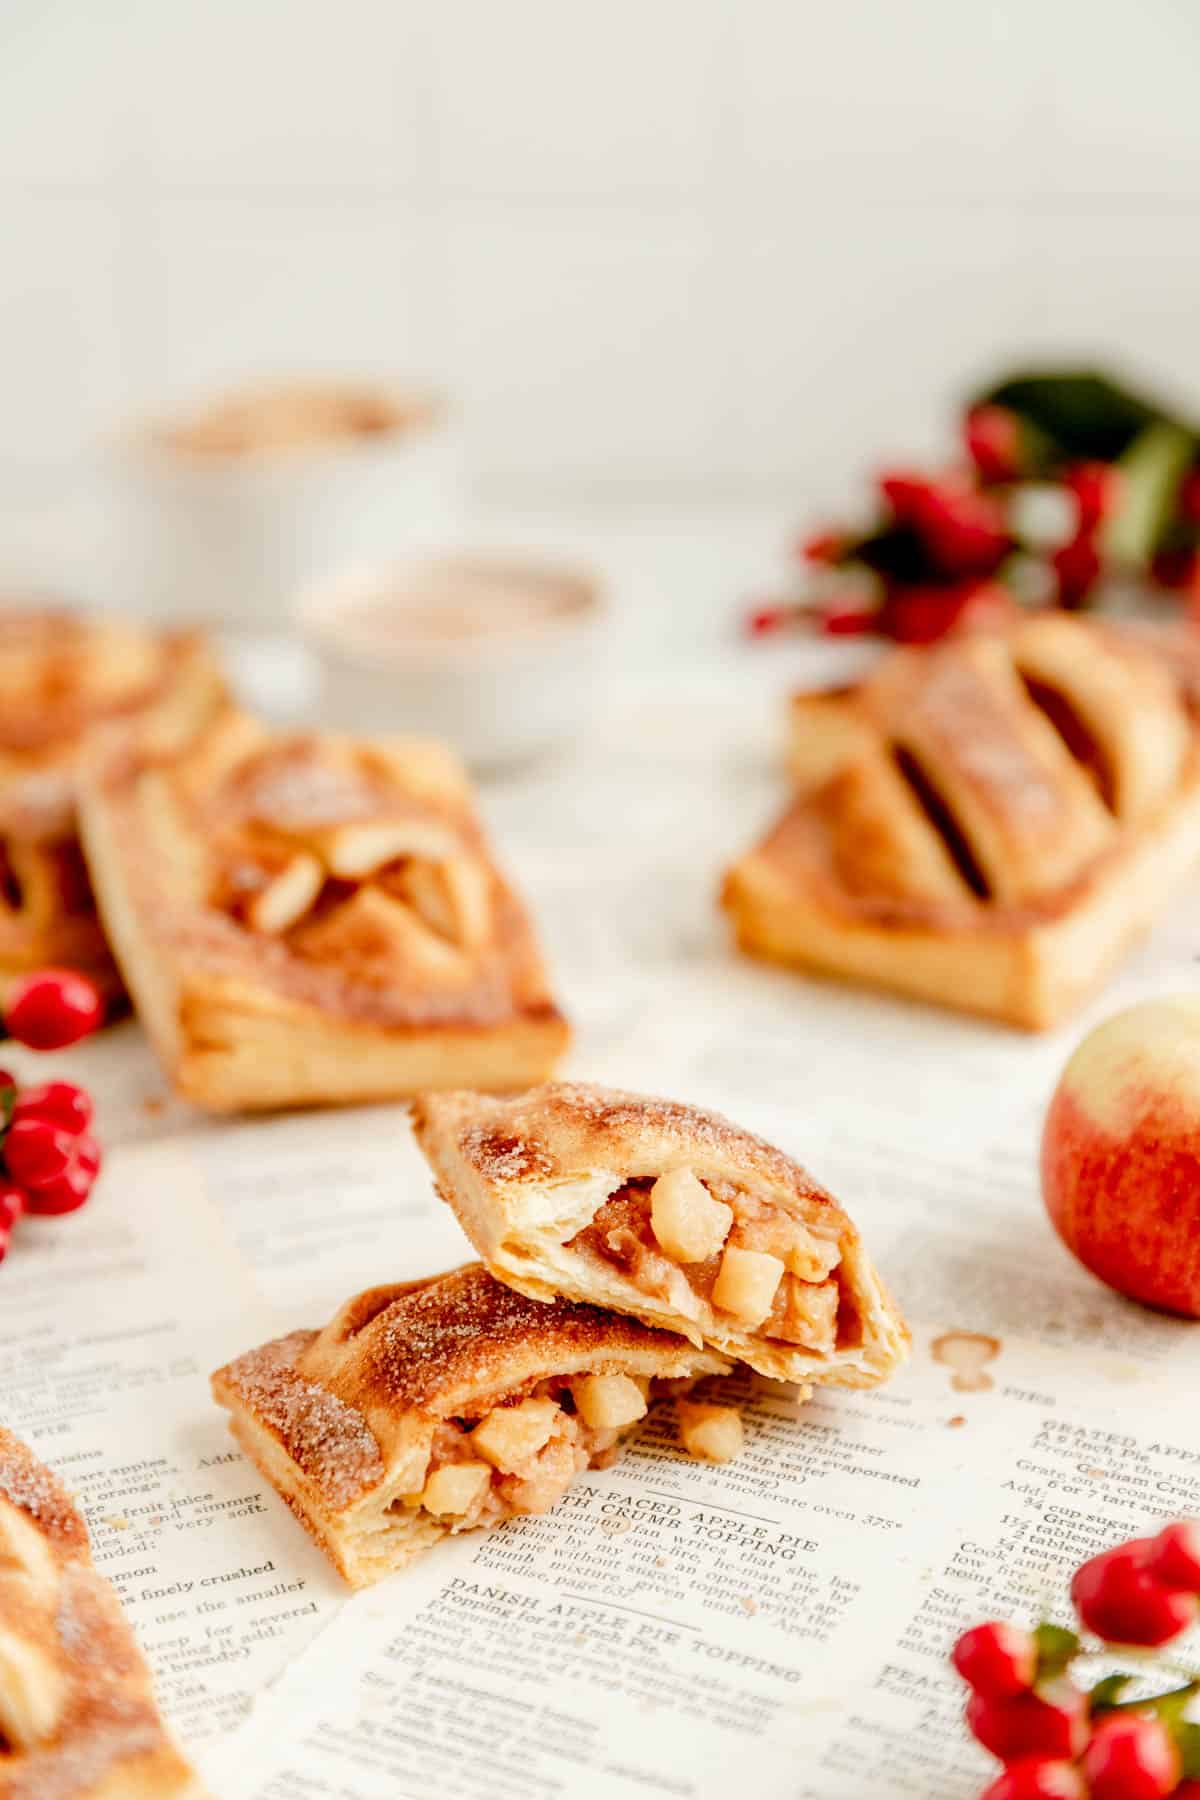
The only thing better than a slice of classic apple pie, is a flaky, cinnamon apple pie pocket you can grab and munch with your hands (because handheld treats are always more fun!). Starting with a delicious all-butter crust without shortening and finished with an extra flavor burst from the cinnamon streusel hiding inside, these hand pies are on a whole other level!
Jump to (scroll for more!):
Classic apple pie...in a cuter package!
If you’ve never had a hand pie, you can just imagine exactly what it sounds like: two layers of beautifully flaky crust filled with a classic fruity pie filling. So, sort of like an apple turnover, but made with pie crust instead of puff pastry.
These mini apple pies are delicious as a classic dessert or even make a yummy breakfast pastry in the morning. They bake up great from frozen as well if you’d like to prep them for a delicious homemade treat right out of the freezer when you have guests at your home for the holidays, or any time of year!
Why This Recipe Leads to Sweet Success
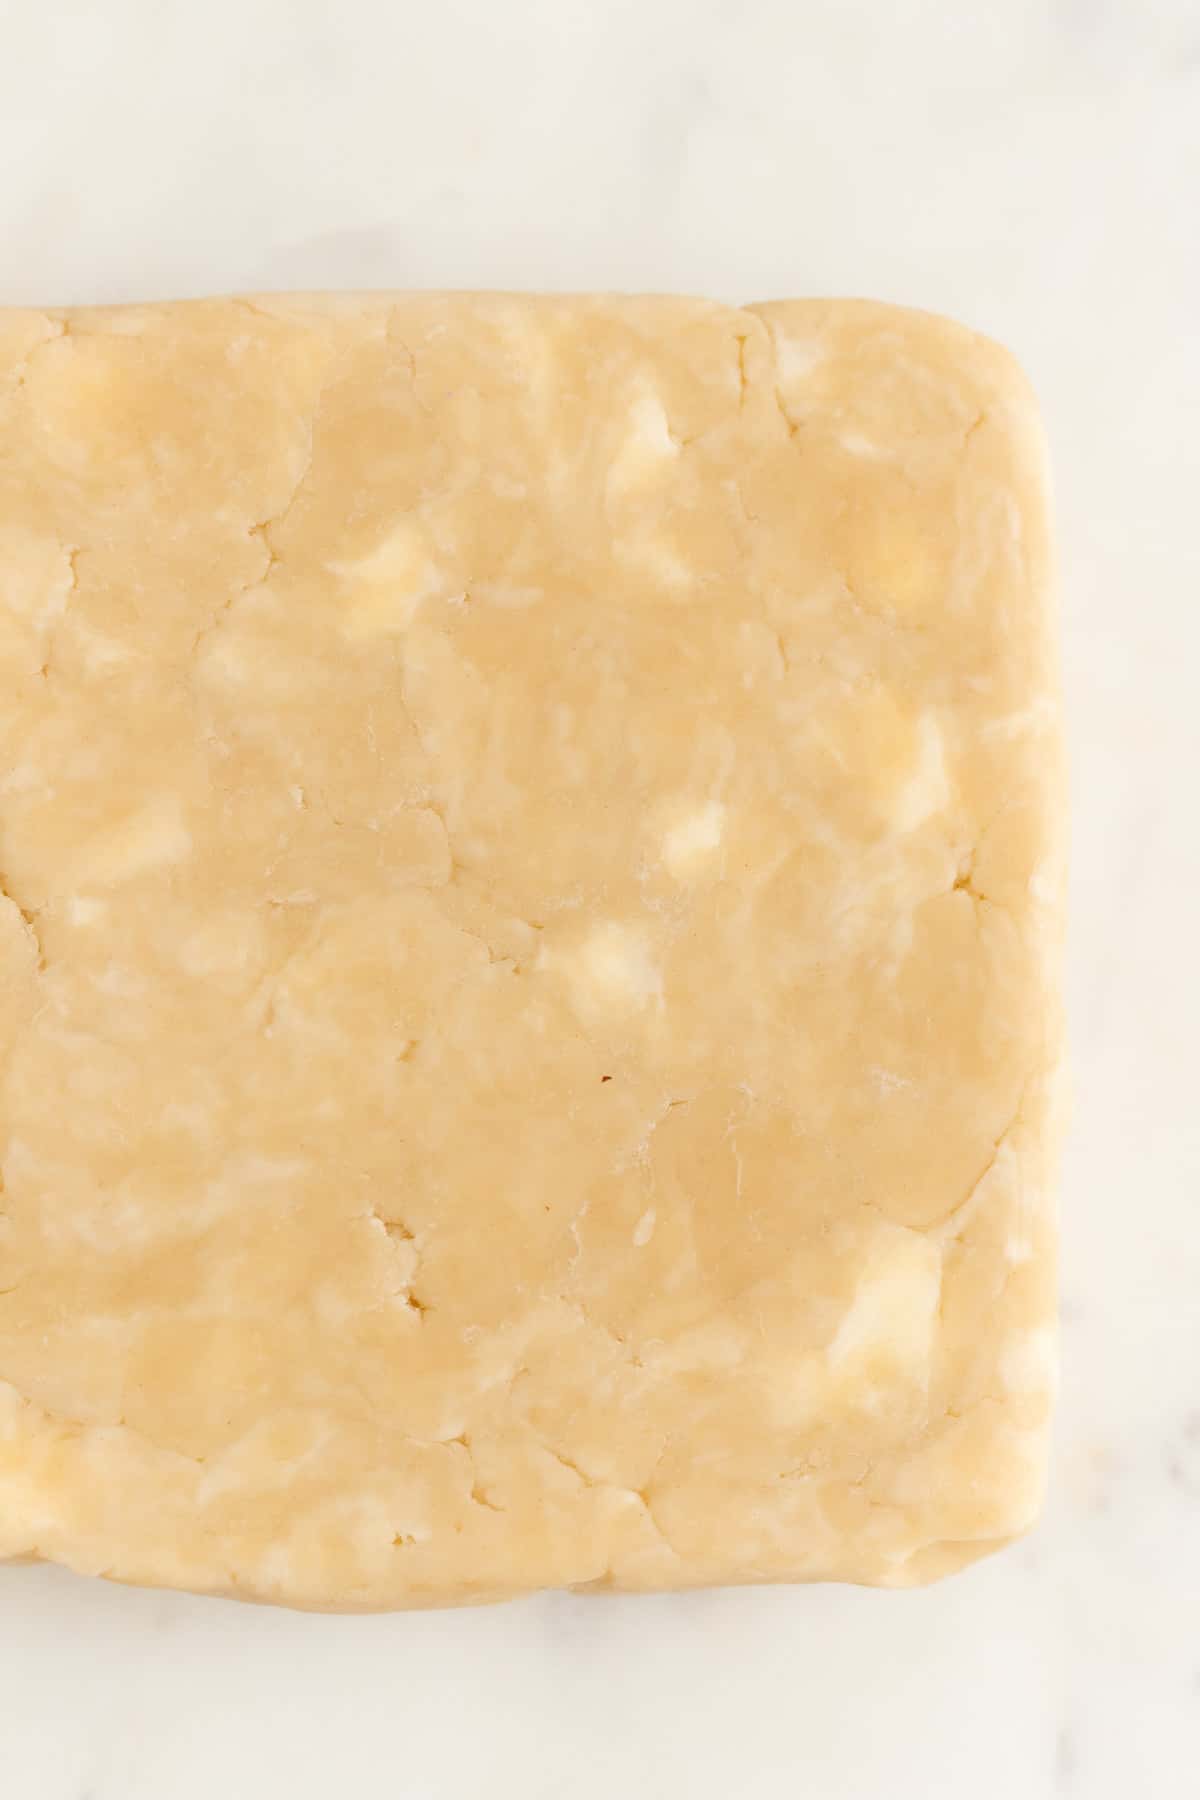
- All-butter + no shortening = super flaky: this recipe uses my classic all-butter pie dough which could not be easier and could not be flakier. It also makes delicious Pie Crust Cookies which I highly recommend making with your leftover pie crust!
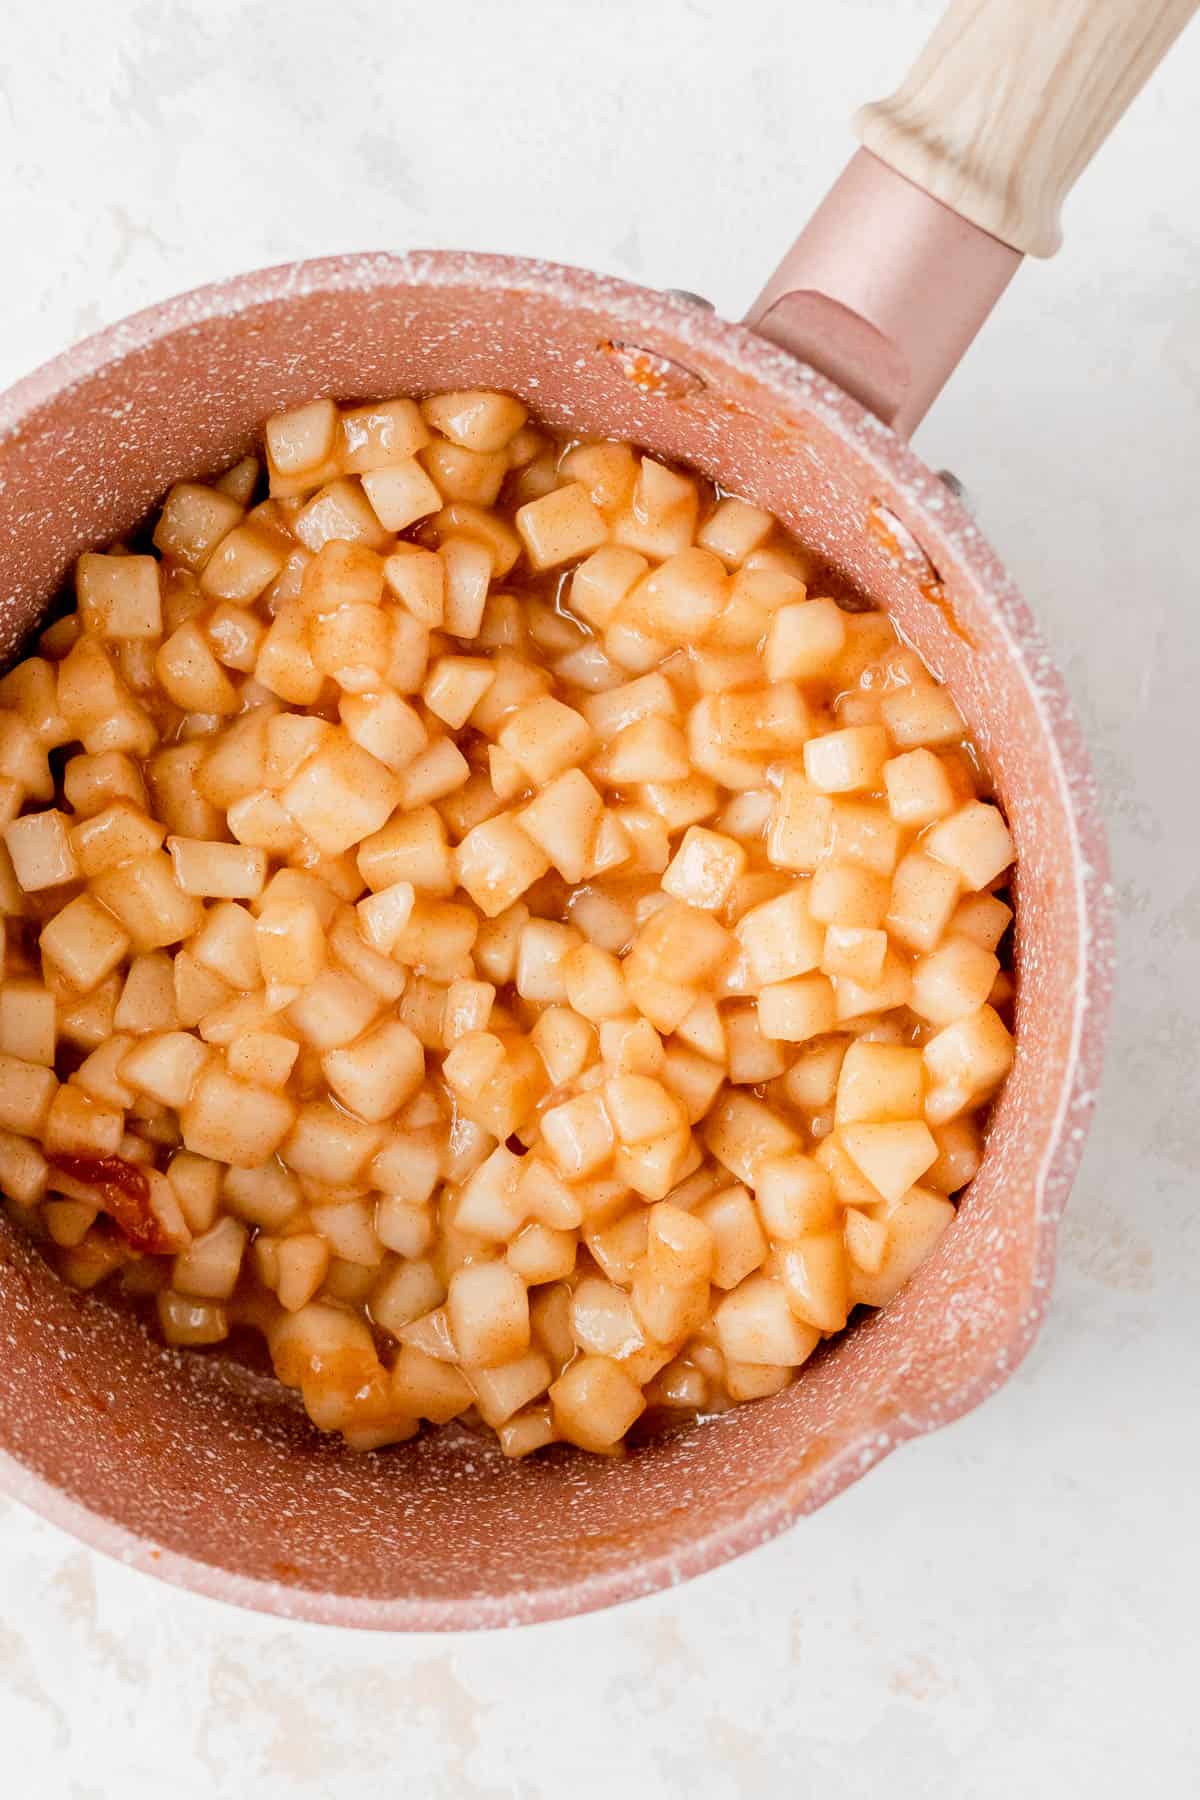
- Pre-cooking the apples: we’re pre-cooking the apples in this filling. This will give us a nice crispy crust that doesn’t get soggy from the apple juice released during the bake.
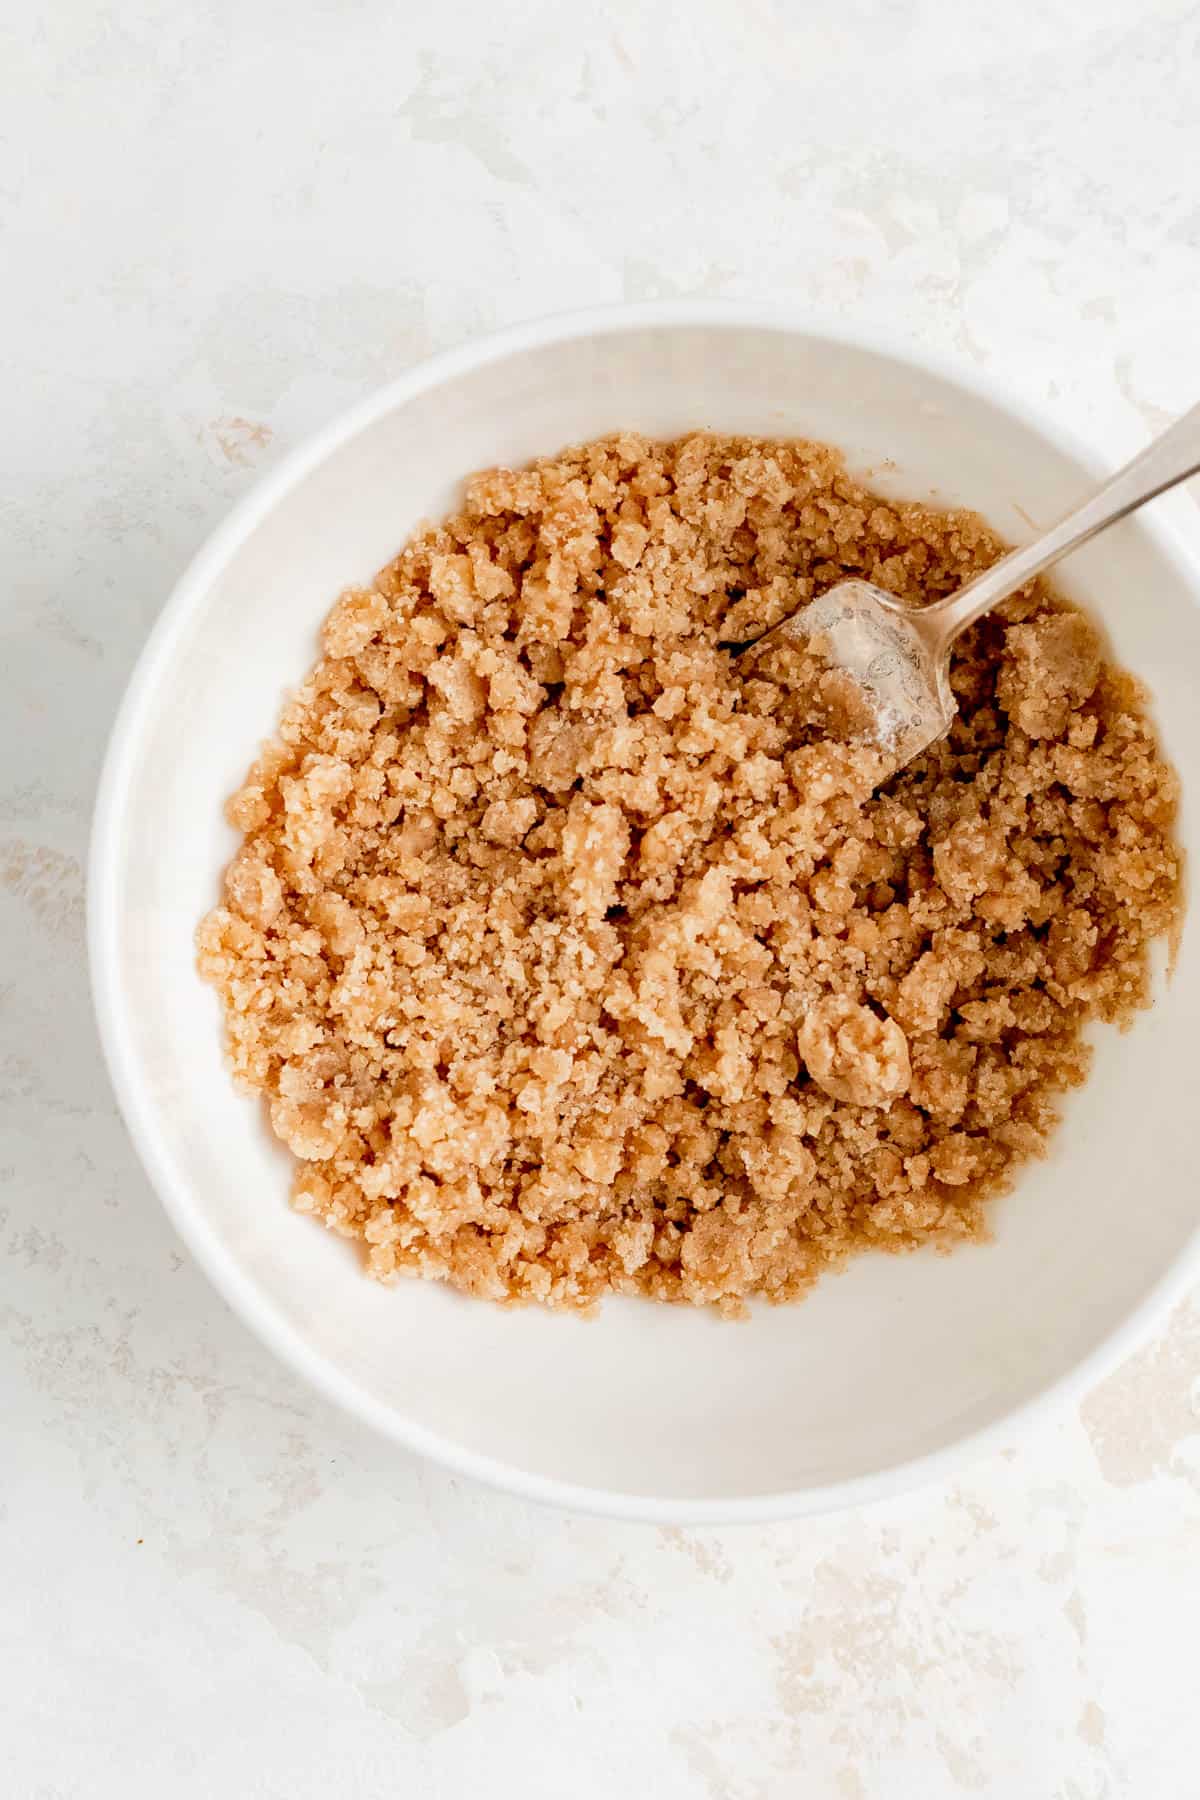
- Streusel soaks up excess liquid: the streusel serves two very important functions here. Firstly, it’ll help to soak up any extra juice released during the bake, to ensure we get a nice crisp crust. And secondly, it adds a great extra flavor to our filling that’ll take these little hand pies to the next level.
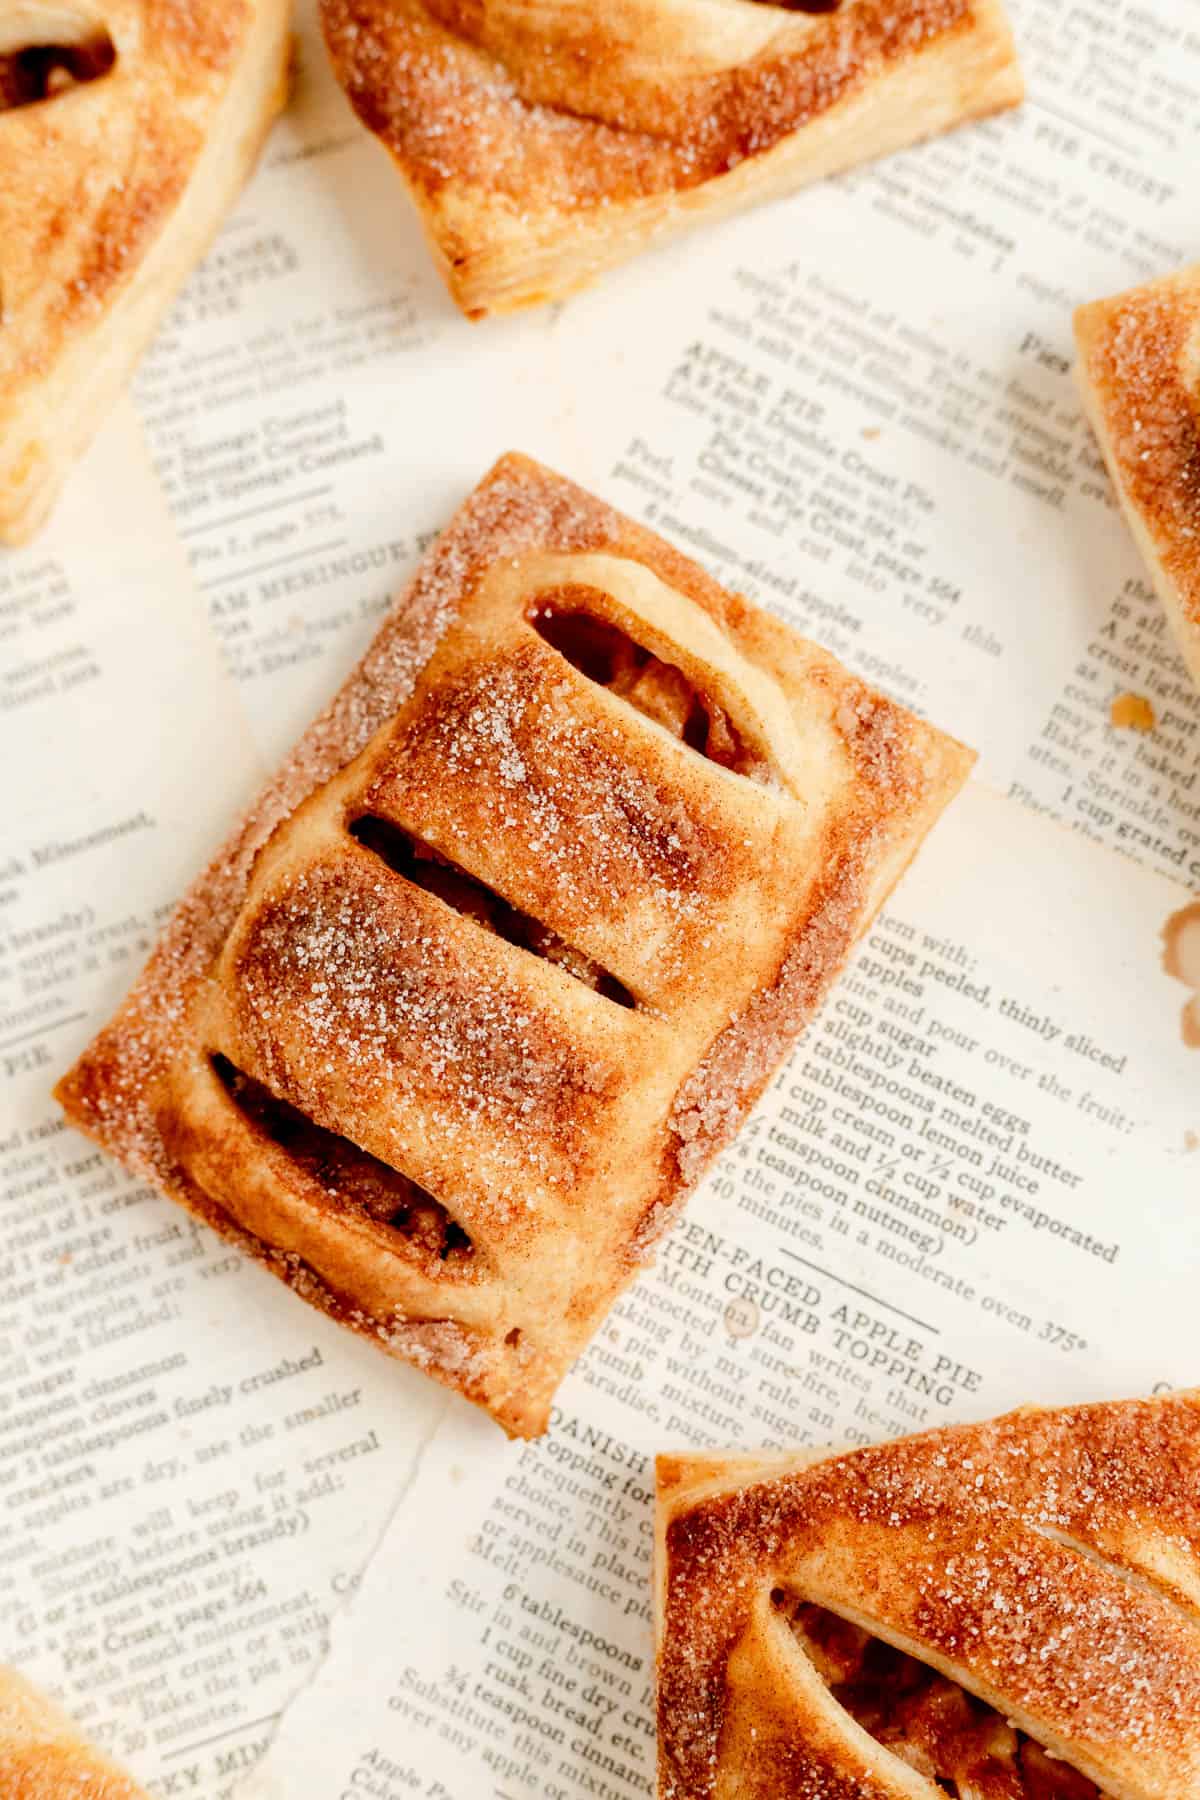
- Shape to your liking: I decided to make these guys rectangular, about the size of a pop tart as they’re easier to assemble at that size. If you’d like though, you’re welcome to make them in triangles, or rounds, or whatever shape you prefer! If you want to theme around a holiday or season, you could always cut out shapes like leaves or acorns with mini cookie cutters, and then attach them to the top of your vented pie pockets with a little water before finishing with cinnamon and sugar.
- No egg wash needed: I’ll be honest with you – I’ve never been a big fan of an egg wash finish on pies. There’s something about that shiny surface that makes them seem less homemade to me. But we still want to have a pretty finish, right? Enter cinnamon and sugar! Not only do you not have to bother with a gloppy, no-fun egg wash, but this finish brings extra flavor and crunch in addition to a pretty look!
Ingredient Tips to Bake it Better
(Pssst…if you're ready to just get baking, get all the details in the recipe card below!)
- Butter: butter is the star of the show here, so make sure you’re using a high-quality brand. It should be unsalted too so you don’t end up with an overly salty crust. You’ll also want it to be really cold before adding it to the mixer to ensure you have some large pieces even after mixing. Those pieces will help make your crust extra flaky!
- Flour: the strength of your flour is the primary ingredient that will determine the texture of your pie crust. I always bake with King Arthur All-Purpose Flour as that has a specific protein content of 11.7%. Other all-purpose flours will work, but many brand have a less predictable protein level. Because of this, you may find that your dough is a little tougher or a little softer if your protein level is higher or lower than that 11.7%.
- Apples: the type of apple you use isn’t too important here as it’s okay if they break down. So I’d use whatever apple you enjoy the flavor of the most, leaning a little on the tart side to balance the sweetness in the filling. I like Braeburn and Honeycrisp apples, but you can even make these pie pockets with pears, or a combination of apples and pears!
- Cinnamon: because there’s a lot of cinnamon in this recipe, I like to use a sweeter, more-mild cassia cinnamon, as opposed to a Vietnamese cinnamon which has a bit of heat to it, sort of like Red Hots candy. If you like that heat though, feel free to use that spicier cinnamon in the cinnamon and sugar topping for an extra little kick.

How to Make These Hand Pies From Scratch
(Pssst…if you're ready to just get baking, get all the details in the recipe card below!)
TO MAKE THE CRUST:
- Mix up a beautifully flaky crust (click here to check out our full Pie Dough Recipe Post!)
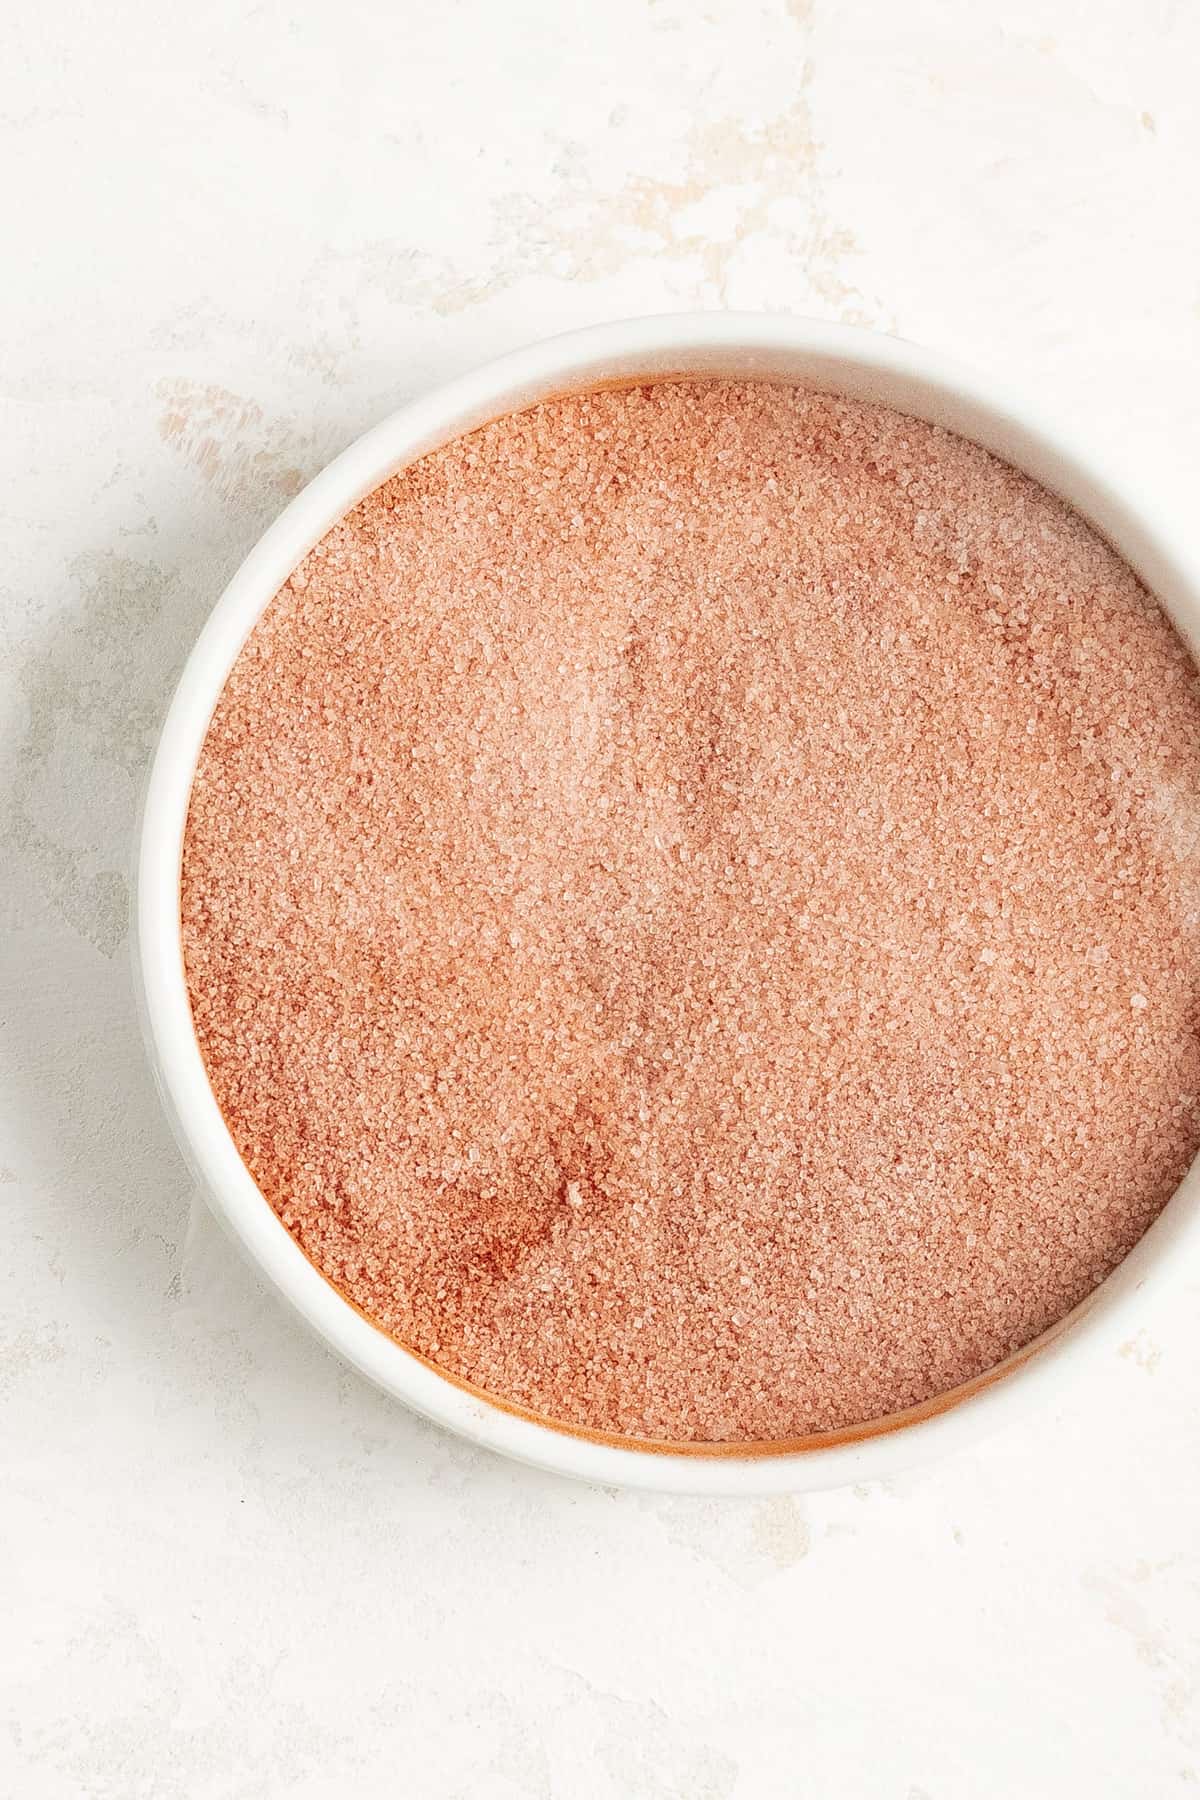
TO MAKE THE CINNAMON AND SUGAR:
- Stir together cinnamon and sugar in a small bowl and set aside.
TO MAKE THE FILLING:
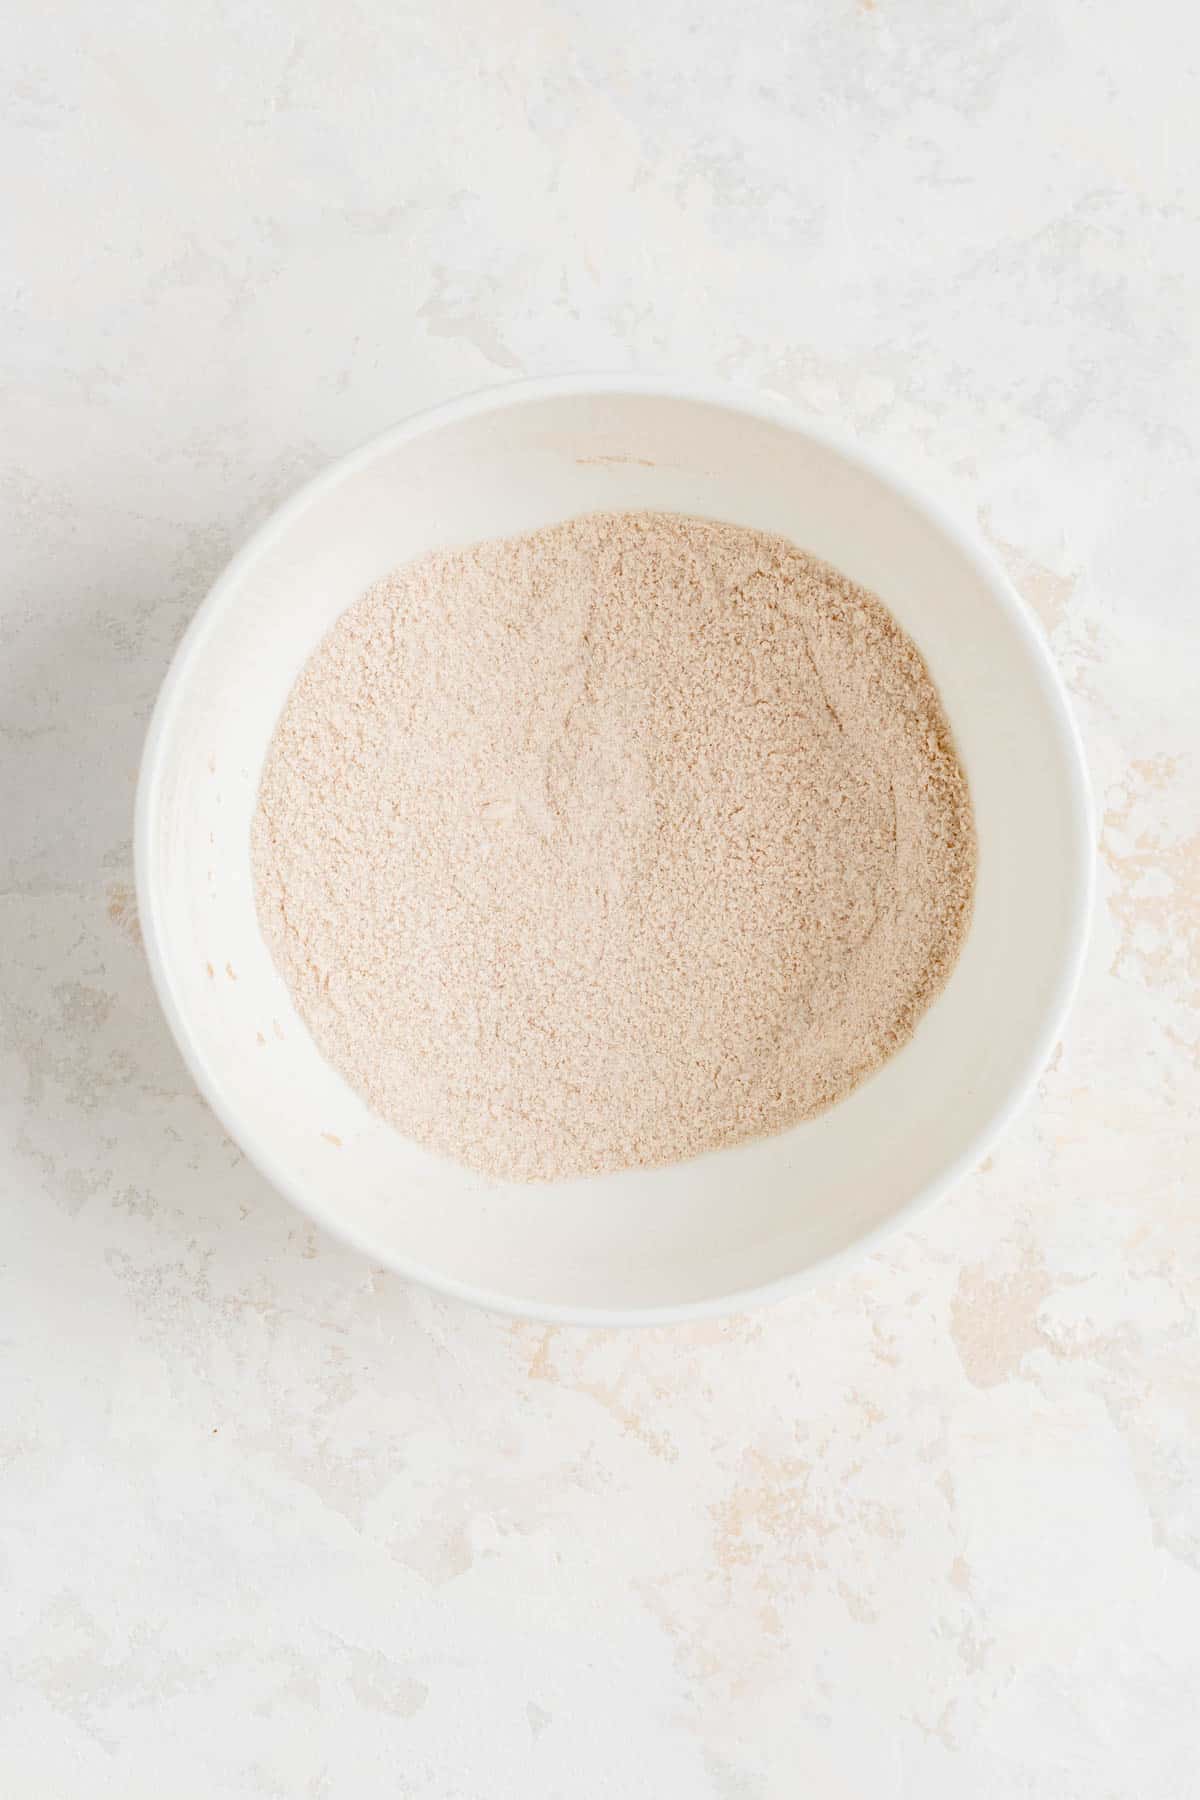
- Stir together all the dry ingredients for the filling.
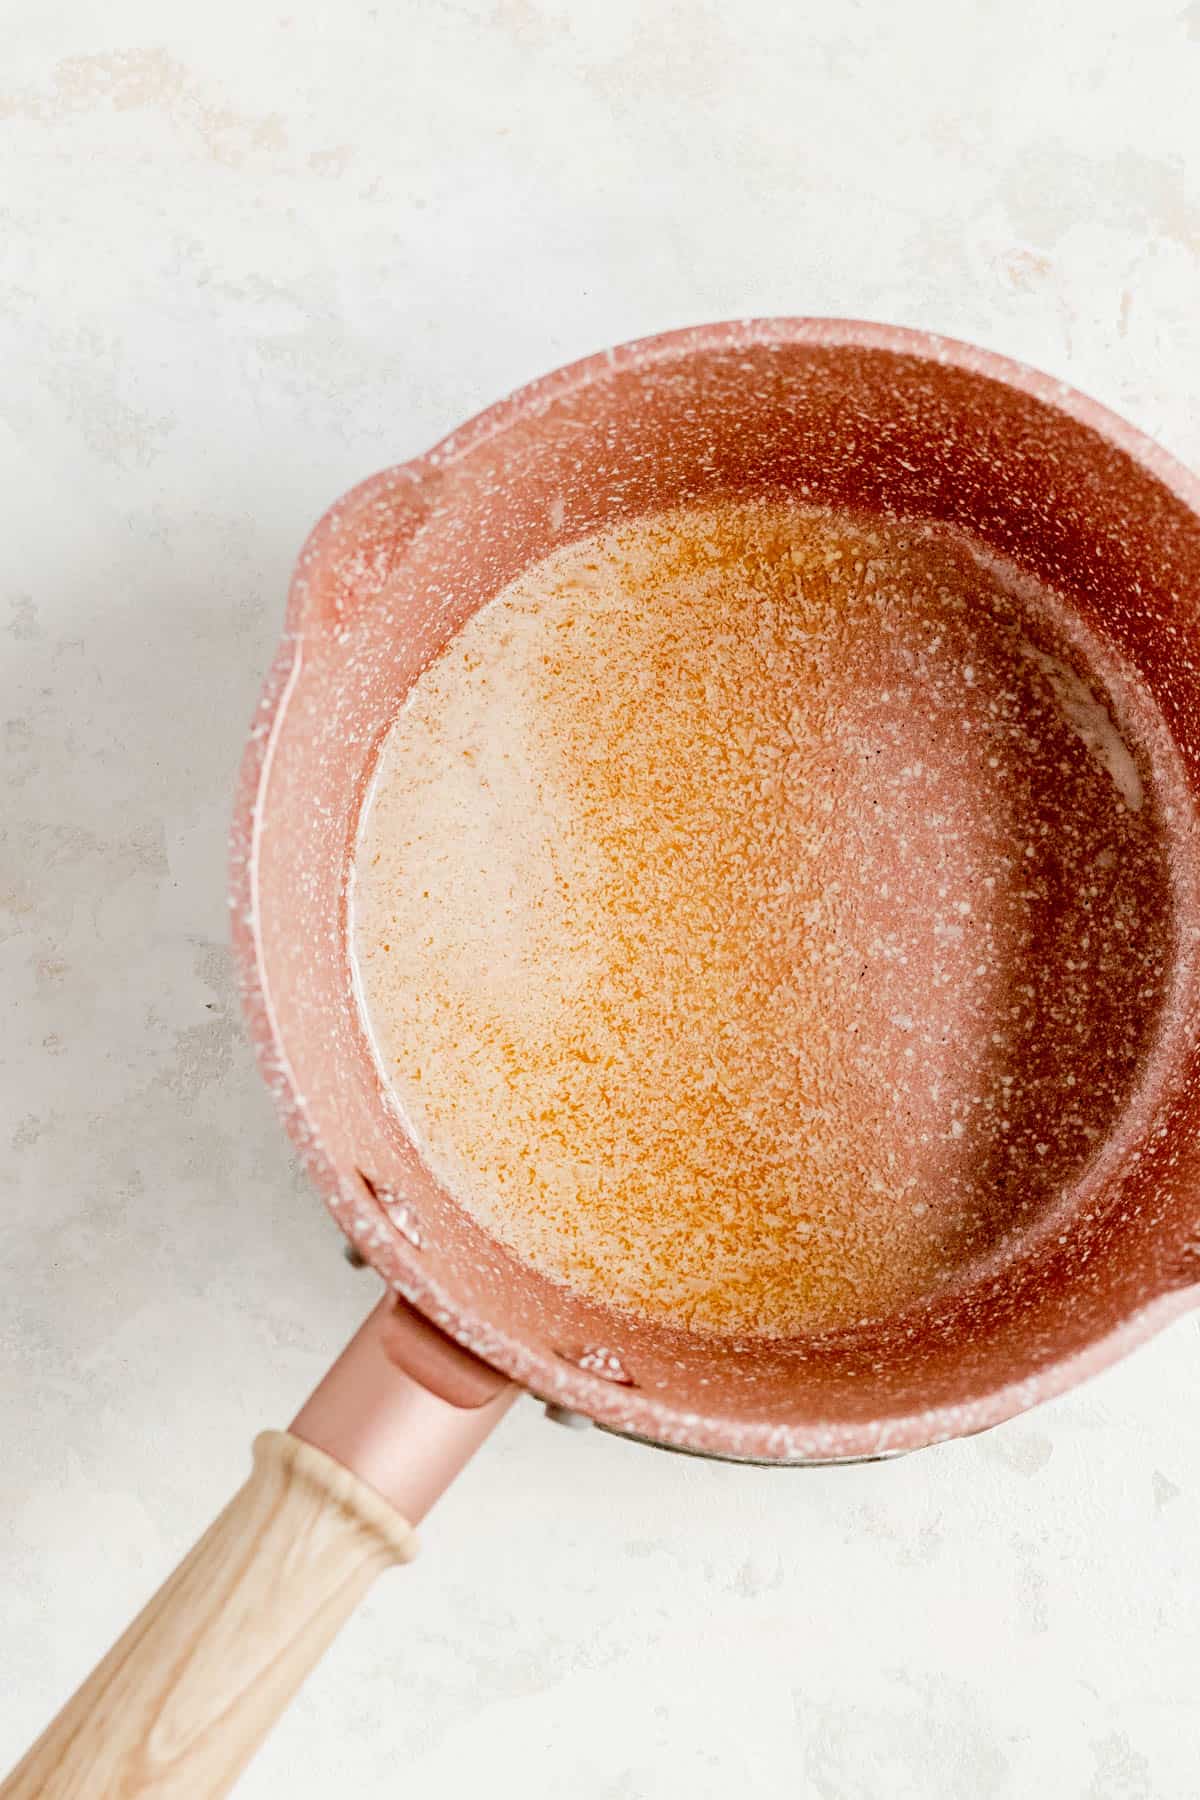
- Melt the filling butter in a small saucepan.
- Add all other filling ingredients (dries and apples) to the pan.
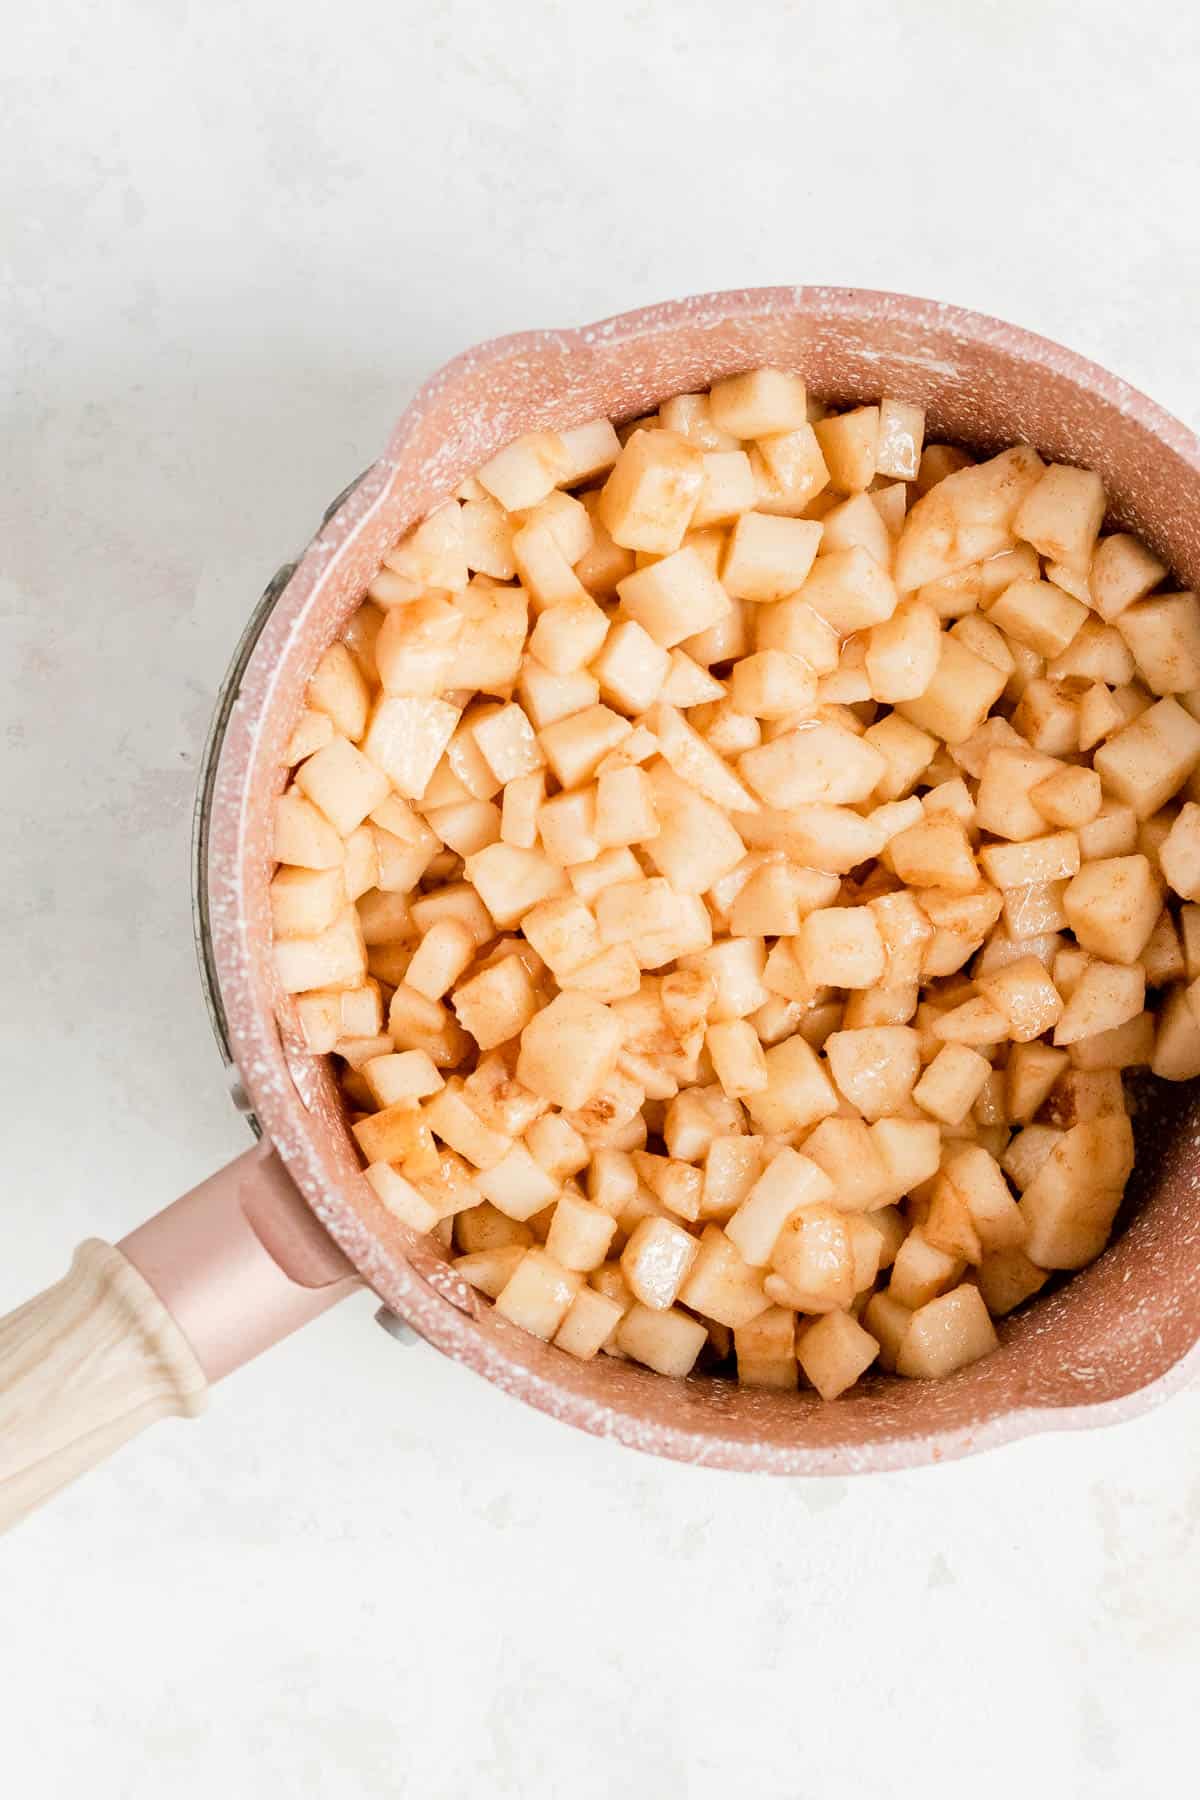
- Cook apples until tender, and coated with a thick caramel sauce.
- Cool apples while prepping the streusel and rolling out the pie dough.
TO MAKE THE STREUSEL:
- Preheat the oven and line two baking sheets with parchment paper.
- Stir together the dry streusel ingredients.
- Mix in the melted butter until fully blended into crumbs and set aside.
TO ASSEMBLE THE PIES:
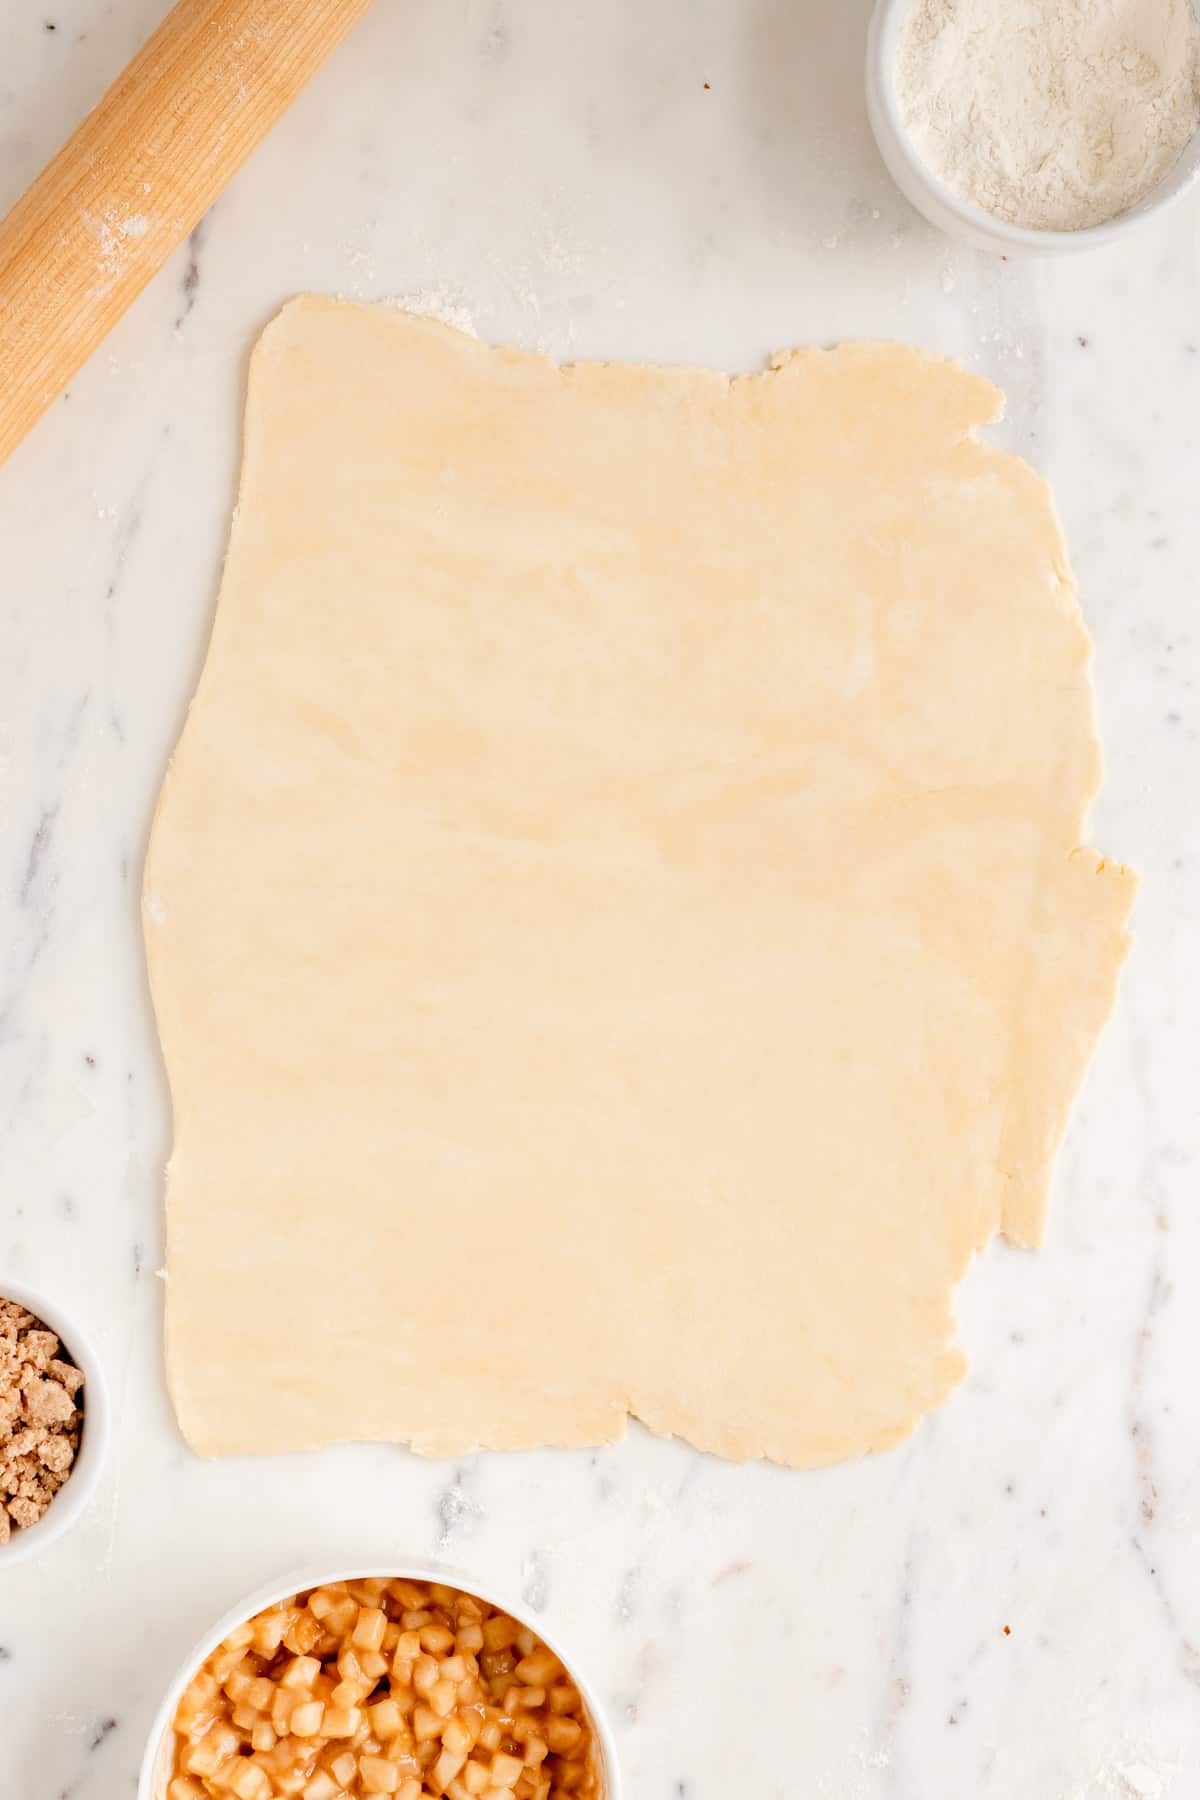
- Roll out your chilled dough to ⅛" thick on a well-floured surface.
- Cut dough into 3" x 4" rectangles, re-rolling scraps as needed.
- Combine the cooled apple filling and streusel.
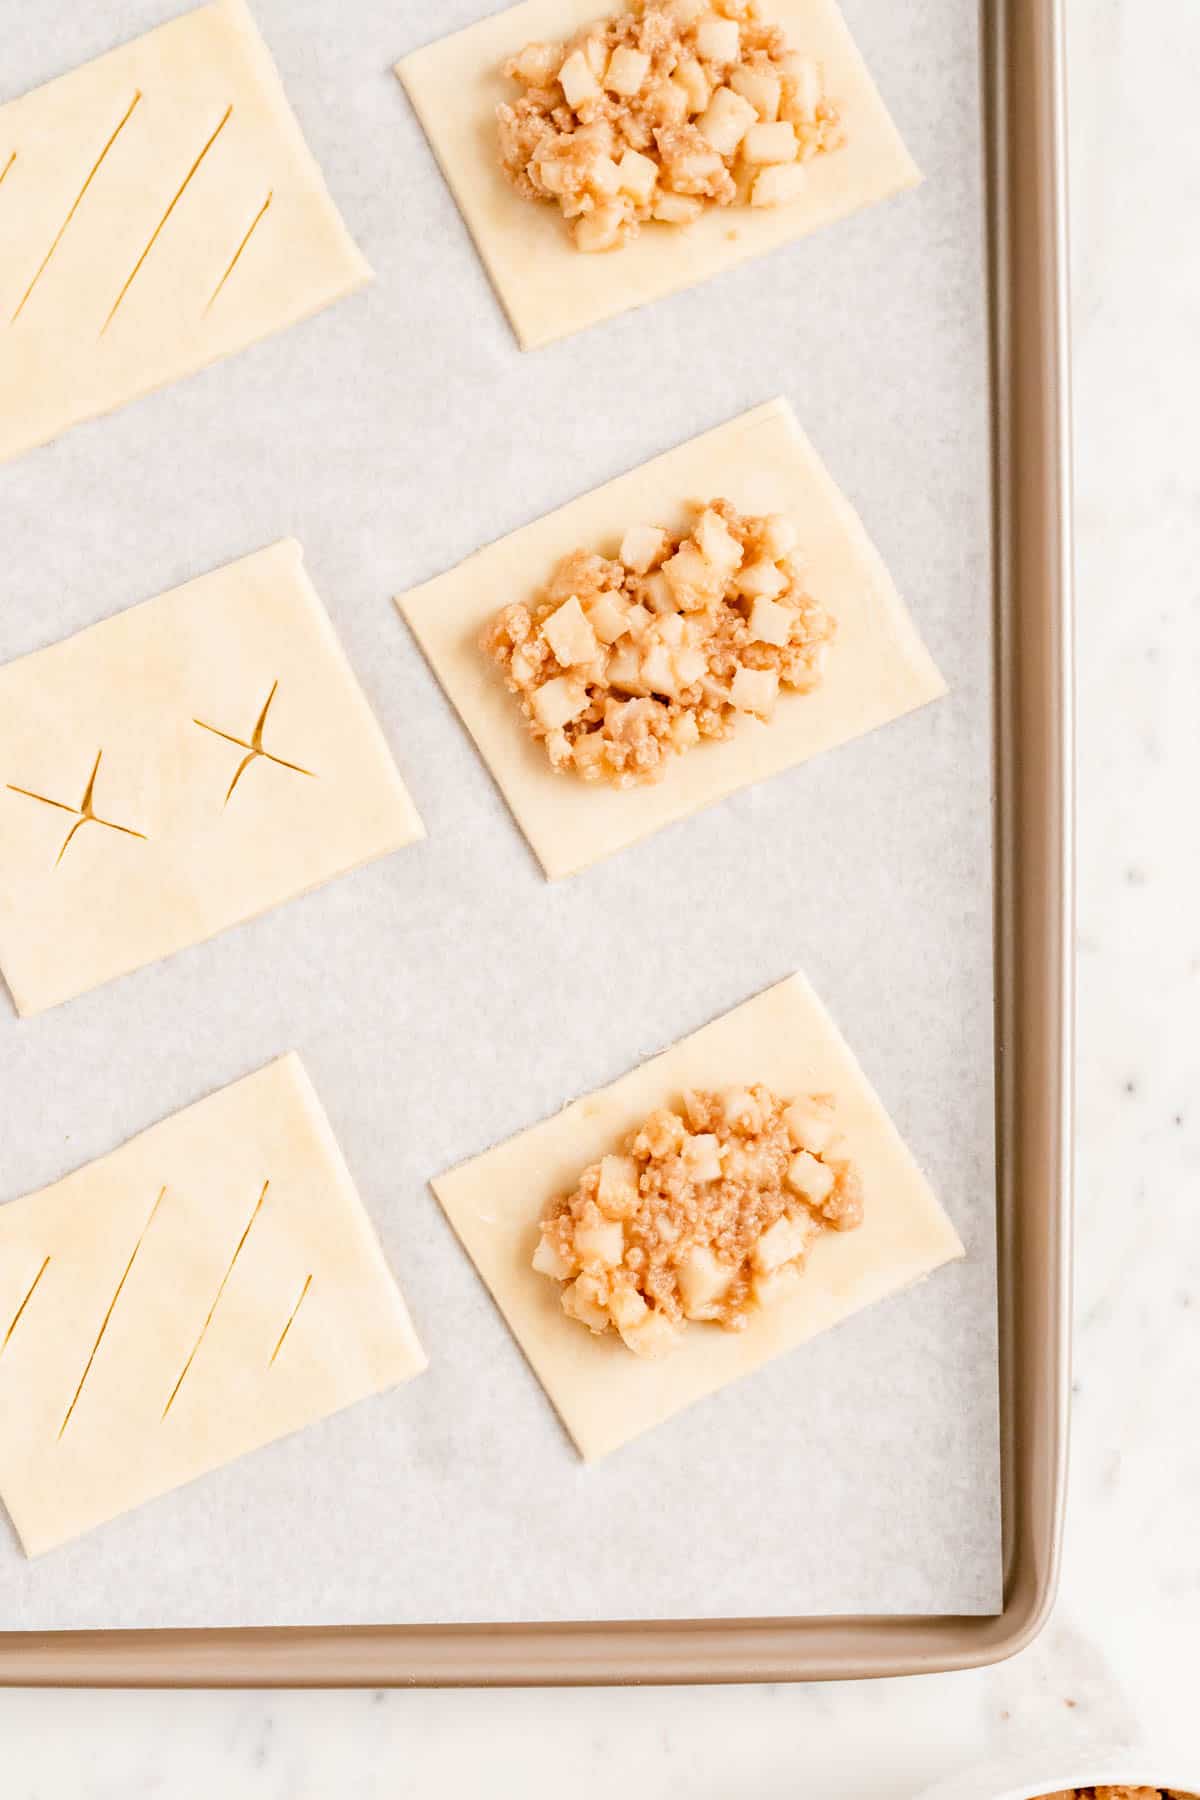
- Add about 2 tablespoons of filling on top of half of your pie dough rectangles.
- Cut vents into other half of the pieces to allow steam to release during the bake.
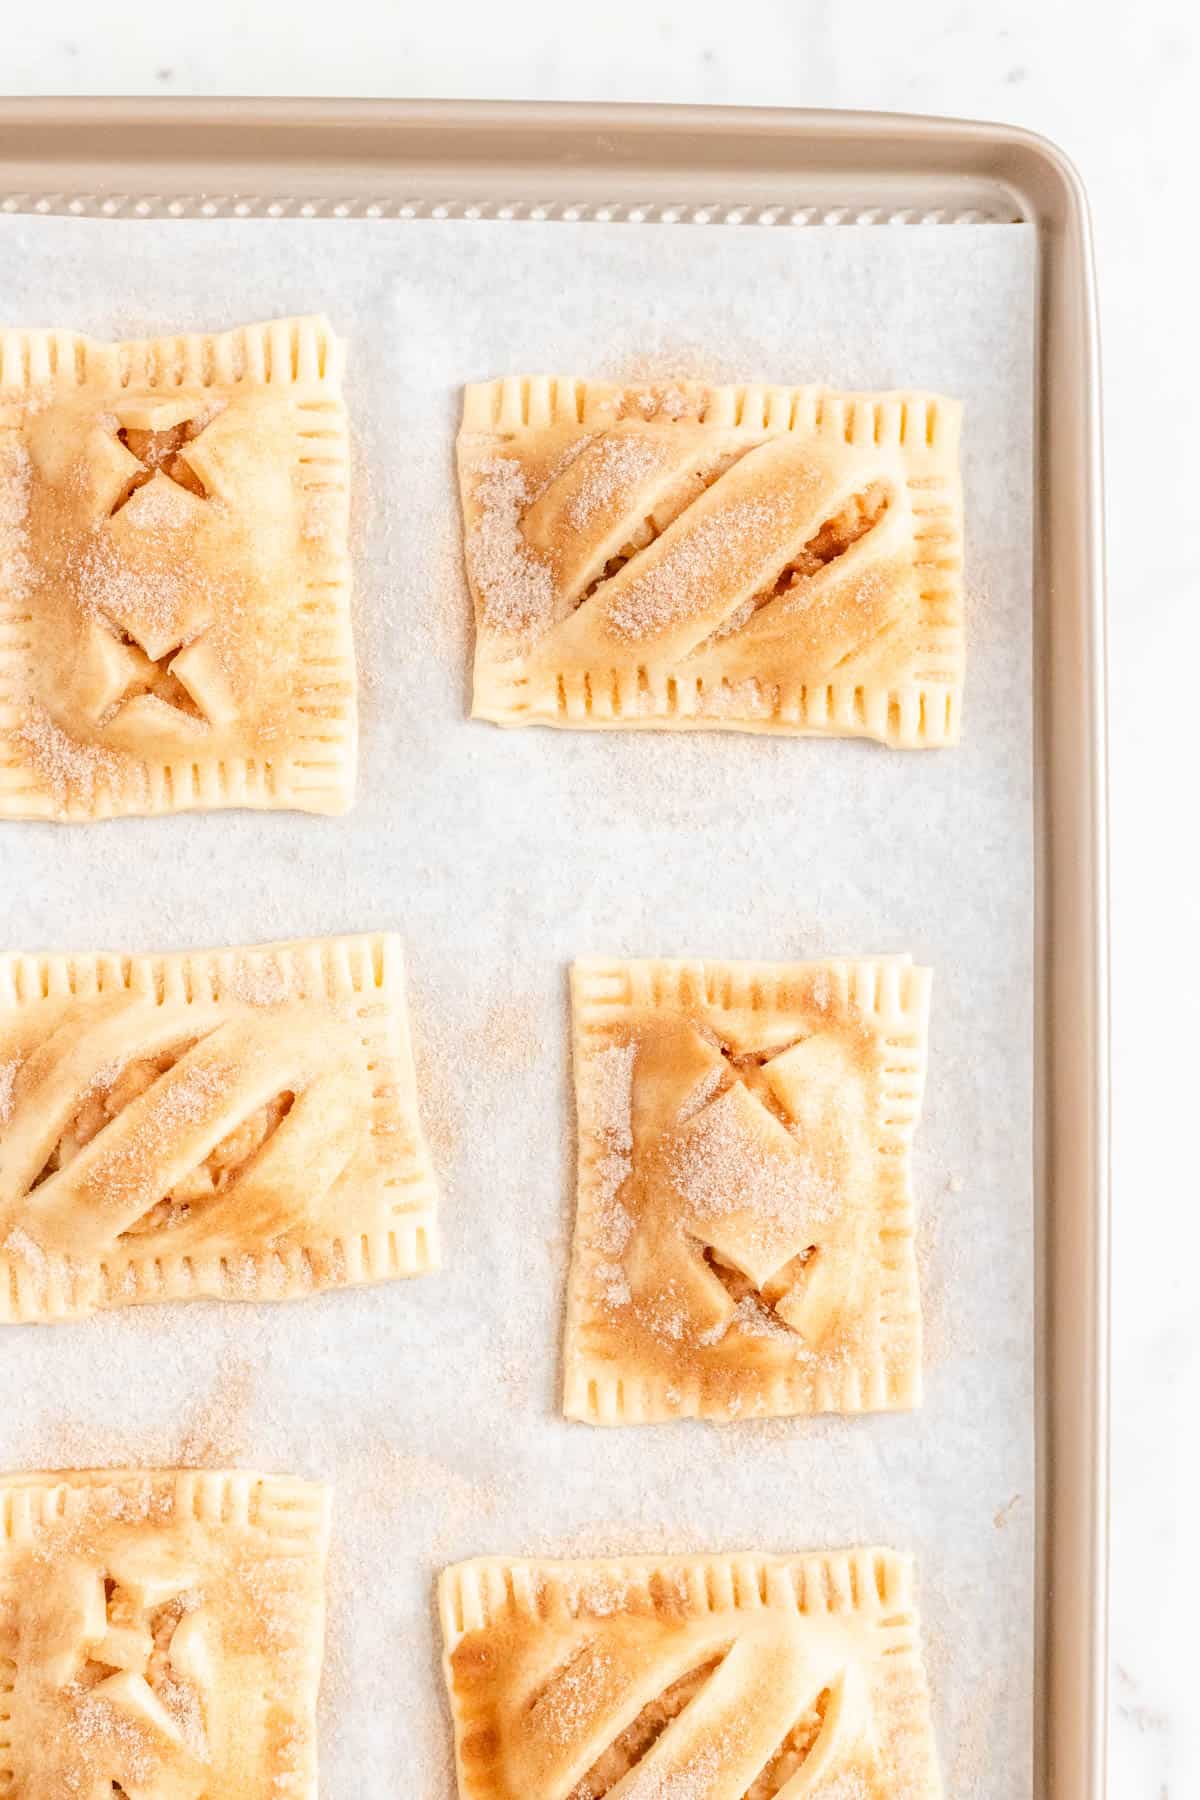
- Lightly wet the edges of each filled bottom piece. Place a vented piece on top.
- Gently press together the aligned edges of the top and bottom pieces, then use a dinner fork to seal a ¼" border all the way around the pie pocket.

- Lightly dampen the surface of your pies, then coat generously with the cinnamon and sugar.
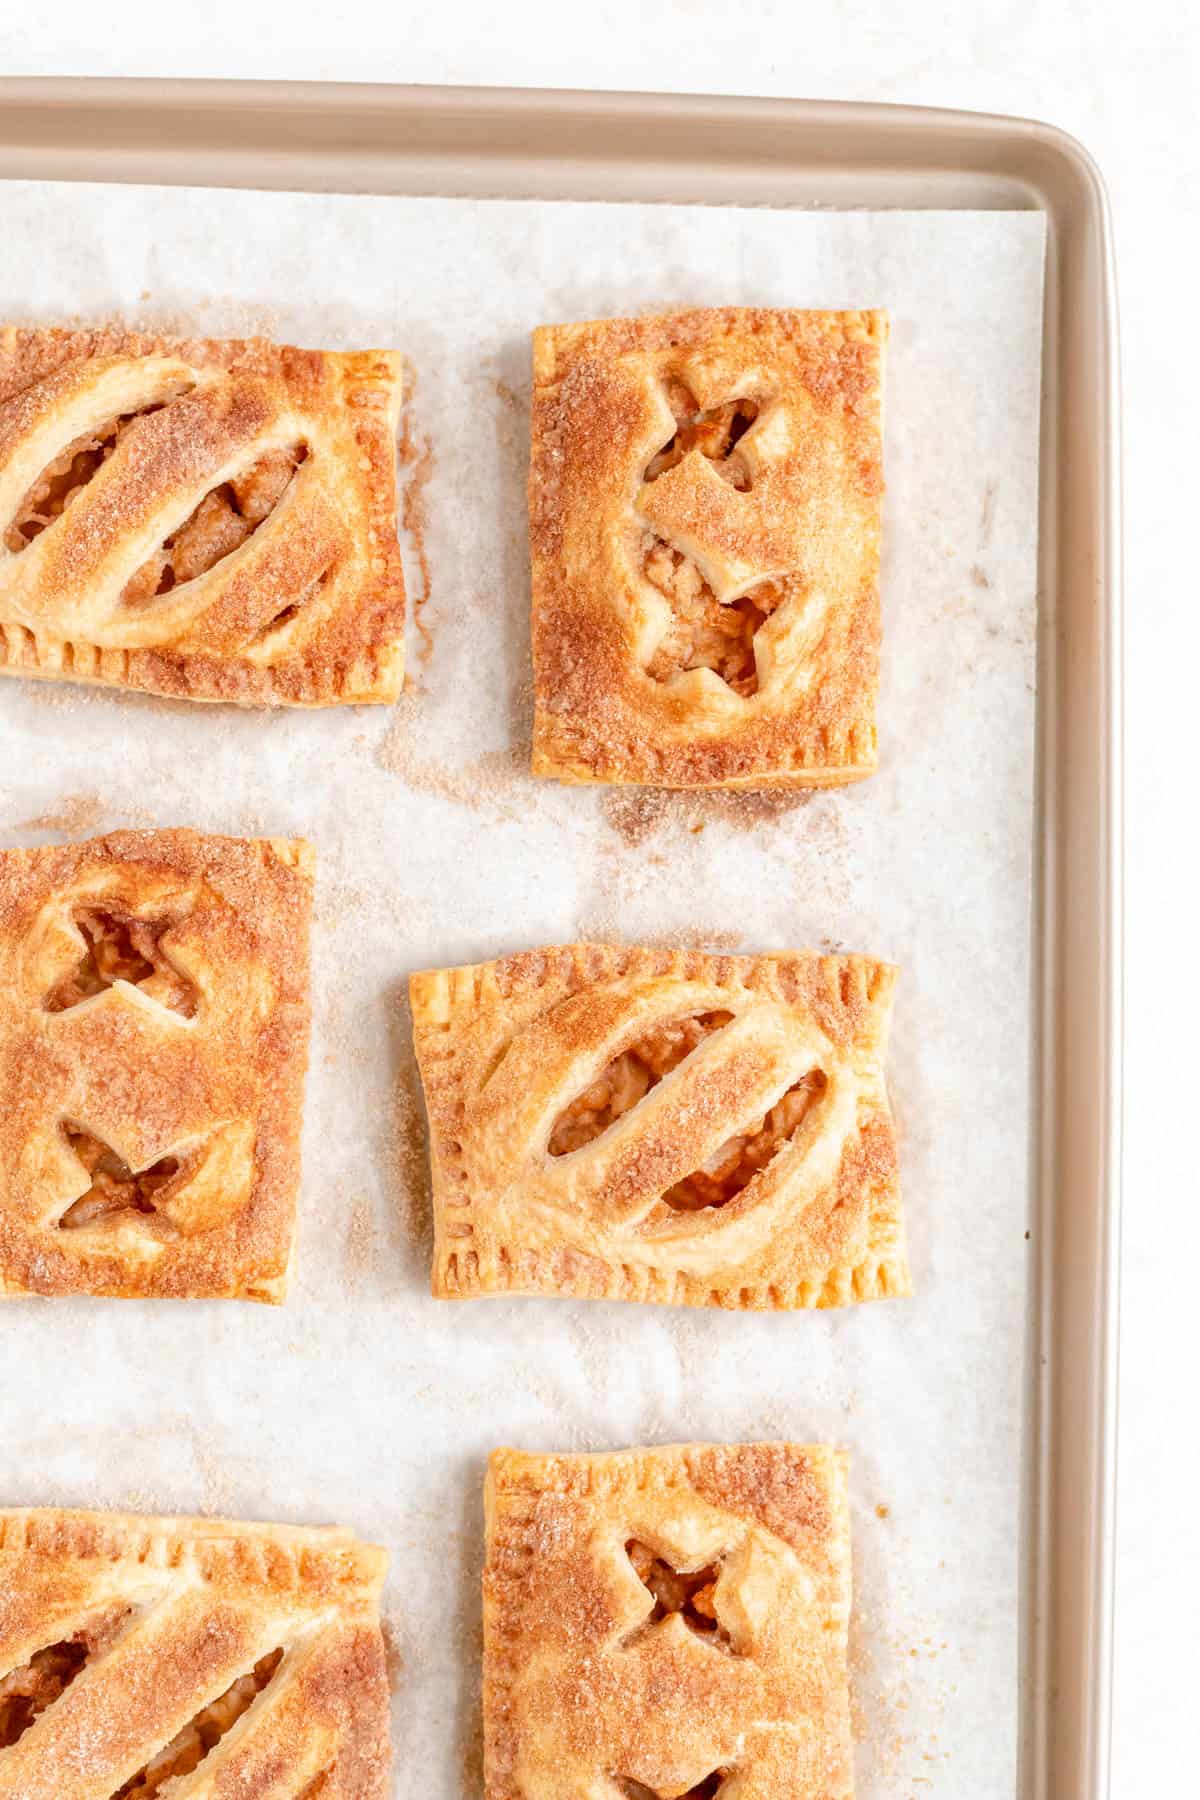
- Bake until deep golden-brown and flaky, then allow to cool slightly and enjoy!
Check out the full RECIPE WEB STORY for a click-through tutorial!
*Expert Tips and Tricks* for Better Baking
What's the TOP TIP for making the best apple pie pockets?
These are crusty little hand pies, so you’ll want your pie dough to be top-notch. Be sure to read through my full Pie Dough Post to learn all the tips and tricks to making a beautifully flaky crust.
You’ll also want to make sure you roll your dough as thin as possible while still being able to pick it up and move it. This will keep your ratio of crust to filling in the tasty zone since there are two pieces of crust to every one portion of filling.
Can you make the pie pockets ahead of time?
Yes! These guys bake up great out of the freezer. You can fully assemble these little hand pies (but don’t add the cinnamon and sugar on top before freezing). Freeze them up to 1 month, and when you’re ready to bake, you can lightly dampen them right out of the freezer to top with cinnamon and sugar and then just pop them straight into the oven.
This is a great option especially for the busy holiday season as you can make these up a week before your guests even arrive, and then have a delicious homemade treat on-demand that’s sure to impress!
How do you store leftover hand pies?
Store leftover hand pies at room temperature for up to 3 days. Please note, they will lose some of their crispness over time, so they’re best enjoyed fresh whenever possible.
Can you substitute other fruit for the apples?
Yes! You can feel free to swap in pears without any issue. In terms of say a peach or cherry or berry filling, I honestly think if you pre-cook the filling, this recipe will probably work great, although I can’t say for sure as I haven’t tested it with those higher-water-content fruits.
To egg wash or not egg wash?
So, I know I was hating on egg wash, but if you love that shiny finish, please feel free to use it! You can either sprinkle the cinnamon and sugar on top of the egg wash or skip it altogether.

Other Recipes You'll Love
If you're looking for other delicious apple treats, be sure to check out my Apple Pie Cinnamon Rolls and Upside-Down Maple Caramel Apple Cake recipe.
And for my fellow cinnamon lovers, here are a few of my other favorite cinnamon and spice recipes:
- Double Cinnamon Streusel Muffins
- Cinnamon French Toast Pancakes
- Fluffy Oreo Cinnamon Rolls with Cream Cheese Frosting
- Pumpkin Whoopie Pies with Cinnamon Cream Cheese Filling
- Easy Snickerdoodles (with cream of tartar!)
- Ginger Sandwich Cookies with Orange Cream Filling
- Cinnamon Streusel Coffee Cake Cookies
- Biscoff Cookie Butter Cake with Biscoff Buttercream

⭐ If you gave this recipe a try please give it a ⭐ rating and tag me on Instagram @mint.and.mallow.kitchen so I can see what you're baking up! ⭐
📖 Full Recipe

Flaky Cinnamon Streusel Apple Pie Pockets
Ingredients
FOR THE CRUST:
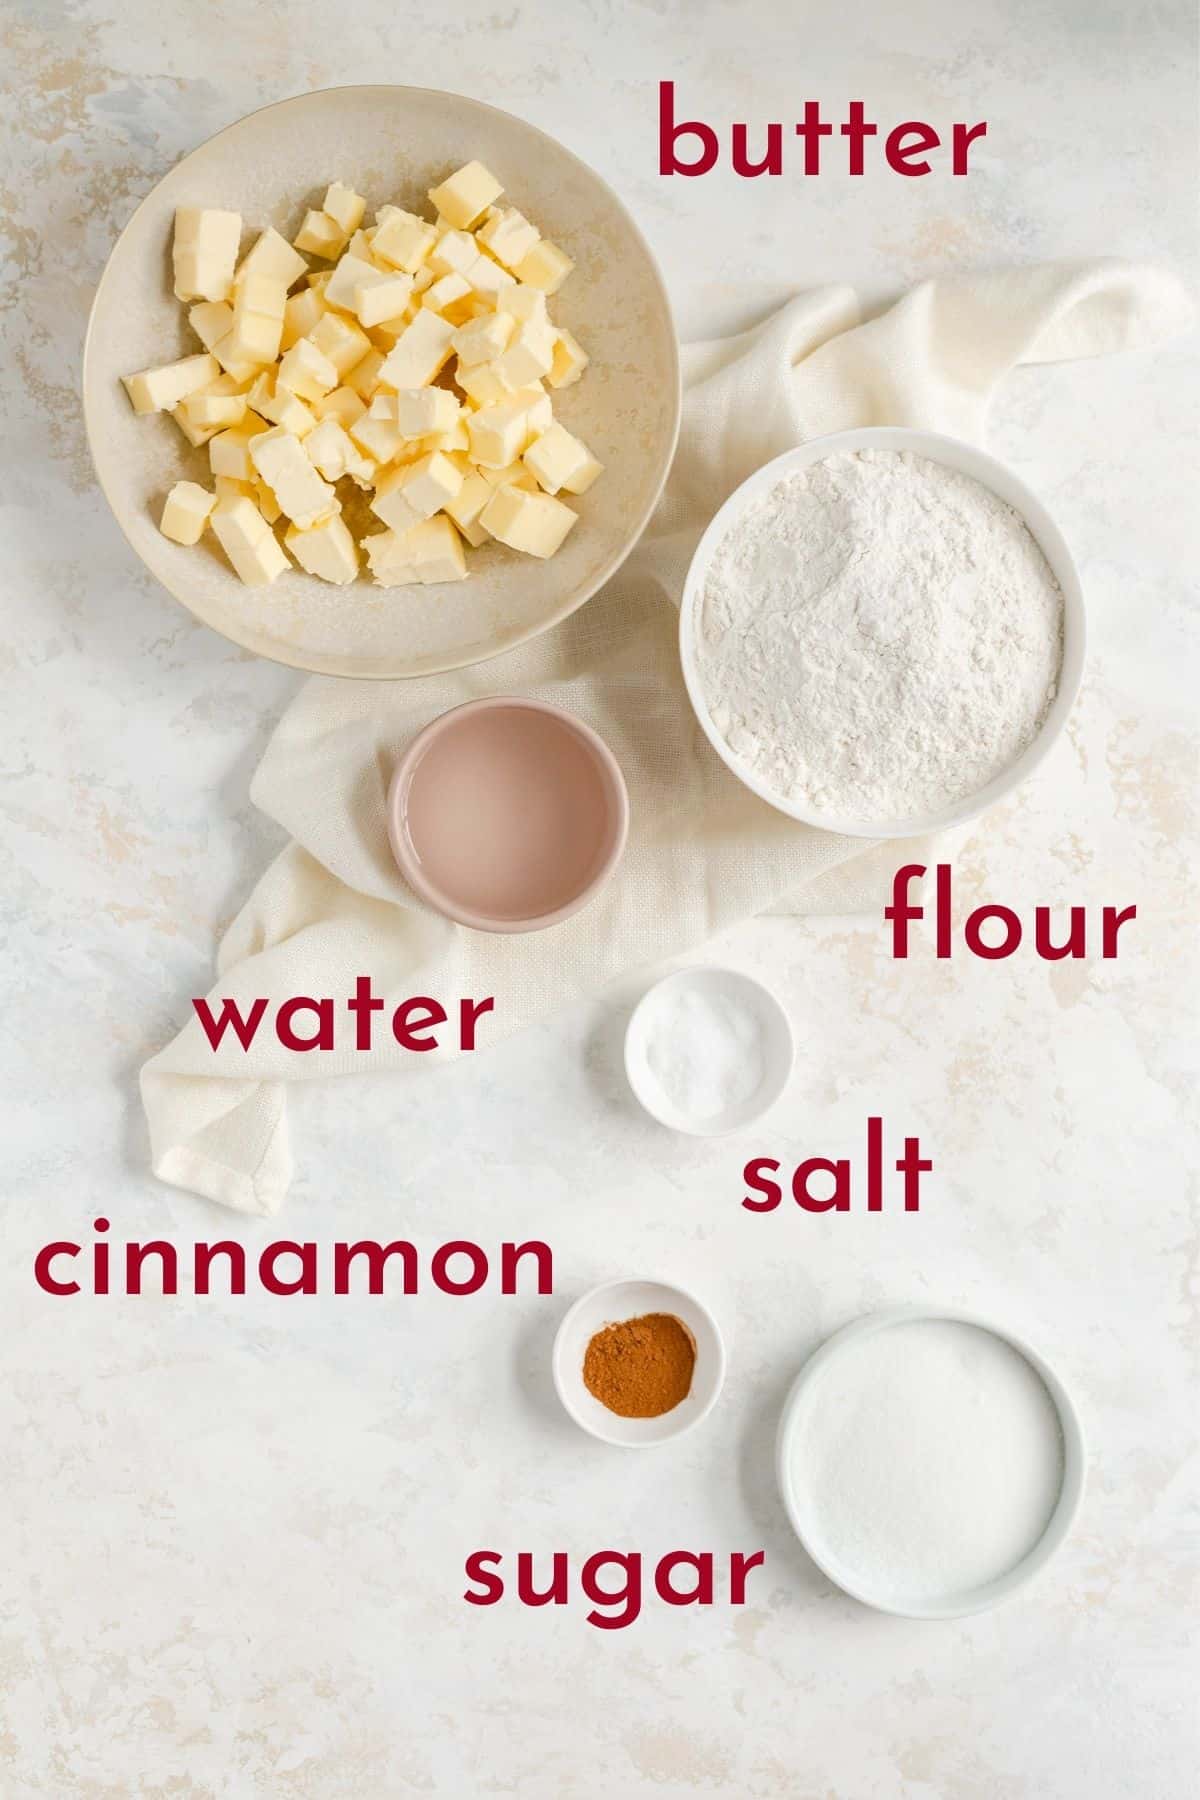
- ½ cup cold water
- 1 ½ teaspoons salt
- 3 ½ cups all-purpose flour
- 1 ½ cups (3 sticks) unsalted butter (cold and chopped into ¼" cubes)
FOR CINNAMON AND SUGAR:
- ¼ cup sugar
- 2 teaspoons ground cinnamon
FOR THE STREUSEL:
- ¼ cup sugar
- ⅓ cup all-purpose flour
- ½ teaspoon ground cinnamon
- 2 tablespoons unsalted butter (melted)
FOR THE FILLING:
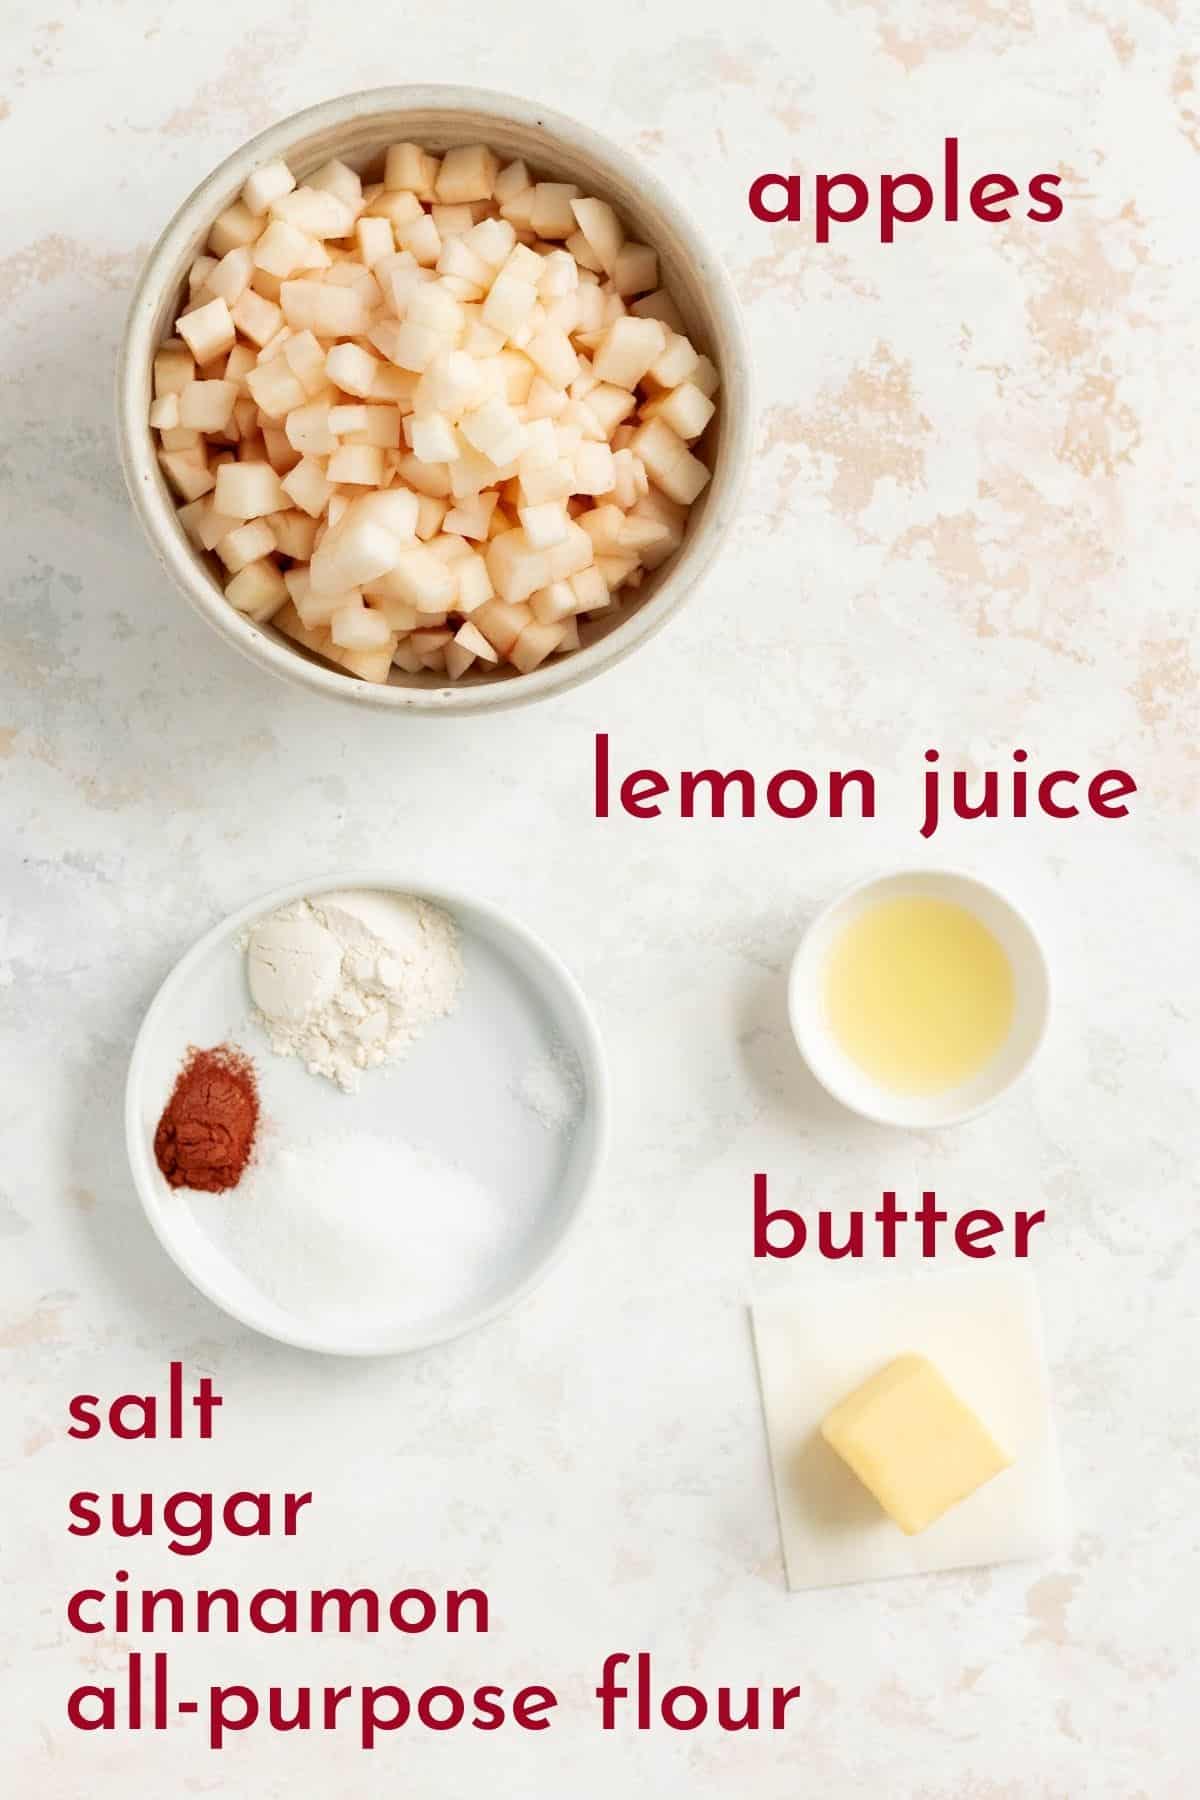
- 1 tablespoon sugar
- 1 tablespoon all-purpose flour
- ½ teaspoon ground cinnamon
- ⅛ teaspoon salt
- 2 tablespoons unsalted butter
- 1 teaspoon lemon juice
- 2 ½ to 3 cups chopped apples (2 large or 3 small apples, peeled and cut into ¼" cubes)
Instructions
TO MAKE THE CRUST:
- Mix up a flaky crust: check out my full Pie Dough Recipe Post to learn everything you need to know to whip up a batch of beautifully flaky all-butter homemade pie dough!
TO MAKE THE CINNAMON AND SUGAR:
- Stir together: stir together cinnamon and sugar in a small bowl and set aside.
TO MAKE THE FILLING:
- Mix dries: stir together all the dry ingredients for the filling in a small bowl.
- Melt butter: melt 2 tablespoons of butter in a small pan over medium heat.
- Cook apples until tender: add the dry mixture, lemon juice, and apples to the melted butter and stir until combined. Continue to cook on medium until apples start to soften, about 12 minutes, stirring constantly to prevent burning. When ready, the apples will have released some of their juices, which will have formed a thick, tacky caramel.
- Cool while preparing dough: once softened, transfer apples to a bowl and place in the fridge for 20-30 minutes to cool before assembling your pies (if the filling is too hot, it'll melt the butter in your pie dough and your layers won't be as flaky). To aid in cooling, stir the apples briefly about half-way through the cooling time.
TO MAKE THE STREUSEL:
- Preheat and prep: when your crust is ready to roll out and while your fillin' is chillin', preheat your oven to 400°F and line two baking sheets with parchment paper.
- Stir together dries: use a fork to stir together all the dry ingredients for the streusel in a small bowl.
- Mix in butter: add melted butter to dries and use a fork to blend until crumbs form and there are no more dry patches in the mixture. If your mixture is a little dry, you can add extra melted butter a teaspoon at a time, or simply squeeze the crumbs together using your hands, then break apart into large chunks. Set aside.
TO ASSEMBLE THE PIES:
- Roll out your dough: working with half your pie dough at a time (leaving the second half in the fridge), lightly flour your work surface and roll your dough out to a little less than ⅛" thick. Airing on the side of thinner is better In terms of taste, so you want to go as thin as possible while still being able to easily pick up and work with the pieces. (If dough is too firm to roll, let it sit at room temperature for 15-20 minutes to soften before rolling it out or use the "beat it" method to make the butter pliable).
- Cut into rectangles: cut dough into 3" x 4" rectangles, re-rolling scraps as needed.*1 Repeat roll and cut process with the second ½ of your dough.
- Combine apples and streusel: when you're ready to start filling you pies, stir together the streusel and cooled apple filling.
- Add filling: place half of your rectangles, spaced at least 2" apart, on the lined baking sheet (ideally you want to place them where they'll stay to bake). Add about 2 tablespoons of filling on top of each rectangle on the baking sheet and pat it down. Be sure to keep all your filling in the center of your rectangles with at least a ¼" border of dough clean around the edge. (Note: you may have a little extra filling leftover depending on how thinly you rolled your dough).
- Vent the top pieces: make several cuts in each of the other halves of your pie dough pieces that will become your tops (this will work as a vent to keep your pies from bursting open as they release steam in the oven). A paring knife works well for this, and I find these three patterns produced the prettiest results:

- Top and seal: using a pastry brush or just your fingers, very lightly moisten the borders of one filled rectangle. Place a top dough piece over the bottom, and lightly press the edges together. Using a fork, seal a ¼" wide border all around the edge of the pie.
- Top with cinnamon and sugar: very lightly brush the surface of the sealed pies with water and sprinkle with cinnamon and sugar.
- Bake until flaked: bake hand pies for 22-26 minutes until tops and bottoms are a deep golden brown (if filling is visible, it should be bubbling too!).
- Cool and enjoy! Allow pies to cool for at least 10 minutes to allow the layers to crisp up a bit, and then grab a warm pie and enjoy the buttery, flaky deliciousness with everyone in the house!

Test Kitchen Tips
- *1(Don't) Work It: You'll want to re-roll your dough as little as possible and when you gather your scraps, try to only work them as much as needed to get them rollable again. The more your work/re-roll the dough, the less flaky our layers will be.)
- Baking from frozen: you can freeze these pies fully filled and assembled for up to a month. To bake, place them on a baking sheet straight out of the freezer, brush with water and quickly add cinnamon + sugar (the water sets quickly on the cold pies). Then bake according to the instructions above and just know you may need an extra few minutes on the bake time depending on your dough's thickness.
- Storage: store leftover hand pies at room temperature for up to 3 days. Please note, they will lose some of their crispness over time, so they’re best enjoyed fresh whenever possible.


Julissa says
It came out delicious, my family loved them. I used just half of the strudel just so it won't be too sweet for the family. Thank you so much for the recipe.
Jocelyn at M+M says
Oh that makes me so happy to hear! And I love that you took the recipe and adjusted to your family's needs. Thank you so much for taking the time to let me know how much they were enjoyed and I hope you and your family have a wonderful rest of this fall season!