• Skip to primary navigation
  • Skip to main content
  • Skip to primary sidebar
Mint + Mallow Kitchen logo
  • Recipes
  • Tutorials
  • About
  • Nav Social Menu

    • Email
    • Facebook
    • Instagram
    • Pinterest
menu icon
go to homepage
  • Easter Recipes
  • Recipes
  • Tutorials
  • About Jocelyn
  • Work With Me
    • Facebook
    • Instagram
    • Pinterest
  • subscribe
    search icon
    Homepage link
    • Easter Recipes
    • Recipes
    • Tutorials
    • About Jocelyn
    • Work With Me
    • Facebook
    • Instagram
    • Pinterest
  • ×

    Home » Baking Tutorials » Baking Technique Tutorials

    BAKING MEASUREMENTS 101: baking by volume vs. weight basics

    Published: Apr 3, 2021 · Modified: Jul 3, 2021 by Jocelyn at M+M · This post may contain affiliate links · Leave a Comment

    Measuring 101: baking by volume vs. weight infographics

    When deciding what the very first technique I wanted to explore should be, I asked myself...

    What one technique is used in every single recipe that most people might not even know they could be doing better?

    The answer...baking by volume vs. weight.

    empty measuring bowls and cups

    Starting Your Recipes Off Right

    The most important thing you can do to give your bakes the best chance at success is to make sure you’re using the precise amount of ingredients called for in the recipe.

    Unlike cooking, which is often guided by intuition and tasting, baking is a science. Albeit a very tasty and fun one!

    At the core of any successful scientific method is precision. In this case, that means making sure every single ingredient you add to your experiment (aka recipe) is measured as precisely as possible.

    Is that all it takes to be a baking master?

    So does that uber-accurate measuring ensure success? Well…no, unfortunately. There's much more to it than that. But learning the differences between baking by volume vs. weight is a great start!

    Your recipe itself may be poorly written, and your methods of preparation are very important as well. That said, if you don’t get the right amount of ingredients into your bowl, there’s no point in bothering with the rest.

    Proper scaling is the foundation of any good recipe, so let’s talk about the two main ways you can measure your ingredients and discuss why you may choose one over the other.

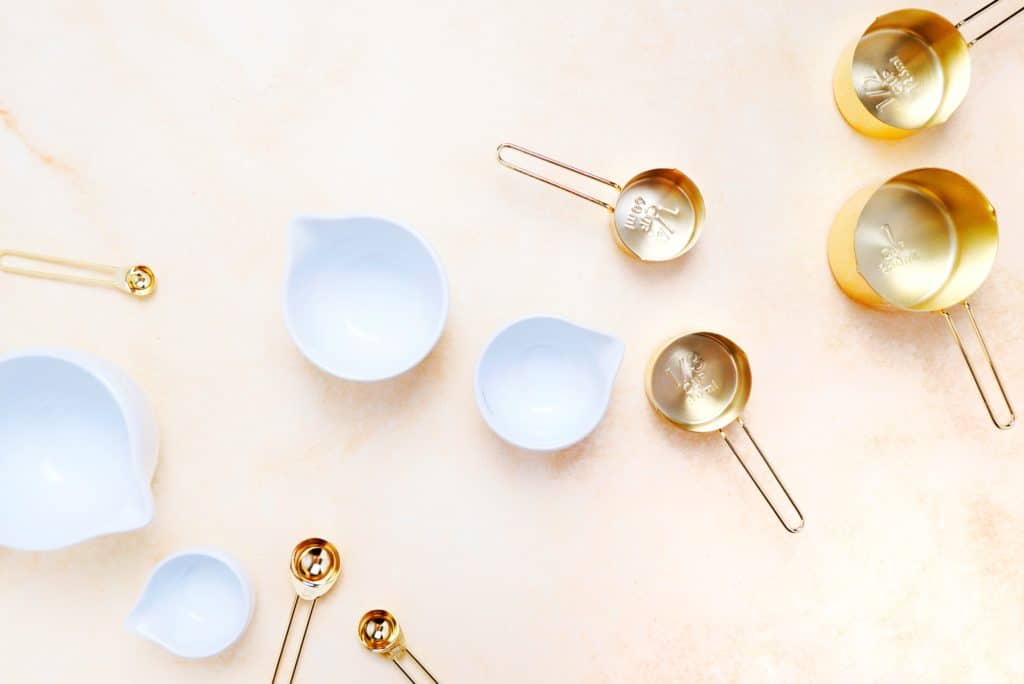
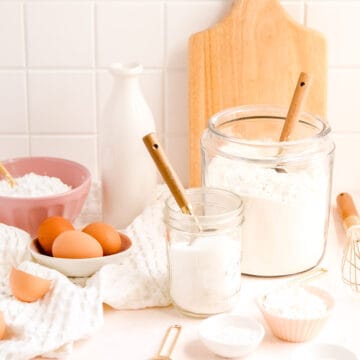
    Measuring by Volume (cups and spoon)

    If you’ve ever baked anything in America, you probably don’t need me to explain how to measure using volume, aka with measuring cups and spoons.

    Even if you’re not familiar with this measuring method, it’s pretty straightforward. You add your ingredient into the cup, liquid measure, or measuring spoon, and level it off.

    As with most measurement systems we use in the US, this one differs from many other parts of the world. Simply put, we measure by volume (the space an ingredient fills up) rather than by weight (how much a certain ingredient weighs regardless of the space it fills up). The weight of an ingredient is based entirely on the physics of gravity, the earth's "pull" on it. (Aaaaand I’ll stop the physics lesson there. After all, it definitely wasn’t my favorite subject in school.)

    Measuring by Weight (ounces or grams)

    If you didn’t guess from my ramblings above, I am a STRONG advocate for baking by weight. And I think you’ll find most professional bakers are. I have never worked in a restaurant, hotel, bakery, or really any professional kitchen that didn’t bake by weight.

    Why is this? Simply because it’s the most accurate, cleanest, and (once you’re used to it) easiest way to bake. Especially if you’re constantly resizing recipes to vary your production output numbers.

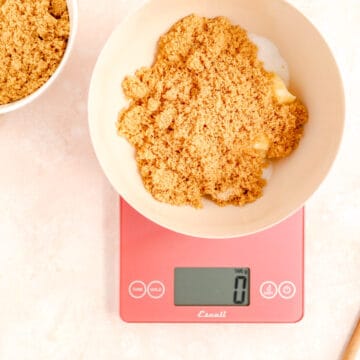
    Scaling by Weight Basics

    If you’re new to measuring by weight, which I’m sure many of you are, don’t worry! I’m going to devote several lessons to this method, so keep an eye out for that. For now, we’ll stick to the short version.

    To measure by weight, you use a kitchen scale. You’ll start by placing a bowl on it, then you’ll “tare” the scale so that it reverts to zero. At this point, it's essentially no longer counting the weight of the bowl.

    Once your've tared your scale (zeroing it out), you can start adding your ingredients, one on top of the other. You can weigh out the right amount of each by taring the scale in between each ingredient (much more detail on this in the future "how to" lesson!).

    The Short + The Sweet

    While the jump from weight to volume may seem scary, I promise that once you get over the learning curve, you will fall in love with its simplicity.

    There is a one minor annoyance to contend with. Namely, the fact that most of the recipes you’ll find in American cookbooks and online use cups and measuring spoons. This fact alone is the most common reason for people to continue baking by volume vs. weight. That said, more and more developers are starting to include gram weights (Christina Tosi and the Milk Bar cookbooks are a great example).

    Regardless, you’ll be surprised by how quickly you can learn how to convert all the classic baking ingredients by heart.

    To help you with that, I’ll be sharing a few more lessons on the pros and cons of scaling methods. We’ll also discuss how to start converting your favorite recipes once you’re ready to take the plunge into baking by weight. I can promise you this: once you jump in, grab a swan floaty (provided by moi), and have a look around, the water is absolutely lovely.


    Currently Preheating…

    Check out my next two lessons in this series to learn more about the benefits of each of these measuring systems and decide which one will work best for you!

    MEASURING 102: pros and cons baking by volume

    happy baking graphic font with hummingbird.

    Ready to learn more and put all your new skills to good use?

    Check out my newest tutorials and recipes below, and get to baking!

    • eggs, cream cheese, butter, orange zest, lemon zest, vanilla, salt, and milk in individual bowls.
      Recipe Style Guide: Ingredients Naming + Organization
    • Close up of cross-section of sliced Bundt cake with white chocolate sauce showing raspberry swirl.
      Heavenly White Chocolate Raspberry Bundt Cake
    • Side view of sliced red velvet Bundt cake with white glaze on pink crystal plate.
      Red Velvet Bundt Cake with Cream Cheese Glaze (mini or big!)
    • a close up of a chocolate chip cookie with a hand having just dunked it in milk
      Bakery Style Chocolate Chip Cookies


    This website contains Amazon affiliate program links. This means that I earn a small commission on qualifying purchases at no additional cost to you. I will never provide a link to nor recommend any product or service that I don’t genuinely love or personally use. Thank you for supporting MINT + MALLOW kitchen and the brands that keep this blog running.

    More Tasty Baking Technique Tutorials

    • measuring cups filled with different colors and flavors of chocolate chips, pistoles, chunks, and bars.
      How to Melt Chocolate Chips (microwave or double boiler method!)
    • heart cookie cutter self portrait of jocelyn the baker
      Recipe Style Guide: Why Good Recipes Matter
    • a table filled with baking ingredients, eggs and measuring utensils.
      Baking 101: Baking Tips for Beginners
    • a red scale at 0 grams with a bowl filled with sugar and butter on top.
      BAKING MEASUREMENTS 103: pros and cons of baking by weight

    Share a little sweetness!

    • Facebook
    • Twitter

    About Jocelyn at M+M

    Since 2011, Jocelyn has worked as a pastry professional in restaurants and test kitchens across the country, before creating M+M Kitchen to share all her knowledge with you. She'll help fuel your creative baking fire by showing you how to take all your bakes to the next level, so you can join her mission of bringing people together through the universal language of sweets.

    Reader Interactions

    Leave a Reply Cancel reply

    Your email address will not be published. Required fields are marked *

    Recipe Rating


    Primary Sidebar

    headshot of Jocelyn in front of flower wall with meringue-covered whist.
    Hiya love, I'm Jocelyn!
    ...the professional baker turned blogger here to help you live your best life through baking. I'll teach you how to bake everything better, and give you the confidence in the kitchen to know your food will not only taste incredible, but look beautiful as well. So let's get baking and spread some love and light in my favorite way - through the universal language of sweets!

    More about me →


    Easter Brunch Treats

    • 45° shot of lemon pancakes stacked up with whip cream and lemons in bowl in back.
      Fluffy Lemon Pancakes
    • a peach cobbler pound cake sliced on a white marble board and pink background.
      Fresh Peach Cobbler Pound Cake Loaf
    • side angled shot of brioche french toast casserole in white ceramic pan with blueberries and vases.
      Brioche French Toast Casserole (with blueberries!)
    • Woven basket filled with cinnamon streusel muffins on white towel with eggs in background.
      Quick & Easy Cinnamon Streusel Muffins
    • close up of sliced glazed citrus cream cheese pound cake.
      Citrus Cream Cheese Pound Cake (with lemon soak and orange glaze)
    • Side view of six pancakes stack with corner cut out and syrup dripping down.
      Cinnamon French Toast Pancakes (quick n' easy!)

    Featured in...

    publication logos that jocelyn at mint and mallow was featured in

    Tried + True Treats

    • white plate piled with multi-colored sugar cookies on coral background with ranunculus on table.
      Soft & Chewy Sugar Cookies (without baking powder!)
    • Overhead of golden vanilla sheet cake in gold pan on pink background.
      Easy Vanilla Sheet Cake (in a 9x13 pan!)
    • Overhead of raspberry cream cheese frosting swirled on vanilla sheet cake surrounded by flowers.
      Raspberry Cream Cheese Frosting (made with jam!)
    • close up of a glazed maple blueberry scone on torn out recipe pages
      Better Than Starbucks Blueberry Scones (easy drop scones style!)
    • carrot cake with pineapple slices on plates stacked up with ranunculus flowers for decoration.
      Old-Fashioned Carrot Cake with Pineapple and Whipped Cream Cheese Frosting
    • Hand holding spoon with white chocolate sauce dripping off into clear glass container.
      Easy White Chocolate Sauce (2-ingredient ganache!)

    Footer

    ↑ back to top

    RECIPES + TUTORIALS

    • the recipe book
    • ingredient tutorials
    • equipment tutorials
    • technique tutorials

    ABOUT

    • about jocelyn
    • privacy policy + disclaimer
    • terms of use
    • accessibility policy

    CONTACT

    • get in touch
    • work with me
    • newsletter

    This website contains Amazon affiliate program links. This means that I earn a small commission on qualifying purchases at no additional cost to you. I will never provide a link to nor recommend any product or service that I don’t genuinely love or personally use. Thank you for supporting MINT + MALLOW kitchen and the brands and companies that keep this blog running.

    Copyright © 2022 MINT + MALLOW