


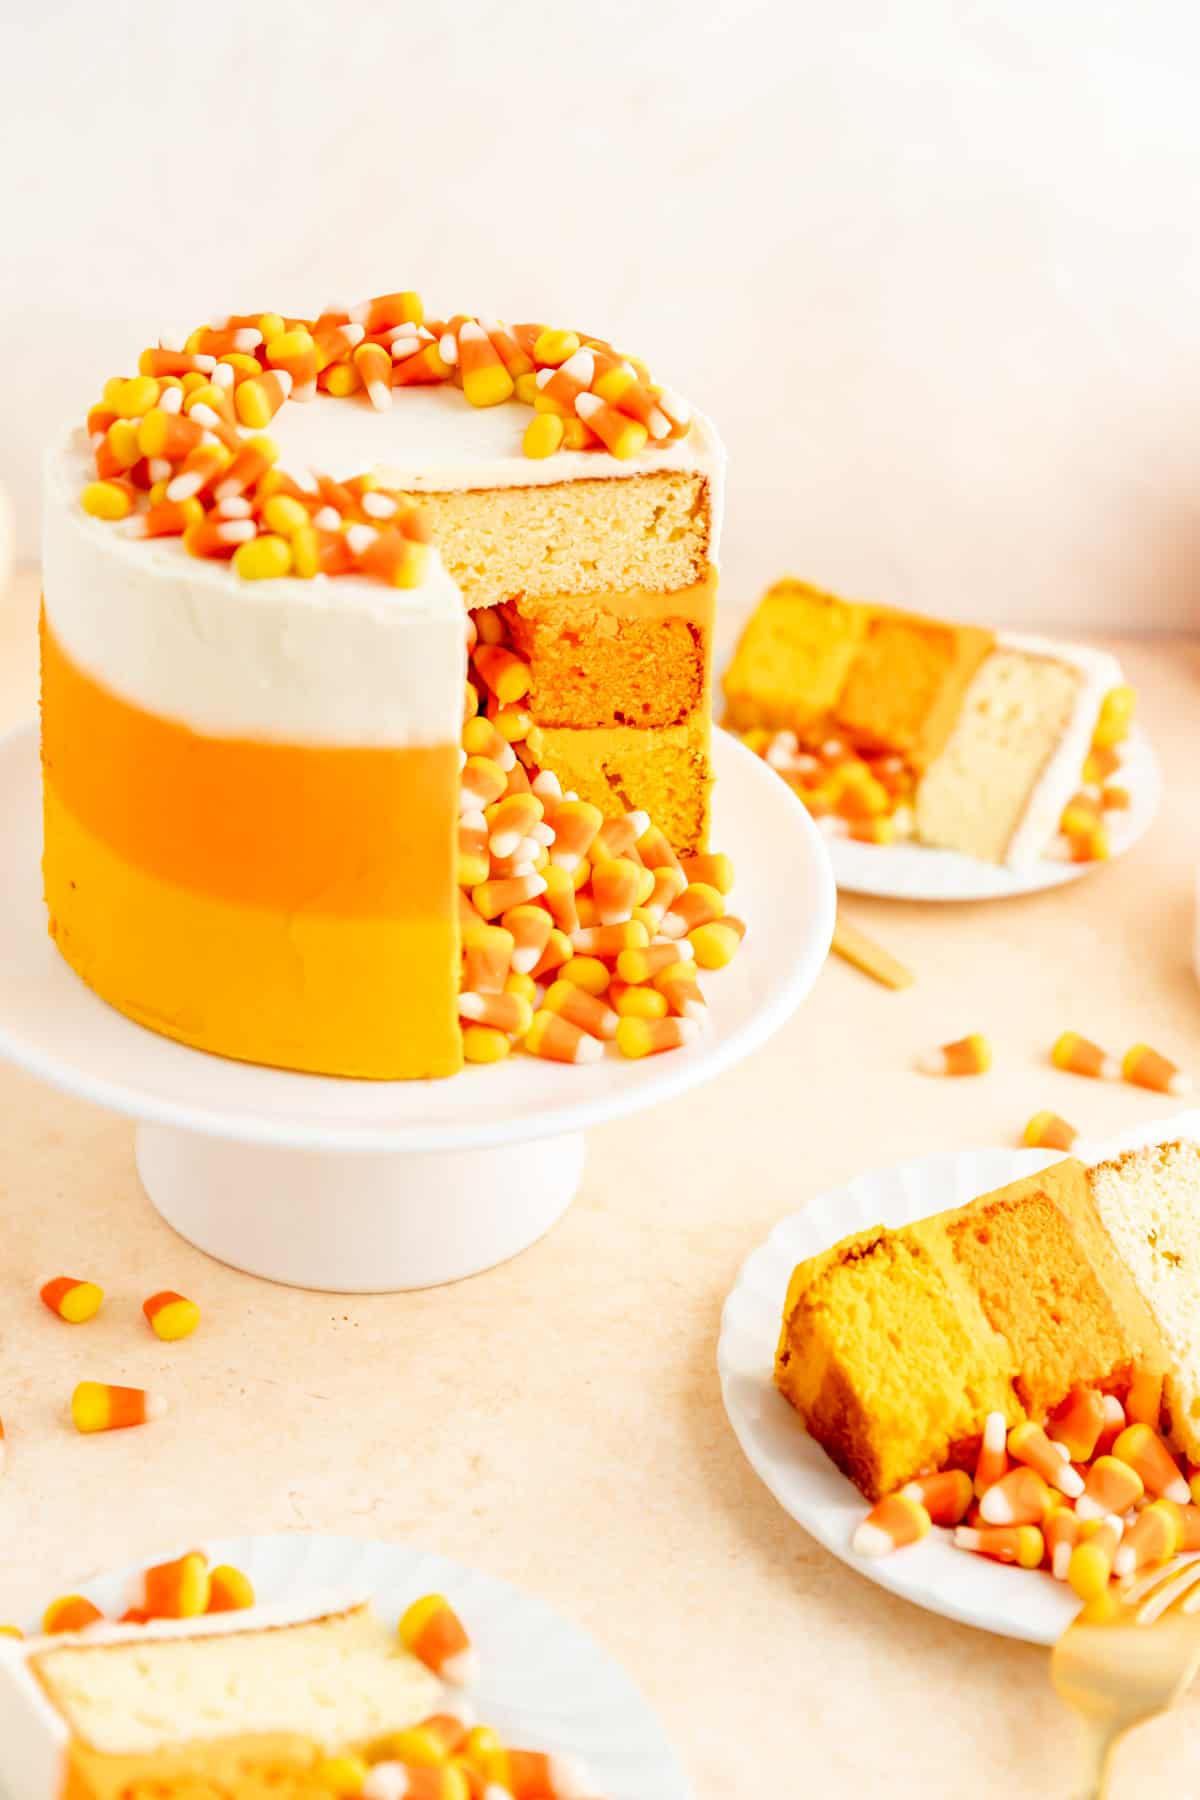
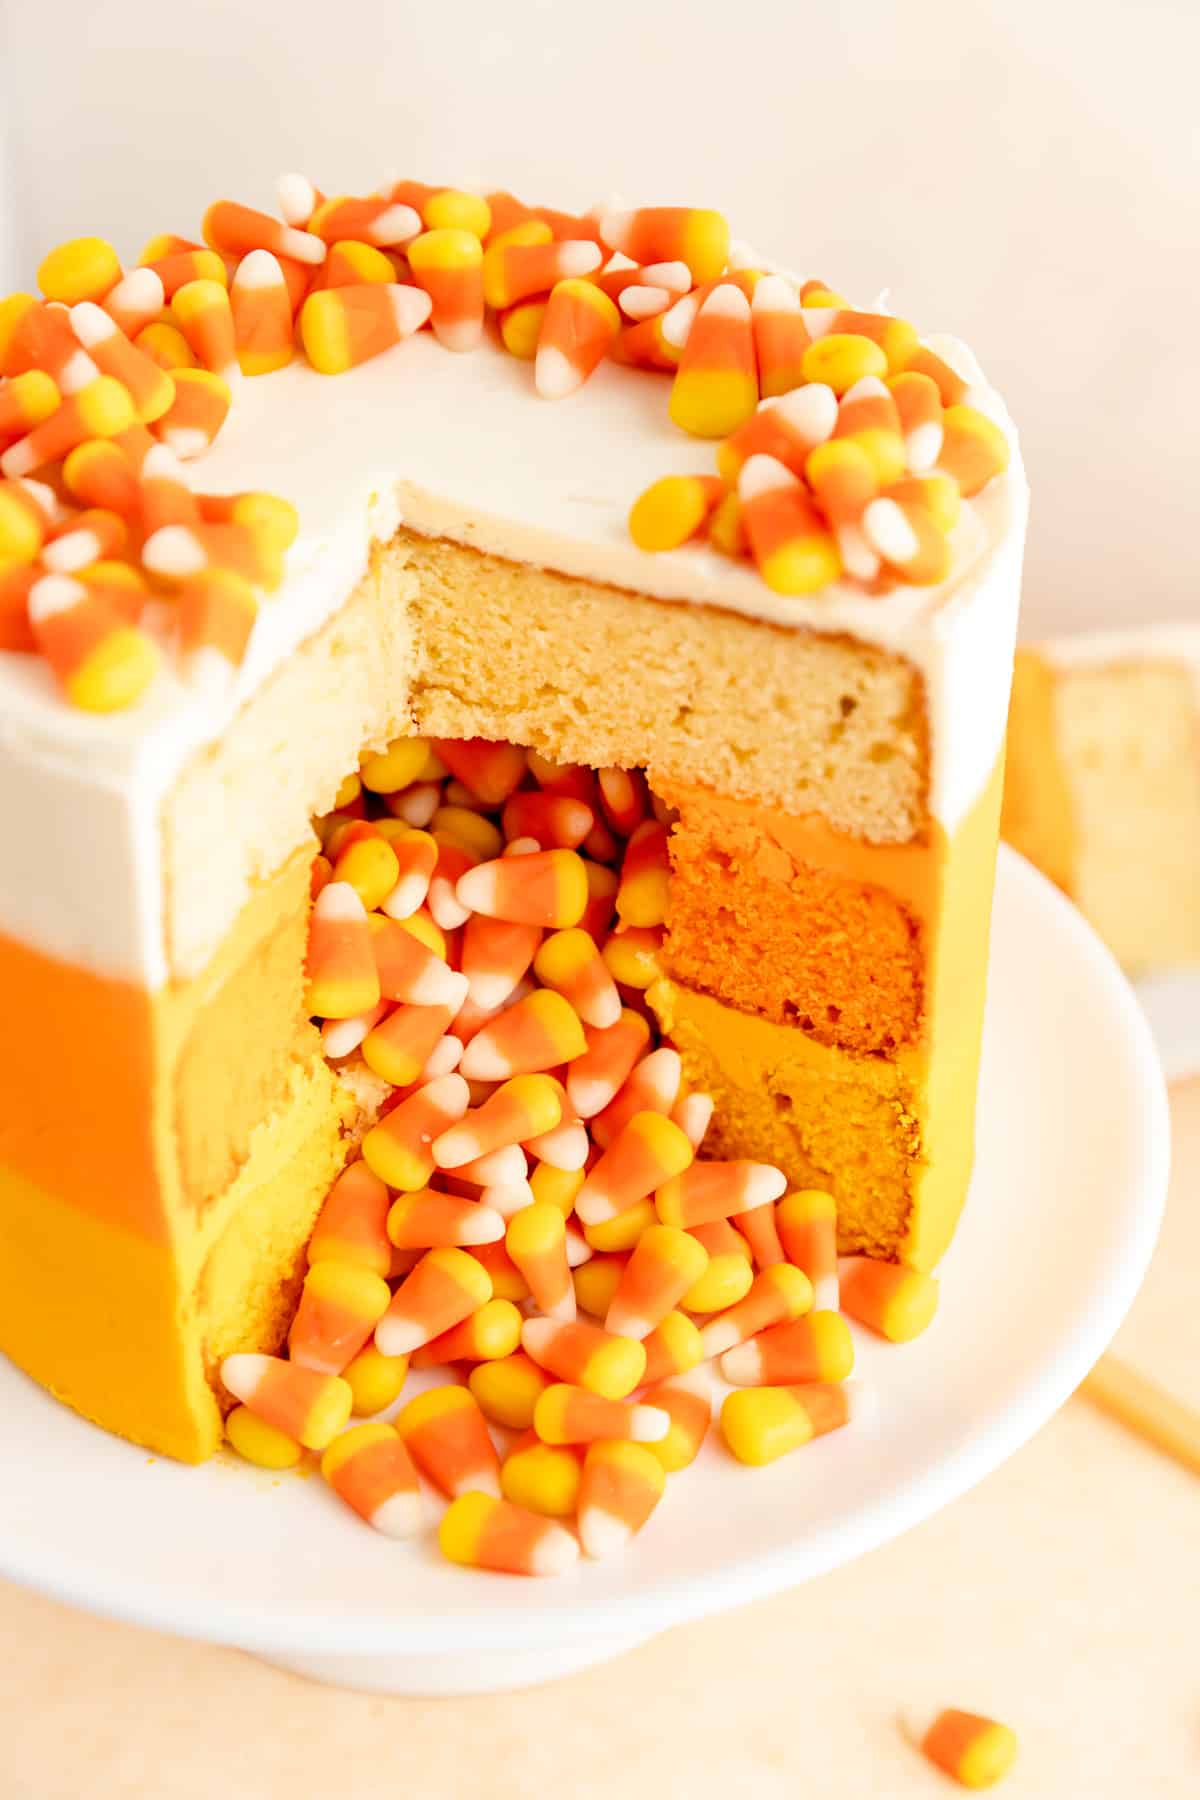
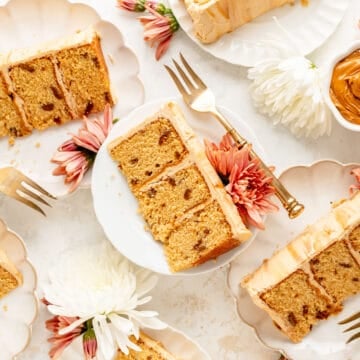
This Halloween Candy Corn Cake is candy filled and topped as well. Inside that luscious vanilla buttercream and layers of moist vanilla cake, there's a candy corn surprise just waiting to burst out and bring your Halloween party to life!
Jump to (scroll for more!):
Business on the outside. Party on the inside!
While I love a good candy-loaded halloween treat, sometimes, you might be looking for a slightly more refined dessert that still embraces this spooky holiday. That’s where this cake comes in.
It's built from my classic vanilla cake and buttercream recipes, but then stacked up to hide a candy corn surprise that will impress any guests at your Halloween party from young to old. While the candy filled may seem like magic, I’ll teach you just how to make it, and I promised you’ll be amazed how easy it is!
Why This Recipe Leads to Sweet Success
- Each piece is simple to make. Layered cakes can seem intimidating. At a minimum, you have two full recipes to make, and then there are decorations, and candy cores, and toppings...oh my! But this recipe keeps each component super simple. Although you do still make a frosting and a batter, the recipes are a quick mix to make it as easy as possible for you to build a lovely layer cake.
- Candy corn whaaaat? I can’t tell you how many times I’ve wanted to make a cake with something spilling out of the middle, but always thought it’d be too much work to make it happen. Well...I couldn’t have been more wrong! This is the easiest, super-impressive decoration for a cake I have tried. From the candy filling to the candy corn striped finish, I’ll walk you through every step with a full video tutorial that demos it all.
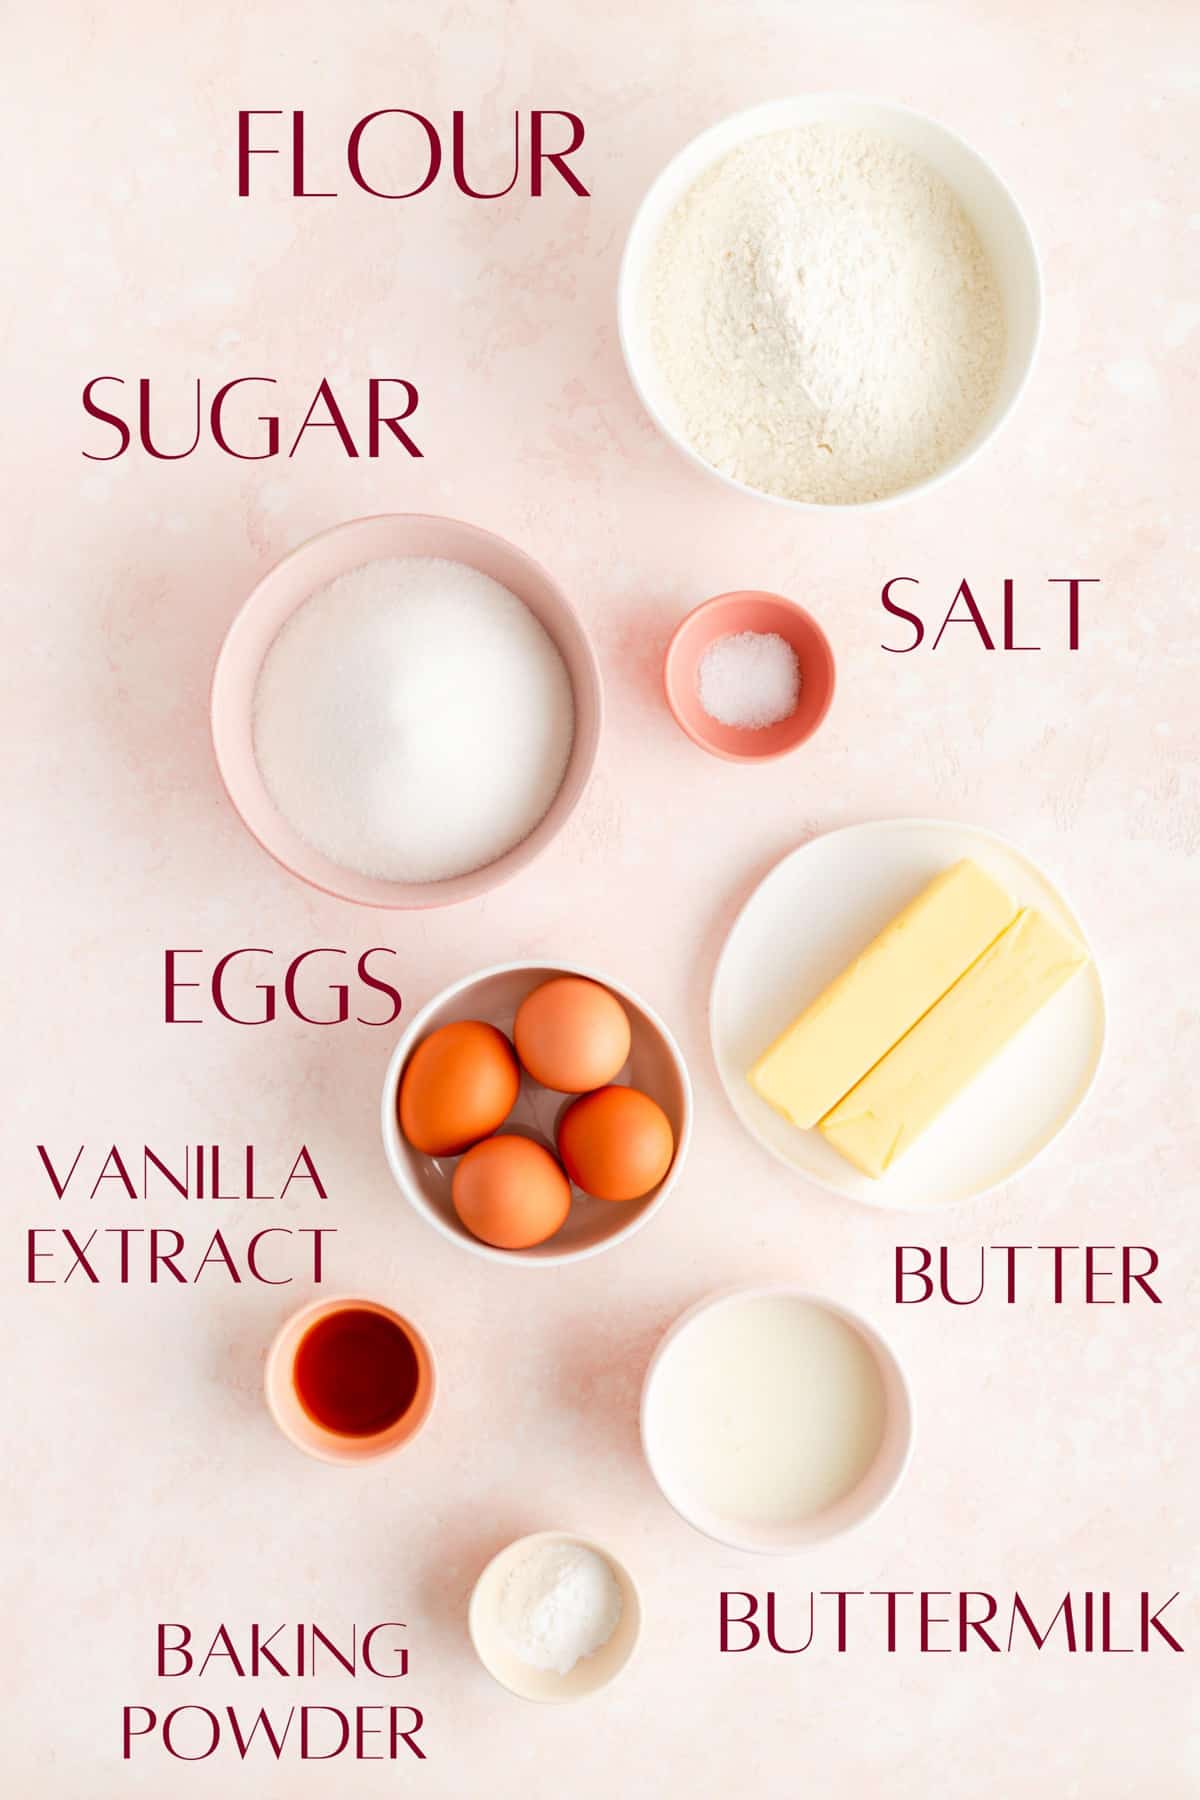
Ingredient Tips to Bake it Better
(Pssst…if you're ready to just get baking, get all the details in the recipe card below!)
I'll let you in on a little secret...this recipe is actually just a snazzying up of two other go-to classics that are already on the site!
For all the background details you need to prep the perfect cake and frosting, check out my Easy Vanilla Sheet Cake post (which we're just baking into 6” rounds here), and it's perfect match, the Easy Vanilla Buttercream Frosting!
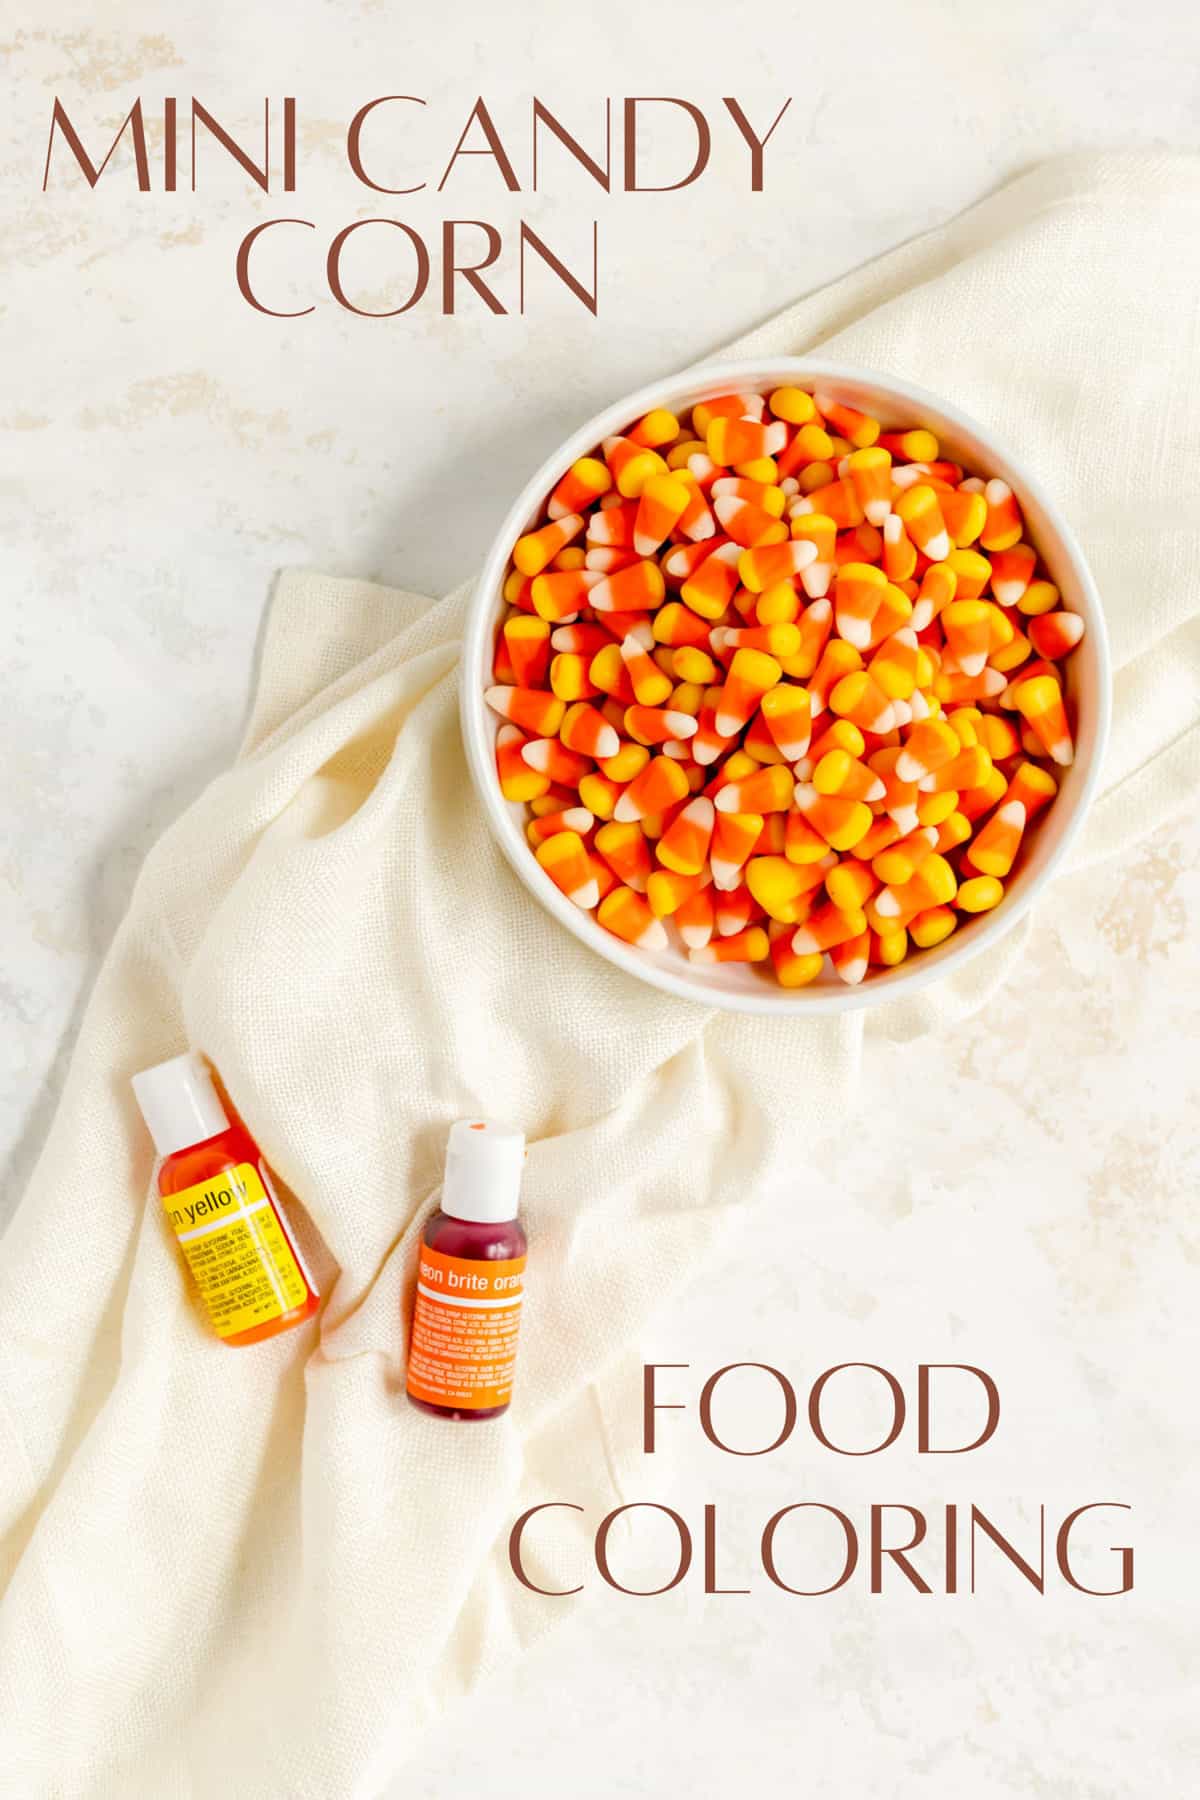
And if you're wondering does your candy corn has to be mini? Technically no, but it does make for a more dramatic "spill" if you will.
I happened to find mini candy corn in my local grocery store. In my testing, I found it had a better “spilling out” effect when cutting the cake as you could fit more of the mini pieces into the center core of the cake. But if you can only find classic candy corn near you, that will work just fine too!
Special Tools and Equipment You'll Need
There are a few optional, but very helpful tools for this cake:
- A 3” round cookie cutter: this makes sure you get a clean cut on your cake core and that your layers will line up nicely. If you don’t have one, cut a 3” wide circle out of parchment paper, and then use a paring knife to trace it in the middle of the cake.
- For any layer cake, a cake turntable is the way to go for a clean, easy frosting process. That said, if you don’t have one, you can certainly still frost your cake by simply turning your serving plate by hand to work your way around the sides.
- Pastry bags are also super helpful for easy frosting, but a zip-top bag with a ½” wide hole cut off the corner works well too.
How to Make A Surprise Cake from Scratch
(Pssst…if you're ready to just get baking, get all the details in the recipe card below!)
TO MAKE THE CAKE:
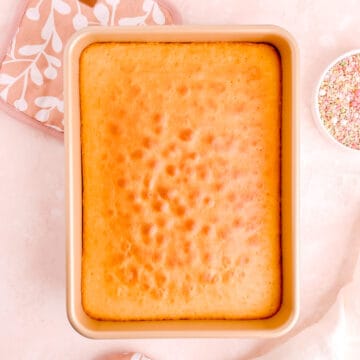
- Preheat your oven and prep your pans.
- Mix up a batch of my Easy Vanilla Sheet Cake (find the full recipe and post here!).
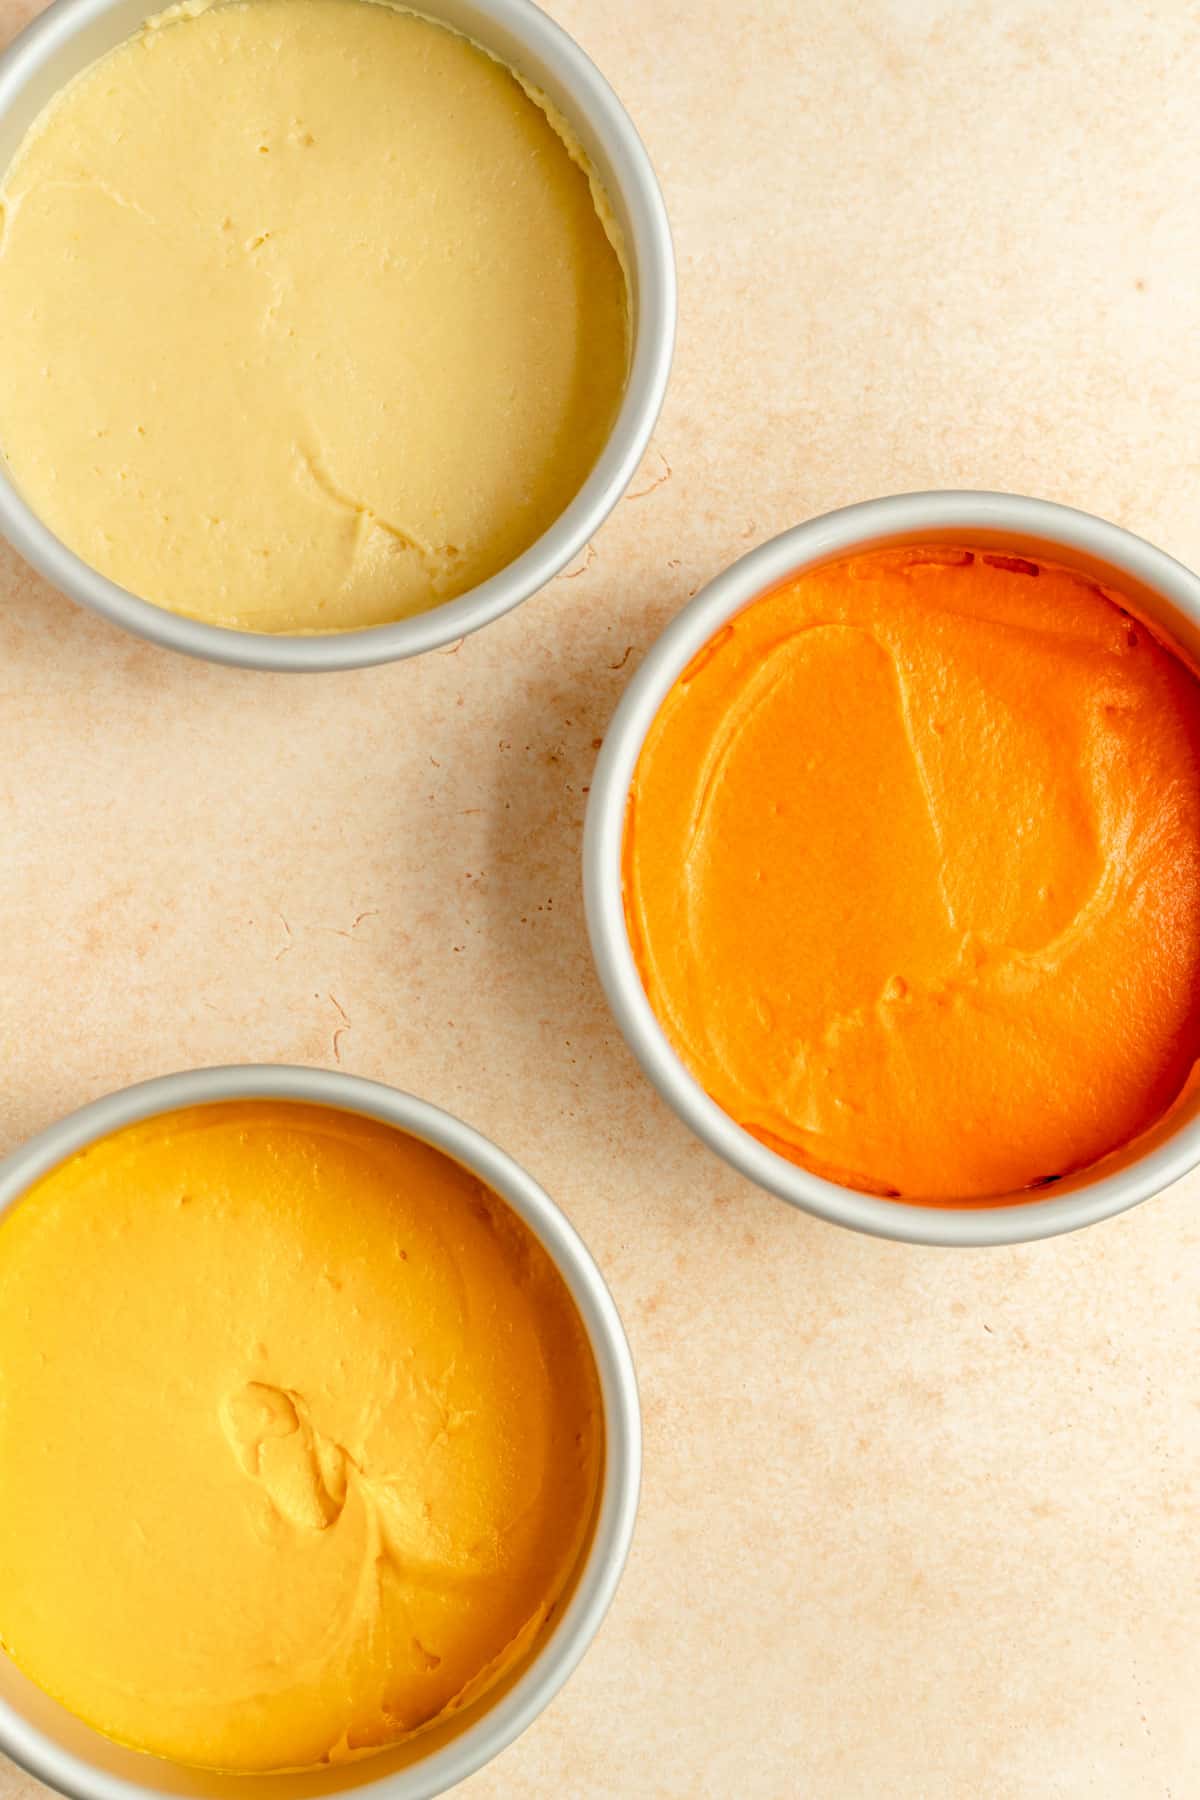
- Divide your batter into thirds and color one third orange, and one third yellow.
- Transfer each batter portion to its own pan and bake until the top is fully set.
- Allow cakes to cool briefly in the pan, then un-pan and cool fully while preparing the frosting.
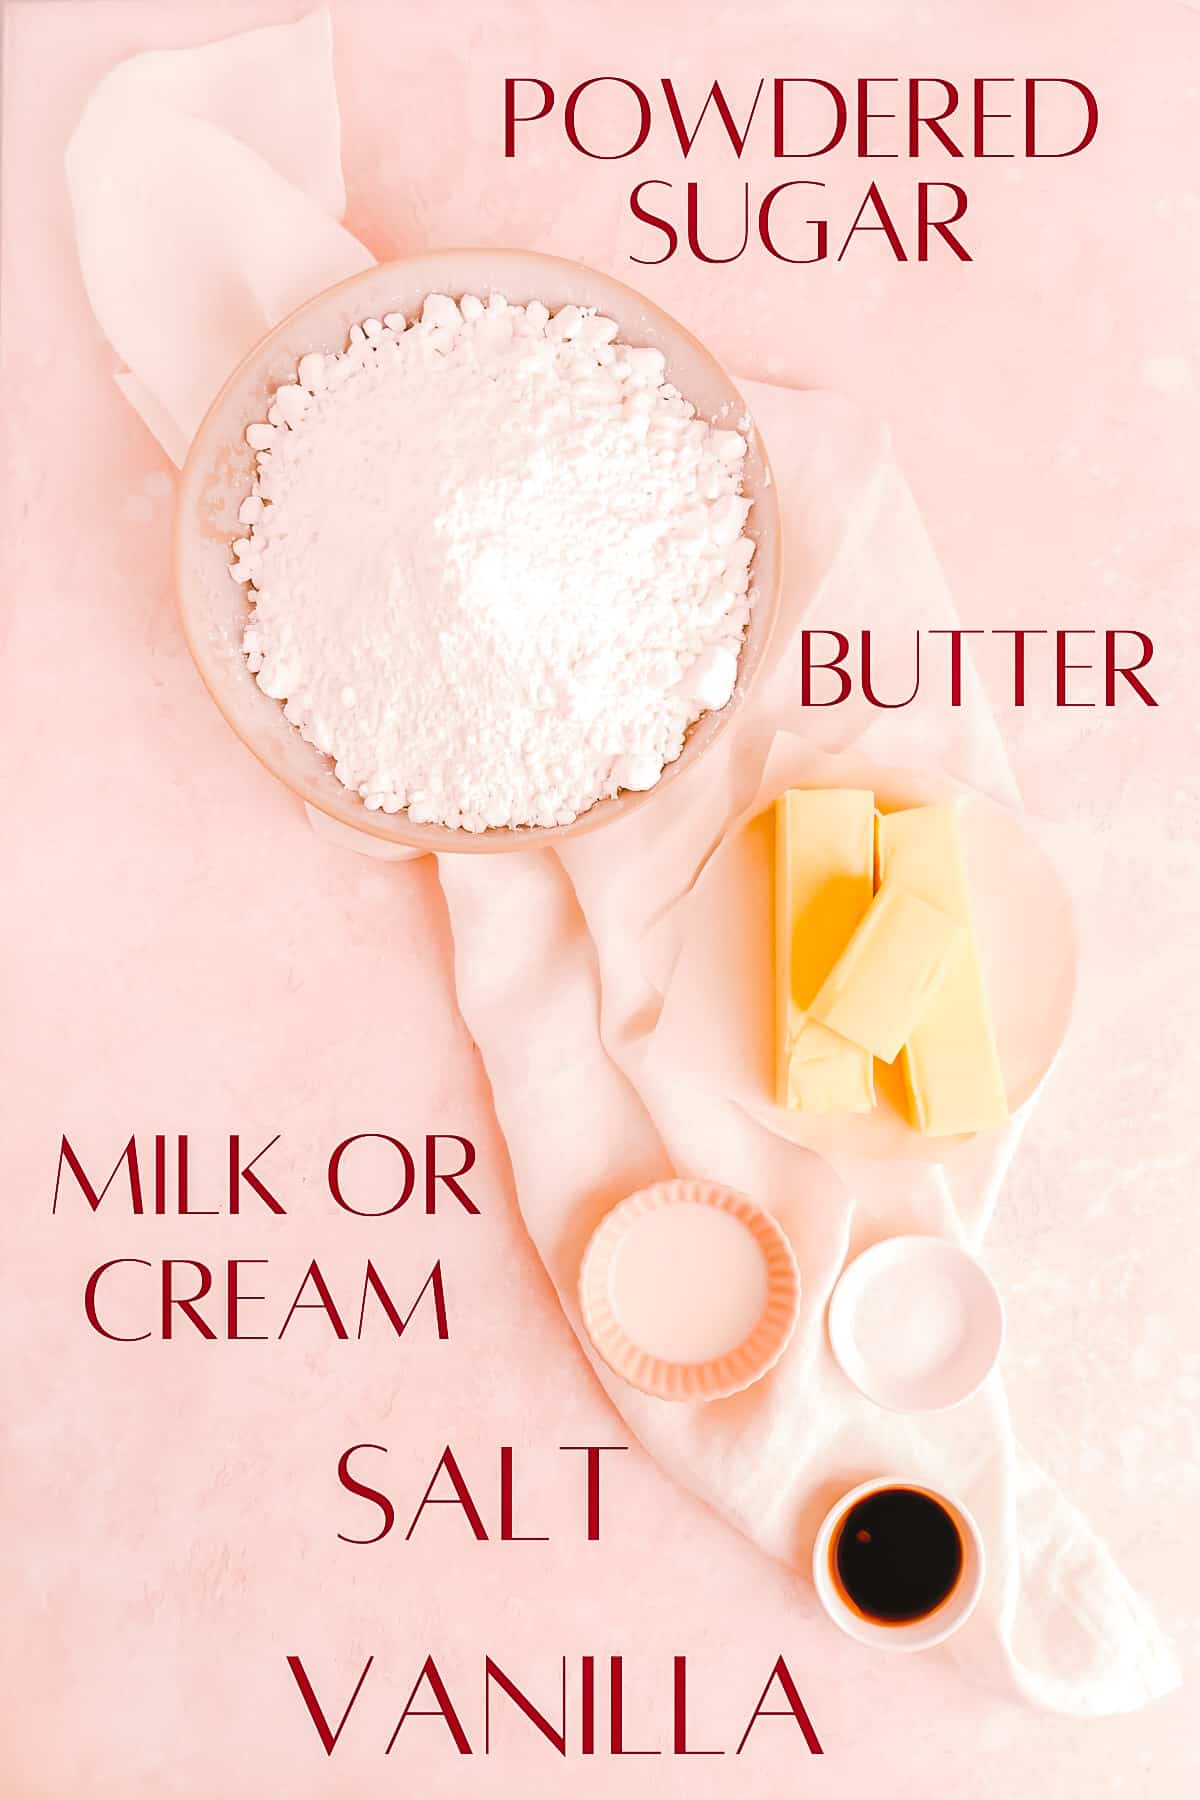
TO MAKE THE FROSTING:
- Mix up a batch of my Easy Vanilla Buttercream Frosting (find the full recipe and post here!).
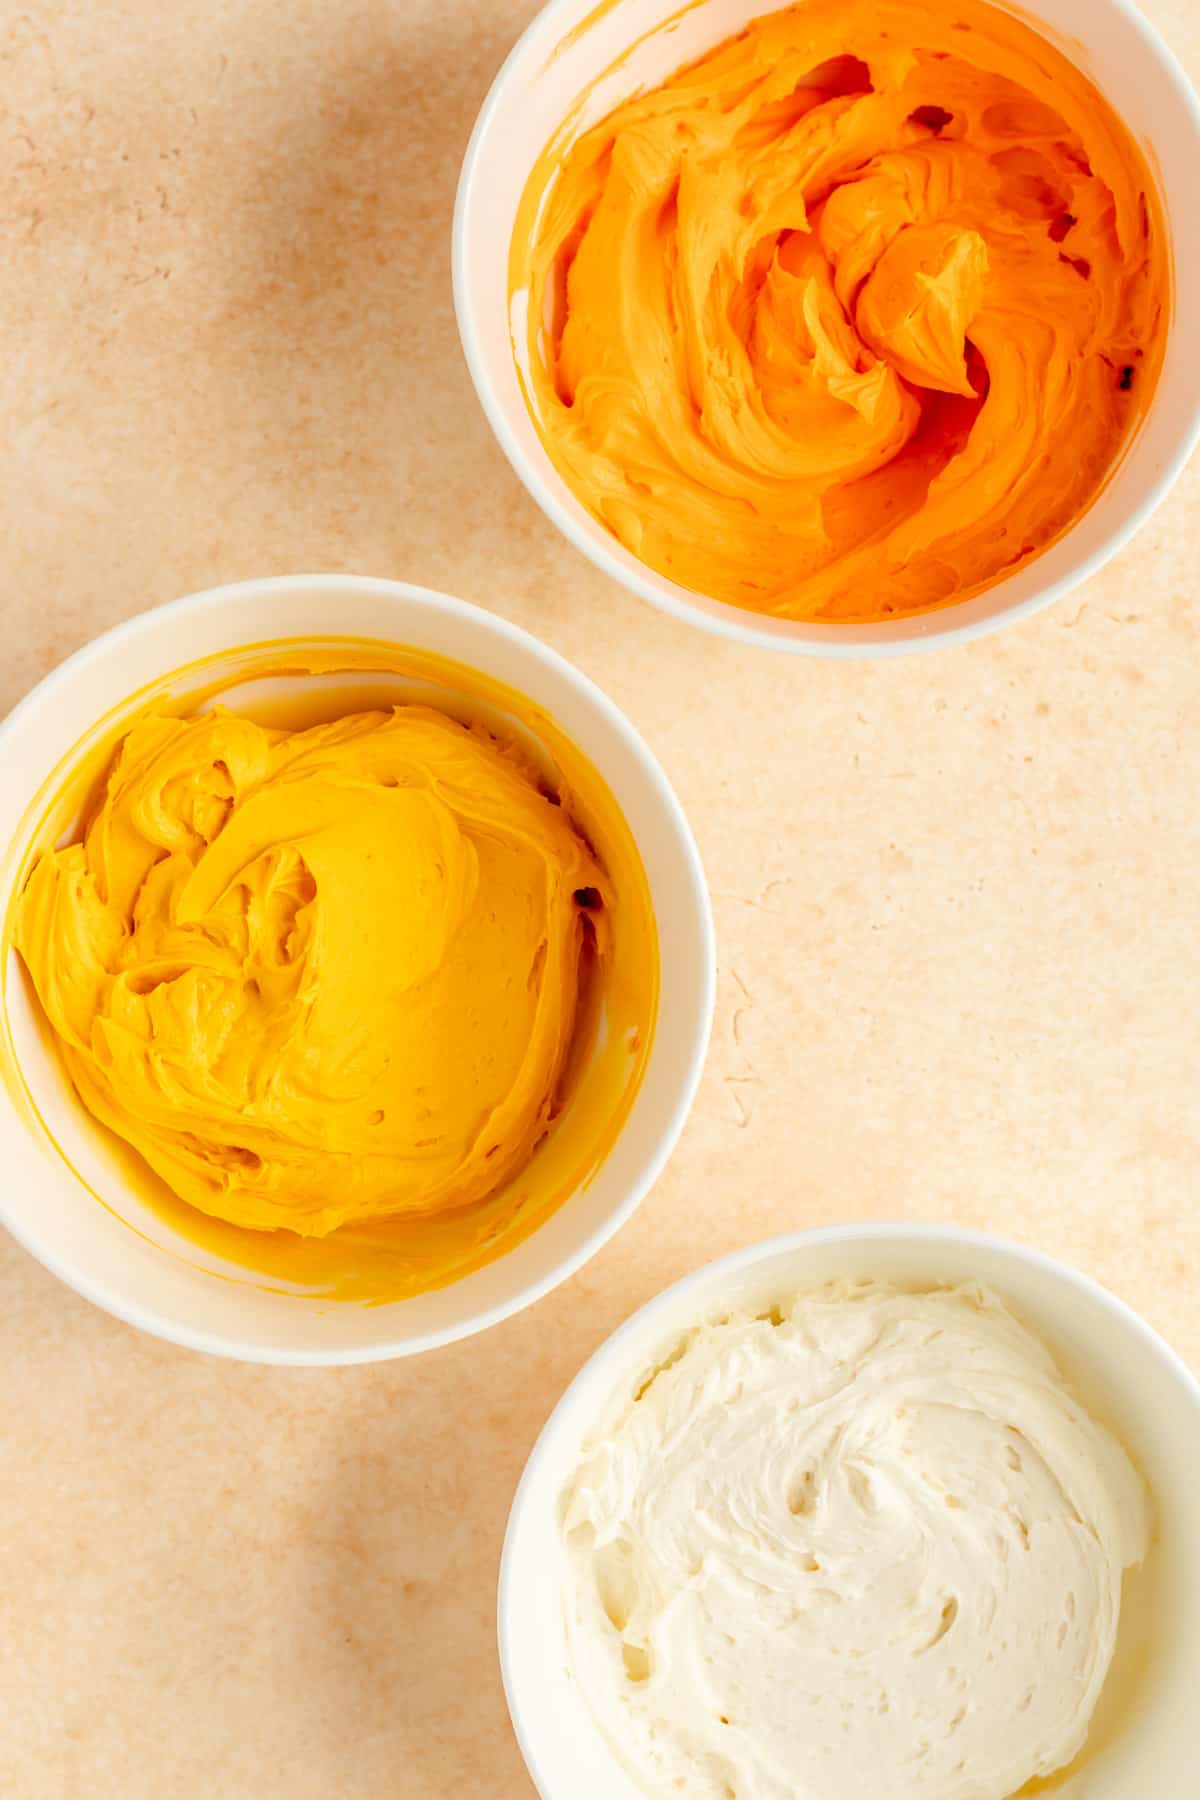
- Divide your frosting into thirds and color one third orange, and one third yellow.
TO ASSEMBLE THE CAKE:
- Level cakes by removing dome if needed.
- Cut out the center of the yellow and orange layers.
- Fill piping bags with each frosting color, and attach the yellow cake to the serving plate.
- Add a layer of yellow frosting, then top frosting with the orange cake.
- Add your candy corn into the empty core.
- Pipe a layer of orange frosting on top of the orange cake, then top with the white cake layer.
- Clean off the outside of the cake (chill if needed).
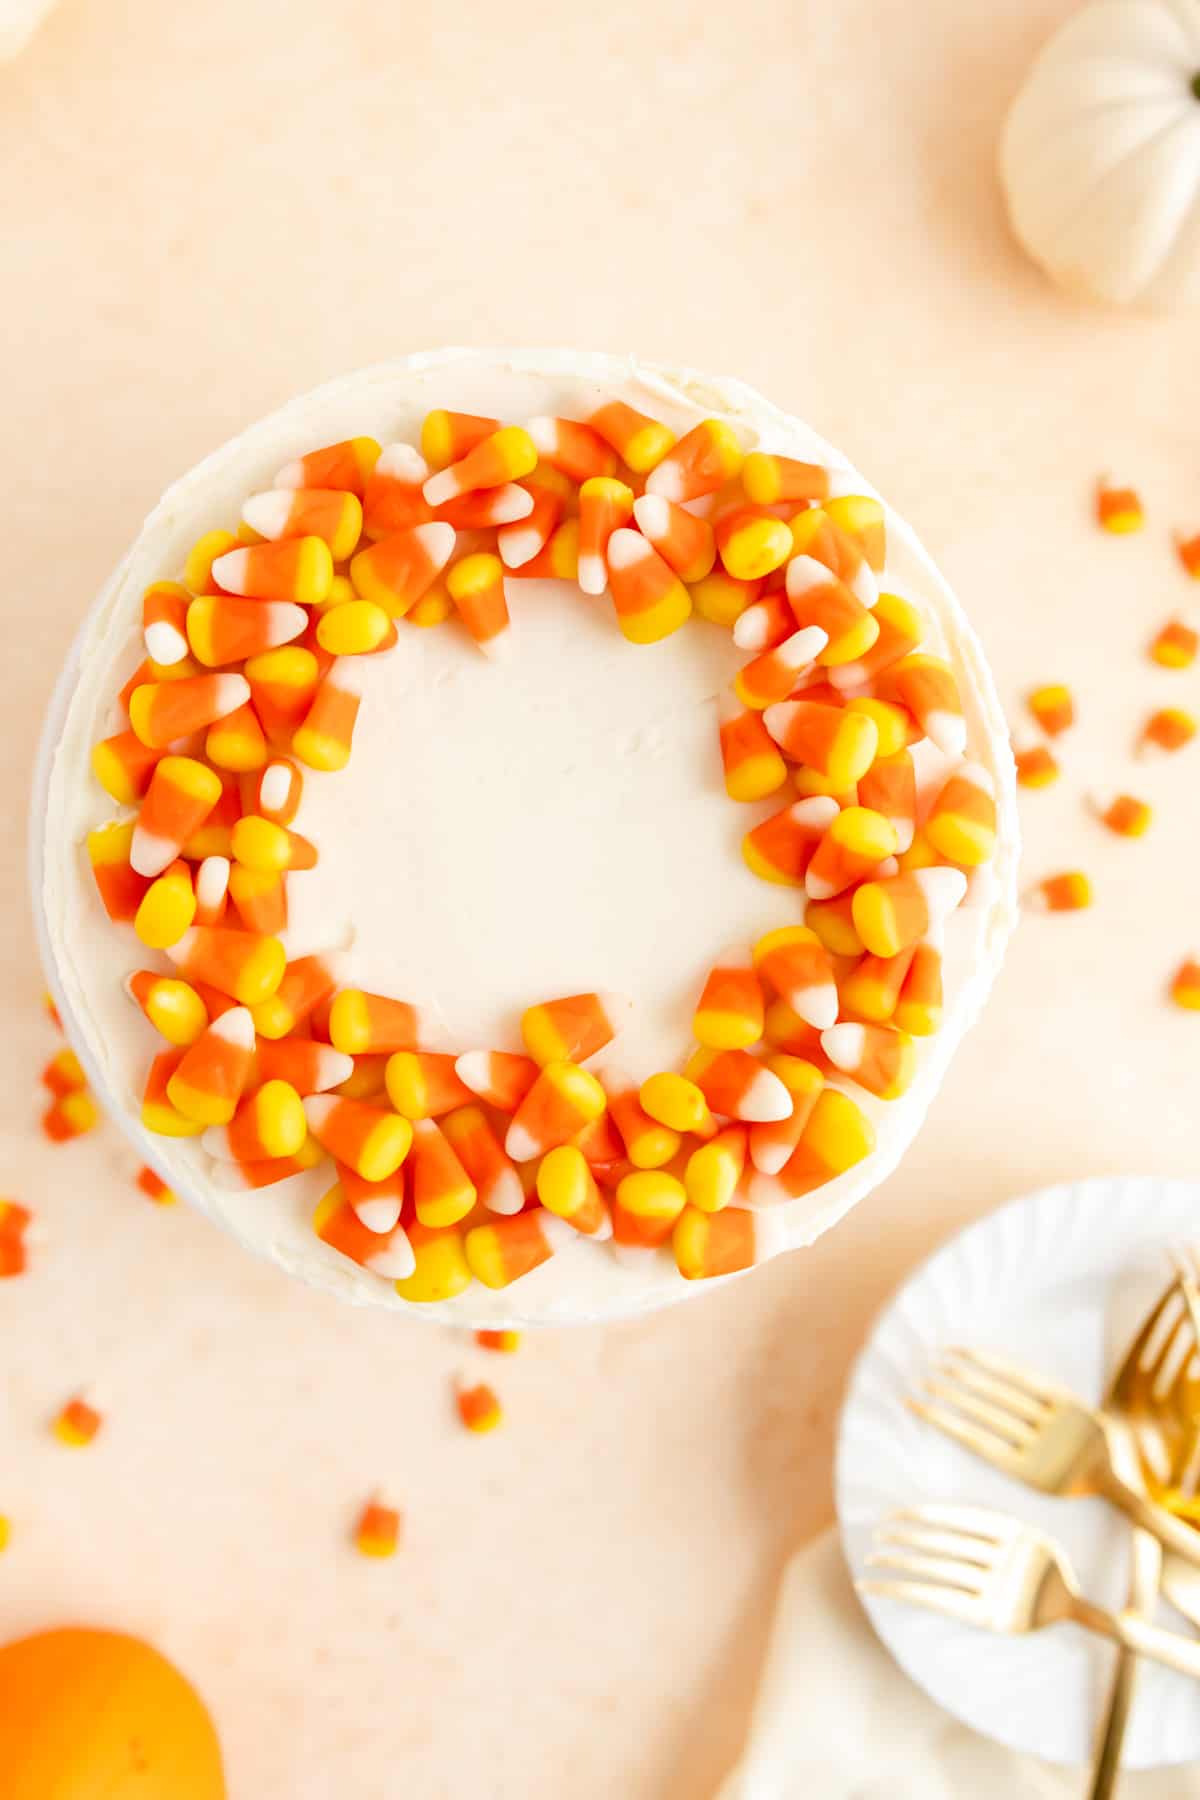
- Pipe stripes around the outside of the cake, matching the frosting color to the cake color. Add white frosting to the top of the cake as well.
- Smooth the sides and top of the cake and add any additional decorations you like.
- Chill the cake for at least 2 hours before service, then serve up a candy corn surprise and enjoy!
So that's the steps in a nutshell, but check out the full video tutorial on Instagram to see it all in action!
*Expert Tips and Tricks* for Better Baking
Make sure you cut your core right in the center for both cake layers so they align when stacked. Also, if your cake feels a little wiggly after putting that top layer on, don’t be afraid to chill it for a while as it’ll make your final frosting process SO much easier, and yield a much prettier cake in the end too.
Can you make this cake ahead of time? How do you store leftover cake?
You can make this cake up to 1 day before serving. Store the cake in the fridge until 2 hours before service, whether storing fresh or leftover. Make sure any cut surfaces of leftover cake have plastic wrap contacting the full surface to keep them from drying out.
Can you fill the cake with something other than candy corn?
Absolutely! This cake is just a classic vanilla cake at its core (no pun intended!), so you can switch up the filling and the frosting colors however you’d like to make this cake a festive centerpiece for any occasion!
Other Recipes You'll Love
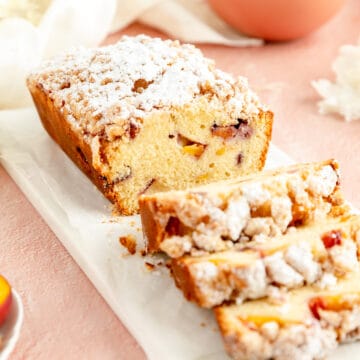
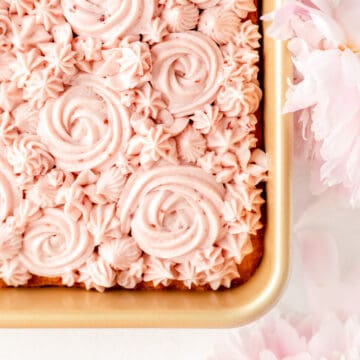
If you're in the Halloween treat mood, make sure you don't miss out on the adorable Chewy Monster Sugar Cookies or Spooky Monster Brownie Truffle recipes! And if you're looking for a quicker mix cake for a crowd, try my Easy Vanilla Sheet Cake with Raspberry, Chocolate, Vanilla, or Cream Cheese Frosting!

⭐ If you gave this recipe a try please give it a ⭐ rating and tag me on Instagram @mint.and.mallow.kitchen so I can see what you're baking up! ⭐
📖 Full Recipe

Halloween Surprise Stuffed Candy Corn Cake
Ingredients
- 1 batch of Easy Vanilla Sheet Cake
- 1 batch of Easy Vanilla Buttercream Frosting
- Yellow and orange food coloring
- 1 cup of mini candy corn* (180g)
Instructions
TO MAKE THE CAKE
- Preheat and prep: preheat your oven to 350°F. Lightly grease the bottom (not the sides) of three 6" round cake pans. On top of that, place a piece of parchment, cut to fit in the bottom of the pan, and again lightly grease the top of the parchment paper.
- Mix it up: mix up a batch of my Easy Vanilla Sheet Cake (find the full recipe and post here!).
- Divide and color your batter: divide the batter into thirds (weighing this on a kitchen scale is a great way to ensure accuracy if you have one!), leaving one-third un-colored, and coloring the other two portions orange and yellow respectively to your desired depth of color.
- Pan and bake: pour each portion into its own pan and spread into an even layer using a spatula, offset spatula (my favorite!), or a dinner knife. Bake for 34-38 minutes until top is fully set, and the center springs back when lightly touched.
- Un-pan and cool: allow cake to cool for 20 minutes in the pan. Then, use a knife or offset spatula to loosen the cake edges from the pan, un-pan the cakes, then allow to cool fully while preparing the frosting.
TO MAKE THE FROSTING:
- Make the frosting: while your cakes cool, whip up a batch of Easy Vanilla Buttercream Frosting (find the full recipe and post here!). Because we want a slightly stiffer frosting for this cake, you can add the powdered sugar all at once instead of in several batches.
- Divide and color: divide the frosting into equal thirds, leaving one in your mixing bowl and placing the other portions in two small bowls. Color one bowl yellow, and one bowl orange to your desired depth of color and leave the last third in the mixing bowl white.
TO ASSEMBLE THE CAKE:
- Level cakes (only if needed): if your cakes have a high dome, level by using a serrated knife and cutting horizontally across the cake while holding the knife level. (If your cakes came out naturally level-ish, feel free to skip this step).
- Cut out the core: using a 3" round cookie cutter or tracing a 3" wide parchment circle with a paring knife, cut a circle out of the center of the orange and yellow layers (be sure to leave the “white” layer for the top whole!).
- Fill piping bags and attach cake to serving plate: place each color of frosting in its own piping bag fitted with a large round tip or with the end cut off to form a ½" wide round hole (if you don’t have piping bags, you can use a zip top bag with the corner cut off to a ½” opening). Pipe a few little spots of yellow frosting on the bottom of the yellow cake ring and press it onto the center of your serving plate.**
- Stack it up: pipe a full layer of yellow frosting (about ¼-1/2” thick) on top of the yellow cake ring. (Leave a little space towards the inner rim so the frosting doesn’t squish out into the core and make a mess of your candy!) Spread icing into an even-ish layer all the way to the outer edge. Top with the orange ring of cake, centering it and pressing it gently into the first layer of frosting.
- Add in the surprise: you'll now have a cake stack with an empty core with the “white” layer on the side. If you see any frosting squishing out inside the core, just use a dinner knife or offset spatula to remove it or smooth it into the cake. Fill the center of the cake with the candy corn, as far up as you like (I filled mine right to the top which took about 1 cup of candy corn).
- Seal off the cake: finally, pipe a layer of orange frosting on top of the orange cake ring, just as before (leaving a little room on the inner edge, but spreading into an even layer to the outer edge). Add the white cake layer on top, wiggle it to the center, and gently press down to fully adhere it to the frosting below.
- Smooth it off: use a straight-edge cake comb or offset spatula to smooth the excess frosting between the layers on the outside of the cake. If the cake feels a little wobbly from the softened frosting, chill for 20-30 minutes in the fridge before finishing the outside.
- Pipe on the stripes: when you're ready to finish the decoration on the outside, pipe yellow rings around the bottom yellow layer, pipe orange rings around the middle orange layer, and white rings around the top third (check out the video to see this in action!). Use a straight-edge cake comb or offset spatula to smooth the excess frosting between the layers on the outside of the cake.
- Finish the top, then chill: use the remaining white frosting to frost and smooth out the top of the cake, and add as many or as few decorations on top as your heart desires! Chill the cake for at least 2 hours before serving.
- Serve up a candy corn surprise! If possible, allow cake to sit for about an hour at room temp before service. Slice and share to watch the candy corn surprise put a smile on everyone's face, then enjoy the tasty cake that made it possible!
Test Kitchen Tips
- *Mini Candy Corn: I happened to find mini candy corn in my local grocery store and found it had a better “spilling out” effect when cutting the cake. But if you can only find classic candy corn near you, that will work too!
- **Stack cake on the serving plate: for this particular cake with a candy core, you need to build your cake right on the serving plate or cake board. It will be easiest to smooth your cake out if your plate is flat and sits nicely on a rotating cake table if you have one.
Mymona Gamiet says
Hi Jocelyn
I made this cake an was super impressed with it. It was light, moist and enjoyed just like that without any frosting. I then made a a bigger one for my cousins birthday and piped swiss meringue buttercream rosettes in 2 different shades and it looked absolutely beautiful, all the guests were super impressed with the sheet cake 😍
Jocelyn at M+M says
That makes me so happy to hear, Mymona! Thank you so much for not only choosing one of my recipes for your celebration, but also for letting me know how much you enjoyed it. It sounds like you are quite the baker and I'm sure it was delicious with that Swiss Meringue Buttercream!