French Red or Black Raspberry Jam (no pectin needed!)
This French Raspberry Jam can be made with red or black raspberries and requires no pectin at all to make the world's best homemade raspberry jam!
Servings: 2 cups
Instructions
- Add ingredients to the pot: place all ingredients in a large pot so that it’s less than half full with everything in it (this helps to allow room for splattering when the jam starts to boil).
- Crush fruit to make slurry: throughly crush raspberries using a fork, spatula, or potato masher and stir together the crushed fruit and sugar and lemon juice until you have a thick slurry.
- Heat to a boil: turn on heat to medium-high, and bring to a boil, stirring slowly with a heat proof spatula. Continue to crush fruit as it heats to encourage it to release its water.
- Maintain a slow rolling boiling: once at a full rolling boil, turn the heat down slightly to maintain the rolling boil, but keep the jam from popping and splattering excessively out of the pot (be careful - the jam specs that fly off the bubbling surface are very hot and can burn you!).
- Cook to temp: continuing boiling for 15 minutes, stirring frequently and scraping the bottom of the pot to prevent burning. Stirring is important for encouraging the water to evaporate off (that’s the steam you see), but don’t stir too quickly as that will cool the mixture and delay the cooking process. You’ll see the jam significantly thicken on your spatula over the 15 minutes, it will foam and then the foam will dissipate, and when it holds at 218°F (103°C) or above for at least 10 seconds, your jam is ready. (See notes if you don’t have a thermometer).
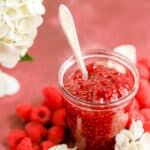
- Store and enjoy! Remove jam from heat, then can according to your preferred method to preserve (see notes). If using immediately and not canning, simply transfer to clean jam jars (typically mason jars), and allow to cool to room temp before capping and storing in the fridge until use. Keep in the fridge for up to three weeks and enjoy on toast, sandwiched between your favorite butter cookies and layer cakes, or swirled into your morning yogurt - the sweet possibilities are endless!
Notes
- Thermometers: I highly recommend purchasing an instant-read thermometer if you’re serious about baking at all, but especially if you’re serious about jams. That said, if you don’t have one, go by the time in the recipe (15 minutes), and keep a plate in the freezer while your jam cooks. When you see the jam significantly thickening on your spatula and you’re at fifteen minutes of boiling, place a few drops on the frozen plate and return it to the freezer immediately. Wait 1-2 minutes and by 2 minutes, if you push in on the edge for the jam blob, you should see it start to wrinkle or that the blob is fully gelled and set (you may even see this wrinkling on the surface of the jam in the pot). This means your jam is ready. If it’s still liquid after 2 minutes in the freezer, continue cooking, rechecking with a fresh spot on the frozen plate every minute or so.
- Canning you jam: canning is a practice I take very seriously as it does involve people’s health and well-being and I am by NO means an expert. So I’ll send you to the people who are! If you’re interested in canning and preserving your jam for an extended period of time, please check out the Ball company website which has great canning guides.
Nutrition
Serving: 1cup | Calories: 1146kcal | Carbohydrates: 286g | Protein: 9g | Fat: 5g | Saturated Fat: 1g | Polyunsaturated Fat: 3g | Monounsaturated Fat: 1g | Sodium: 9mg | Potassium: 1091mg | Fiber: 46g | Sugar: 231g | Vitamin A: 235IU | Vitamin C: 192mg | Calcium: 180mg | Iron: 5mg
Did you try this recipe?
It’d mean so much to me if you could please give the recipe card a ⭐ rating on the site and leave a comment to help others find this sweet recipe! Xo, Jocelyn @ Mint+Mallow