Strawberry Simple Syrup (for drinks, pancakes, and more!)
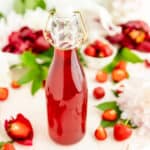
This homemade syrup has a stunning natural deep red color, only 3 ingredients, and a super simple prep. You’ll be blown away by how much fresh berry flavor is in one tiny bottle!
Servings: 24 tablespoons
Ingredients
FOR THE STRAWBERRY WATER:
- 1 pound strawberries*1 about 3 cups chopped
- 1 cup water
FOR THE SYRUP:
- 1 ½ cups sugar
- 1 cup strawberry water
Instructions
- Prep strawberries: rinse the strawberries. Remove the tops from the berries, and cut into quarters.
- Add strawberries and water to pot: place berries in a medium to large-sized pot (2 quarts or bigger as this recipe can boil up quite a bit, so make sure there’s plenty of room so your syrup doesn’t overflow). Roughly crush the berries with a fork in the pot to start releasing their juices. Pour 1 cup water overtop and stir briefly (the berries should be just barely submerged).
- Boil berries to infuse: bring the water to a rolling boil over medium-high heat and allow mixture to continue cooking at a full rolling boil for 5 minutes. If mixture is about to boil over, just turn down the heat, and stir frequently to prevent strawberries from sticking and burning on the bottom of the pot. At the end of 5 minutes, take the pot off the heat and allow it to sit for 5 minutes to cool slightly and infuse a bit more.
- Strain the berries: strain the strawberry water through a fine sieve or coarse sieve lined with cheesecloth or a coffee filter. You should have at least 1 cup of liquid drain through, and be sure to press the berries into the sieve with a spatula to make sure you release as much juice as possible. You can just discard the strawberry bits in the strainer when finished. Rinse out your pan so it is nice and clean for the next step.
- Add strawberry water and sugar to pot: set your pot on the burner with the heat off. Pour 1 cup strawberry water into the pot, then add in the sugar pouring it slowly into the center of the pot (it's important the water goes first to prevent the sugar from sticking to the bottom, and we add everything on the stove so we don't shake the pot while moving it).
- Gently stir to combine: very gently stir the mixture to incorporate any big clumps of sugar, just until roughly combined, being sure not to splash any sugar onto the sides of the pot (it could cause your syrup to recrystallize while cooking which we definitely don't want!).
- Turn on the heat: turn your burner on to medium heat. Allow the syrup to heat up and cook without stirring it at all (that said, if you see a stubborn white spot in the bottom of the pot where the sugar is sticking, feel free to gently stir it in). Once it reaches a boil, maintain a rolling boil for 1 minute for thinner variation*2 (or longer if needed to fully dissolve the sugar although it should be dissolved after just that 1 minute).*3
- Cool and enjoy! Once the syrup is clear, remove it from the stove and allow it to cool in the pot or carefully transfer to a heat-safe container for storage (I prefer glass pyrex pitchers or mason jars). Keep refrigerated for up to 4 weeks. Use to soak your favorite cakes, add a fresh berry note to your favorite cocktail, or even spruce up your ice tea or summer lemonade!
Notes
- *1Strawberry Weight: this weight is for whole strawberries (not cleaned and cut). So you’re just using one standard container you’d find at the grocery store for this recipe.
- *2 Thicker variation: if you'd like a thicker syrup for topping breakfast treats and desserts, boil the final syrup for 5 minutes total instead of 1. Watch it carefully and stir it often as it can quadruple in volume during this longer boil.
- *3 Foamy top: a foam will form on the surface of your syrup as it boils. You can skim off if you like, but usually I find it goes away on it's own as the syrup cools so I don't bother.
- Storage: store your simple syrup in an airtight, non-reactive container. I prefer glass like a mason jar or a glass pour bottle with a tightly sealed top. Simple syrup keeps for 3-4 weeks in the fridge if it's kept air-tight and clean (not contaminated with cake crumbs etc.).
- Freezing: this syrup can be frozen and will keep frozen for up to 4 months. It's best thawed in the fridge for a day or two before use.
Nutrition
Serving: 1 tablespoon | Calories: 54kcal | Carbohydrates: 14g | Protein: 0.1g | Fat: 0.1g | Saturated Fat: 0.003g | Polyunsaturated Fat: 0.03g | Monounsaturated Fat: 0.01g | Sodium: 1mg | Potassium: 29mg | Fiber: 0.4g | Sugar: 13g | Vitamin A: 2IU | Vitamin C: 11mg | Calcium: 3mg | Iron: 0.1mg
Did you try this recipe?
It’d mean so much to me if you could please give the recipe card a ⭐ rating on the site and leave a comment to help others find this sweet recipe! Xo, Jocelyn @ Mint+Mallow